MacBook Pro Tips for Touch Bar Users and Notes Fans

Are you a big fan of Apple MacBook Pro 15 model? Do you own the MacBook pro 2016 version? There are a lot of ‘fruit’ customers who prefer using several computeres as well as mobile devices. iPhone, iPad, Mac are often owned in more than one model per user. Well, if you do have the Touch Bar on your machine and prefer using Apple Notes instead of other text programs you might wish to learn some interesting MacBook Pro tips.

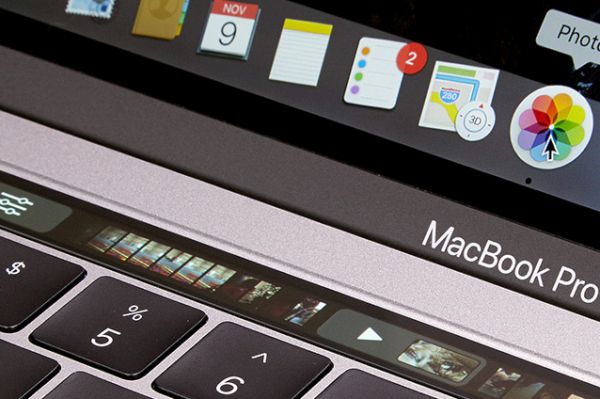
It is actually useful to know your MacBook Pro specs as well as some popular tricks. This way you can simplify your work with various application, spend less time on your tasks and enjoy your everyday life. One great feature brought by Apple this year is Touch Bar on MacBook Pro. It lets you perform various actions much quicker with a single or a couple of clicks. For example, it is possible to use Touch ID to unlock Notes with Touch Bar, delete your notes or even add some customizations on-the-go.

We won’t describe all the new MacBook Pro specs as this time we plan to devote the post to Touch Bar tips and tricks only. This spec is a great addition to Apple computers. You just need to explore some possibilities. By the way, if you don’t see sidebar in iTunes learn how to fix iTunes 12.4 problems.
Mac Touch Bar Apple Notes Tips

How to Use Touch Bar with Apple Notes on Mac

You can work with Notes via Touch Bar. Just follow the step-by-step instruction below and you’ll master this must-have trick.

Step 1. You should launch Apple Notes on MacBook Pro 2016.

Step 2. Click on the new note icon and you’ll create a new Note on your computer.

Step 3. If you need to format an existing note you should click on Format icon (it reminds of capital and lowercase letters A). Then click on Title and you’ll work with H2 format option. Click on Heading and you’ll work with H3 format. If you wish to format body text you need to click on Body. Use Bullets icon when you need to create bullets list. If you prefer working with dashes list you should click on the Dash icon. For numbered list you should press on Numbers icon. If you need to close tools that format your text just hit the X.

Step 4. It is easy to create checklists via Checklist icon.

If you wish to connect 5K display to your Mac computer you’ll love the changes!

Here are some Touch Bar MacBook Pro tricks for Notes app:

*Use Indent when you wish to indent left / right margins

*Italics helps you italicizing words and sentences in Notes

*Place your cursor at the end of the sentence and click on the desired format to change text format with ease

*Bold icon helps you make words or whole sentences bold

*Underline icon can be used to underline a word or sentence
Apple Mac Touch ID

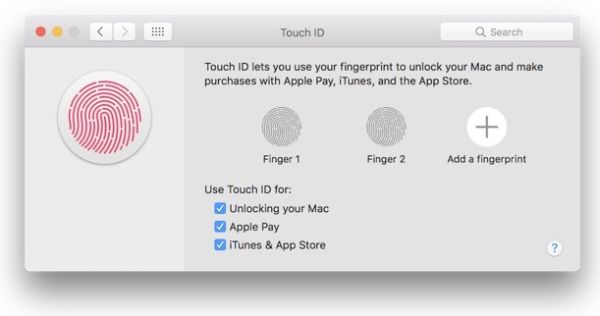
Unlock Apple Notes with Touch ID

Step 1. Launch the application.

Step 2. Select the locked note you wish to unlock.

Step 3. Place your finger on Touch ID (the one you have registered for your sensor) and you’ll unlock all your notes at once.

Step 4. If you want to lock your notes press on Lock icon (you can see it at the top part of Notes application).

Fix problems with launchpad apps missing on Mac OS Sierra machines.
MacBook pro Touch Bar Apple Notes

Delete Notes Using Touch Bar

Step 1. Choose the note you prefer to remove.

Step 2. Click on Trash icon (in Touch Bar).

Step 3. If you want to delete folders, select a folder instead of a note and press on the Trash icon.

Customize Touch Bar on macBook Pro 2016 model

MacBook Pro Tips for Touch Bar and Notes Customization

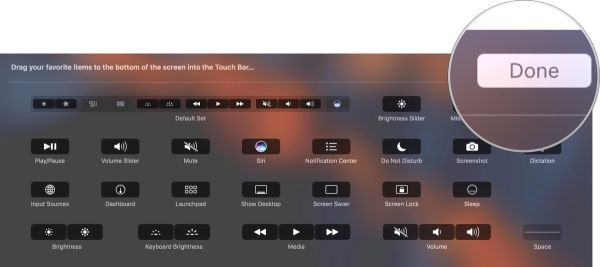
Step 1. You can launch Notes program – press on View in menu – click on Customize Touch Bar option. You can drag any tool from the customization panel and drop it into your Touch Bar.

Step 2. When you want to remove a tool from Touch Bar you should move your cursor down and select the tools.

Step 3. Remember to click on Done option when you are happy with the results.

Step 4. To customize your formatting tools simply choose a note in Notes application.

Step 5. Press on View option and choose the feature Customize Touch Bar. Now you can work with tools and customize them.

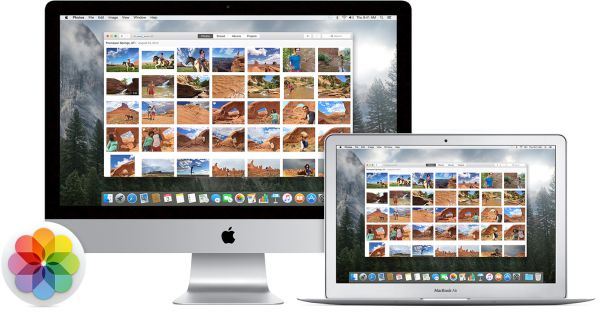
Apple Photos Tutorial for Mac Users to Hide and Unhide Photos

Guides on how to use Mac OS are pretty popular among Mac users. Still there are so many questions you might be looking to answer after updating to macOS Sierra. This operating system has a lot of interesting tricks and secrets. You’ll love exploring its possibilities but let’s start with Apple Photos tutorial. It should be useful for all macOS Sierra fans who love taking and storing images on their computer. Learn how to fix iTunes sidebar missing problem on your Mac which is fast and simple to do.

Are you curious how you can hide pictures on Mac or unhide them? What is the difference for iPhoto vs Photos app? How does everything work once you install macOS Sierra on your computer instead of using an earlier version of the ‘fruit’ desktop firmware? We wish to provide you all the answers in this post. P.S. Have you tried to connect 5K display to Mac computer?

iPhoto vs Photo app vs Aperture Mac

iPhoto vs Photos App

These are actually two different options offered by Apple. The stock Photos app can be used on Mac to save your memories. iPhoto is an older version of the program (it is a different release) and you can easily update from iPhoto (or even Aperture) to Photos once you install OS X Yosemite 10.10.3 or newer operating system on your ‘fruit’ computer.

Modern users prefer Photos application and you can download iPhoto for Mac although you are highly advised to run the newer program. Read Apple Photos review (you can find it online) and you’ll understand how the two versions are different. User who are big fans of social networks should learn how to send disappearing photos via iPhone Instagram application on iOS 10.

How to Hide Photos on Mac

Apple Photos Tutorial: How to Use Mac OS Sierra to Hide / Unhide Images

Step 1. Follow Photos for Mac download link to install this program on your computer. You can visit the ‘fruit’ store and find Apple Photos app download link right there.

Step 2. Launch Photos program on your computer.

Step 3. You need to view your album and decide which images you prefer to hide from Photos.

How to Hide Picture in Photos App on Mac

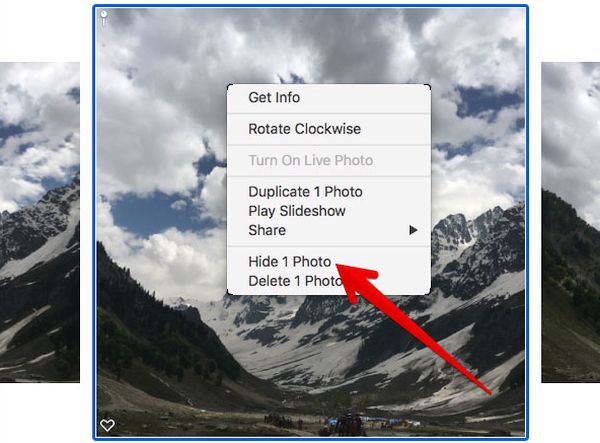
Step 4. Now Control + click on the picture that should be hidden and select ‘Hide Photo’ option.

Step 5. Confirm your decision by pressing on Hide Photo once again.

Step 6. That’s it. The image is hidden. You can repeat the guide for each photograph you want to hide on Mac.

You can also customize your MacBook Pro with Touch Bar model if you want to.

Unhide Photos Mac Instruction

How to Unhide Pictures on Mac

Step 1. When you wish to reveal your images you need to launch Photos program and open your Hidden album.

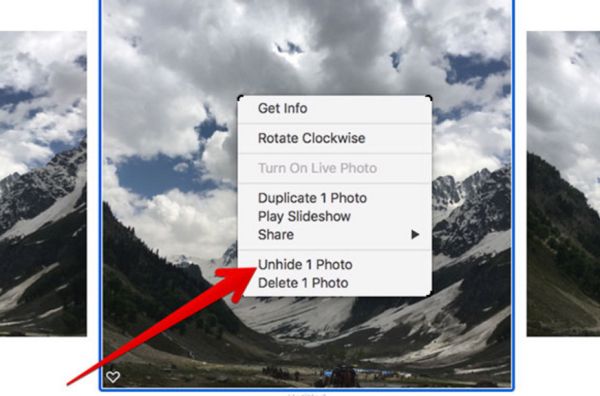
Step 2. Right click on the image that you wish to unhide.

Step 3. The photo will appear in your Moments, Collections, Years and Photos.

Step 4. Repeat the guide for each photograph you are planning to unhide.

Hide Several Photos at Once on Mac

How to Hide Several Photos at Once

Step 1. Sometimes you want to hide multiple photos at the same time. Launch Photos.

Step 2. Choose several pictures at once by dragging the cursor.

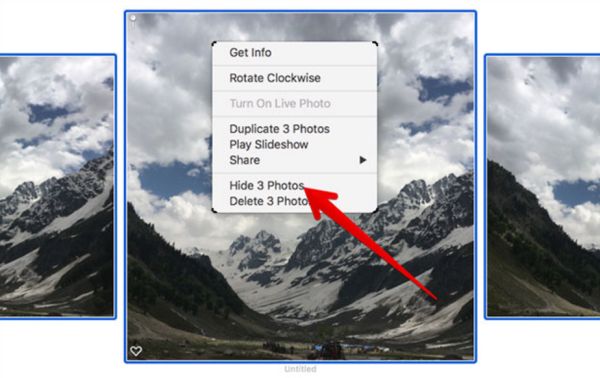
Step 3. Right click or use Command + Click on those images.

Step 4. Choose Hide Photos and confirm. They will be hidden.

A lot of use know how to use Photos for Mac OS Sierra. Still even if you install the Photos Mac application you might know how to hide your private images from the stock app. Now you know what you can do so follow the guide above and you’ll easily hide pictures on Mac without creating a secret folder Mac. Hopefully you’ll love the simple secret and make it your personal instruction for those days when you don’t want your friends or relatives to find photographs that are not meant for their eyes.

There are ways how to hide folders Mac however this is something to talk about in the future. Right now you know that you are able to hide some or all pictures and they will disappear from your Collections, Moments and Years. They will be stored in Hidden album only you can access. Luckily, it is also easy to reveal them when needed.

View Hidden Photos on Mac App

How to Find Hidden Images on Mac

Step 1. Go to Photos program on your computer.

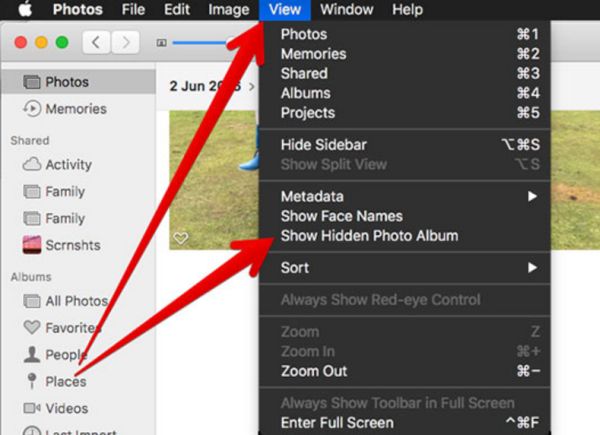
Step 2. Choose View option.

Step 3. Click on Show Hidden Photo Album.

View Hidden Photos Mac Guide

Step 4. Doulbe-click on ‘Hidden’ album you will see on the left menu.

Step 5. Enjoy all the hidden images you have.

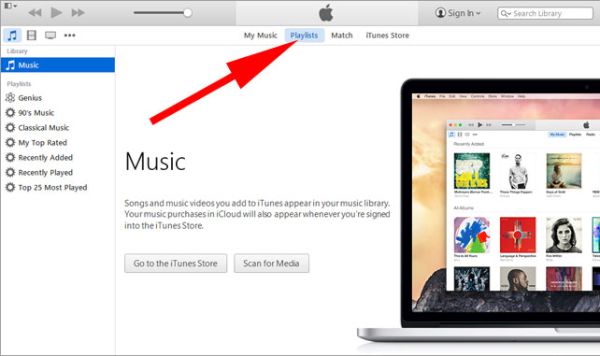
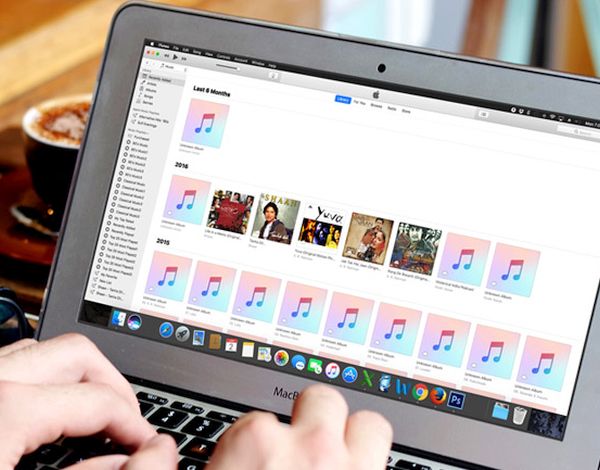
Your iTunes Sidebar Missing? Fix iTunes 12.4 Problems, Return Sidebar

Is your iTunes sidebar missing? There are users with Mac or Windows computers who are using iPhone 7 (iPhone 7 Plus or other popular ‘fruit’ phone) or iPad and have updated their desktop program to discover new iTunes 12.4 problems. Have you also installed this version of Apple tool? Can you not find your sidebar anymore? Is there a quick fix to your issue? It is great that you can send disappearing photos on iPhone by following a simple guide.

Apple is constantly updating its software and hardware. Every year the company presents new popular gadgets (some of them are becoming extremely popular, others are just popular among millions of customers from all over the world and there are devices that are less popular yet a lot of people are still buying them because this is ‘Apple’). We know how to find sidebar in iTunes. We will share our knowledge with you. Return this useful part of the Mac / Windows program to your computer.

Can't Find Sidebar iTunes 12.4 Issue

Disadvantages of Can’t Find Sidebar in iTunes 12 Bug

It is easy to sync your new iPhone 7 with iTunes, download songs, apps, games, audiobooks and other staff using this desktop application. Sidebar makes the whole navigation process simple, quick and easy.

This addition is very important. You’ll have to spend more time while transferring songs, TV shows, movies etc. from iTunes to your iPhone or iPad. Without this feature you’ll be disappointed and this is the main reason why you should deal with no sidebar in iTunes 12. Let’s get it back.

How to Find Sidebar in iTunes 12.4

How to Enable Sidebar in iTunes

It is great that you can easily fix iTunes sidebar missing problem, hide and unhide it as well as customize it. Isn’t it awesome? Let’s fix your iTunes 12.4 problems right here right now and the problem will be gone. Remember that you can easily connect 5K display to your Mac.

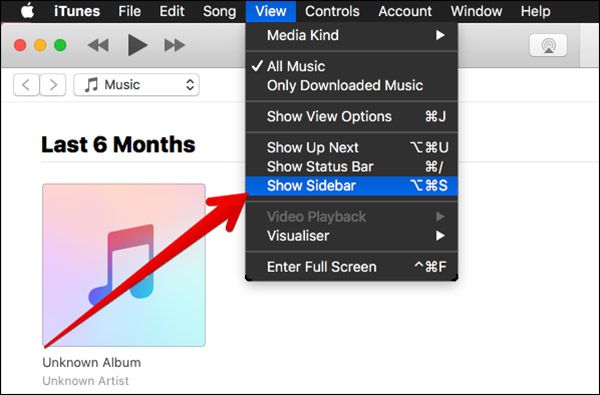
Step 1. Launch iTunes on your computer. This ‘how to find sidebar in iTunes’ instruction works great on both Mac machine and Windows PC computer.

Step 2. Go to ‘View’ section.

How to Show Sidebar in iTunes 12.4 Mac Windows PC

Step 3. There will be a drop-down menu. Choose Show / Hide Sidebar option (the one you need to use at the moment). When you see no sidebar in iTunes 12 you need to enable it. When you wish to hide this option you should disable it. This is really simple.

Will you customize your iTunes sidebar once you locate it? We hope that the guide on how to display sidebard in iTunes is useful to you and any iTunes 12.4 issues you face will be gone once and forever [it is possible to sync iPhone with Windows 10 computer, isn’t it great?].

Once you deal with can’t find sidebar in iTunes 12 you can learn how to use some customization options and edit it.

iTunes 12 Customization Edit Guide

iTunes Sidebar Customization Guide

Step 1. Update to iTunes 12 or newer version on your computer. Only these versions allow you editing the program’s elements.

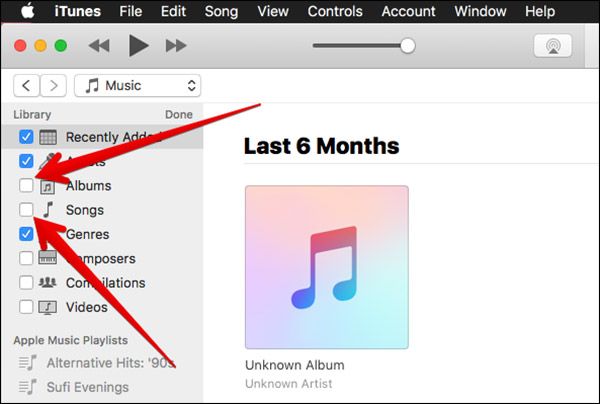
Step 2. Once your cursor is moved towards Library section there will be ‘Edit’ option.

Step 3. Click on Edit to start the Mac customization process.

Step 4. There are different options you can turn on and off. You can edit your albums, recently added, genres and other features. Enable and disable what you wish to change by checking or unchecking the options.

Step 5. Once you are happy with the changes you can confirm your decision by clicking on ‘Done’ option. This way your customizations will be saved.

That’s pretty much it. You know how you can return your iTunes sidebar once it is missing from the program. You can also customize some of the features to be visible or disappear. This is a cool way to make your version of iTunes better and more interesting and useful to you. Add changes and don’t be afraid to play with the app’s settings.

What do you think about new iTunes 12.4 version? Isn’t it cooler than the previous release?

How to Fix iOS 10 Message Crashing Problem on iPhone 7 and iPhone 7 Plus

Do you experience any iOS 10 problems with iMessage? It could happen on newer firmware version than iOS 10 because Apple presented iOS 10.1 and 10.2 versions as well. Some iPhone 7 and iPhone 7 Plus owners as well as ‘fruit’ fans with earlier handset models come across an unpleasant iOS 10 messages crash issue.

There is an interesting hack you need to learn about when it comes to solving your problems. In most situations the iOS 10 messages freezing issue comes unexpectedly. You are using your Messages application as always but it suddenly stops responding and your iOS 10 messages not sending. This is not nice since you probably wish to send a text message at anytime to anyone, right?

iPhone Messages Crash problem Fix

iOS 10 Problems with iMessage

There could be a malicious SMS you have on your device that crashes it. Even users who have installed iOS 10 ipsw file might face such iOS 10 problems. Have you heard about possible attackers who are able to send you’re a special file that makes iOS 10 messages crash? Well, it is indeed possible.

How does it work? Why iOS 10 messages not delivered are simply your iOS 10 messages not sending [you can always unlink your iPhone number from iMessage]? You can do nothing as soon as you click on the link you received. The bad link makes your app crash however there are tricks you can try to solve this situation.

How to Fix iOS 10 Glitch on iPhone 7

How to Fix iPhone Message Glitch on iOS 10

So if you see iOS 10 messages crashing bug you need to act. Since you cannot prevent third-party users to send a malicious file that caused new issues with iOS 10 opeating system you need to fix the problem once it appears. Follow the simple step-by-step guide below and you’ll deal with the iOS 10 freezing with your Messages.

Step 1. Take your iPhone and make sure it is updated to the latest version of mobile operating system.

Step 2. Launch Safari browser on your phone.

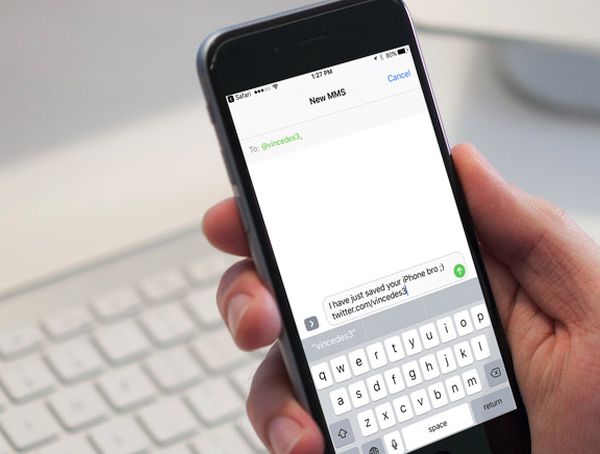
Step 3. You should visit the following website: https://www.vincedes3.com/save.html as this is what can really help you with your iOS 10 messages not sending because of the crash.

Fixing iOS 10 Messages Crash Bug

Step 4. The site should open your stock Messages app on your iPhone 7 or other model. Don’t worry. This happens automatically.

How to Solve Messages Crashing Bug on iPhone 7

Step 5. The link should also redirect you to the new message screen. There will be a pre-written text that says ‘I have just saved your iPhone bro 😉’ and this means that your iOS 10 messages freezing problem is finally fixed.

Step 6. Launch Messages app and you should experience no freezing or crashing issues on it.

There is a different tool you can try. It is possible to crash messages on your friend’s handset. You can do this to test the hack you have learned above and fix their issues as soon as you cause it. Here is how you can crash iPhone using iMessage:

Step 1. Take your iPhone. You need to download one contact file. Do this.

Step 2. Once you visit the link you can upload the contact file. Save it to your Dropbox or iCloud Drive.

Step 3. Now you should text this file through iMessage to your friend. Just let him or her know that you are planning this action. Once your friend reads the text message with malicious file linked to it and click on the link the Messages application will crash at once.

Step 4. Now you can follow the above guide to fix the iOS 10 issue with freezing Messages tool.

Step 5. Fix the bug and save the guide for future use.

There are a lot of iOS 10 issues you’ll have to face this year. Apple is working on future updates and hopefully newer versions will fix the bugs by default letting you solve everything with a simple upgrade.

Keep in eye on what you receive and don’t click the links unless you are 100% sure they are safe. Otherwise you can crash your iPhone or iOS 10 apps and search for quick fixing solutions.

How to Recover Deleted Notes on iPhone 7 or iPhone 7 Plus

Have your iPhone note disappeared? This can be a big problem for users who have the iPhone 7 or iPhone 7 Plus released in the fall 2016 or those who own an earlier Apple smartphone model if you don’t know how to recover deleted notes on iPhone. We’ll share the instruction below that works for different devices. You can use it for iPhone notes recovery, restoring your notes on iPad, Mac machine and even Windows PC.

Sometimes you delete your notes without intension. Luckily, you are still able to get them back. Just learn how to recover notes from iPhone and you’ll return everything you have accidentally removed. You’ll need some additional things, for example, you should use iCloud to make it happen or use third-party programs that can help you with iPhone notes recovery. Learn more about possible iPhone 8 release.

Deleted iPhone Notes Restore

If Your iPhone Notes Disappeared

Is it possible to recover deleted notes on iPhone? The simplest way to work with your notes is through such programs as OneNote, Evernote for iOS 10 iPhone and Simplenote. Still a lot of users prefer working with the stock Notes application offered by Apple.

How can you find your iPhone notes deleted? There can be different situations. Sometimes you simply click on the wrong option and automatically confirm your decision and this results in your files being accidentally removed by you. Sometimes you are trying to clean up your old files and by change you also remove important or new notes you have.

Remember this guide if you are one of those people who likes to take notes and write everything down to remember. Notes help performing your daily tasks and keep everything ‘in mind’ just in case.

Don’t be disappointed ever again. Recover files you have deleted without purpose and enjoy using your iOS device or PC. Let’s get closer to ‘how to recover deleted notes on iPhone’ and save you some time and nerves [do you know if you own the GSM or CDMA iPhone model?].

How to Recover Deleted Notes on iPhone 7

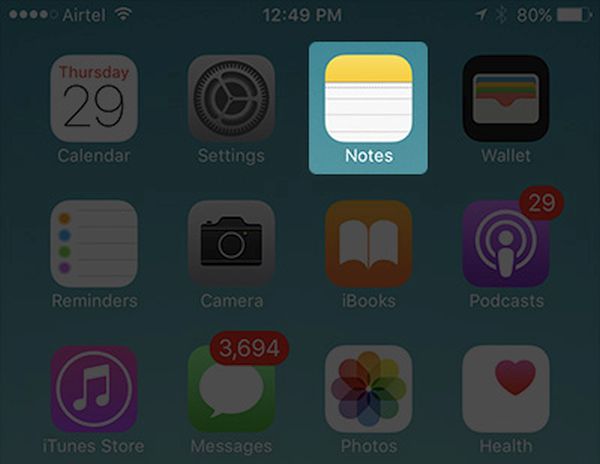
Step 1. To recover iPhone deleted Notes you should open this application on your smartphone or tablet (or computer).

iPhone Notes App Recover Deleted Files

Step 2. You will see a back arrow (it should appear at the left part). Click it if you wish to continue with ‘how to restore deleted Notes’and move on.

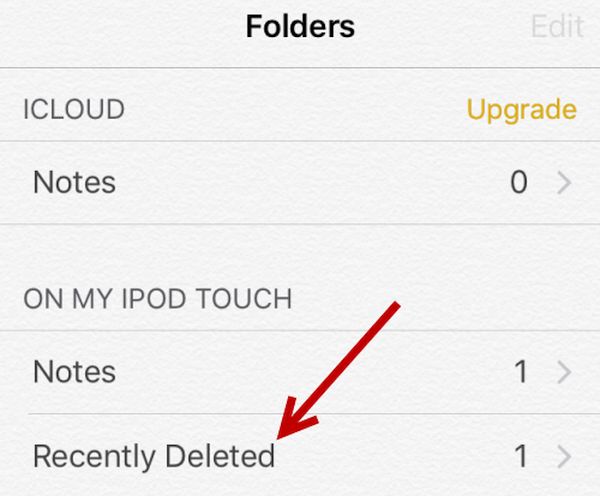
Step 3. You should click on Recently Deleted folder to proceed.

Recover Recently Deleted Notes iPhone

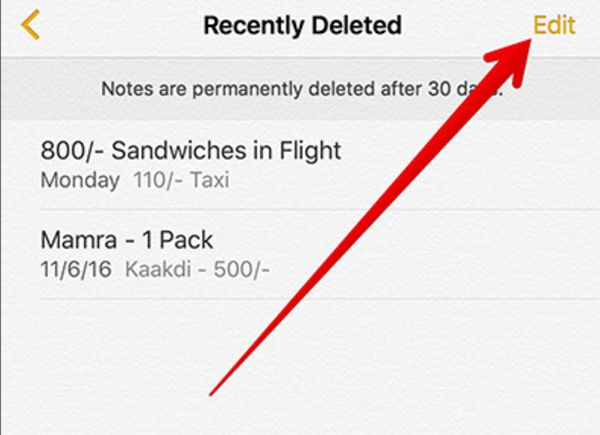
Step 4. Press on ‘Edit’ option that is located at the upper right part of the screen.

Step 5. Select the Note you wish to restore. Click on it.

Step 6. Press on Move To at the lower left part of the screen.

Step 7. You should click on Notes folder.

Step 8. The Notes you delivered should be restored now. You can find your recover Notes iPhone files in your Notes folder.

We hope that this simple ‘How to recover Notes from iPhone’ (no matter if you own the latest iPhone 7 / 7 Plus or previous handset).

How to Recover Notes Deleted on Mac or Windows PC, iPhone, iPad

How to Restore Deleted Notes on Windows PC or Mac

Step 1. You need to use iCloud to return your computer Notes. Visit icloud.com site from your desktop browser.

Step 2. Sing into your iCloud account.

Step 3. Press on the Notes icon to proceed.

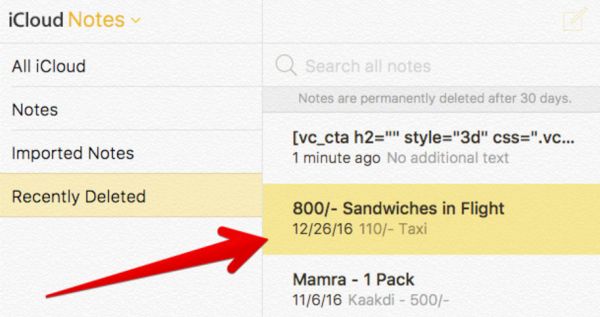
Step 4. Press on ‘Recently Deleted’ you’ll find at the left part of the menu.

Step 5. There will be a list of all the notes you removed accidentally or deleted on purpose.

Restore Notes Deleted on Mac

Step 6. Press on the note you plan to restore and click on Recover option (it is located that the upper center of the screen).

Step 7. The note you have pressed on will be restored successfully.

Hopefully you can easily restore all the files you have removed. Just remember that you should do this within the 30 days after you delete it. Otherwise the program will automatically and permanently clean of its folder and your notes won’t be restored.

How to Connect New Mac 5K Display and Fix Possible Issues

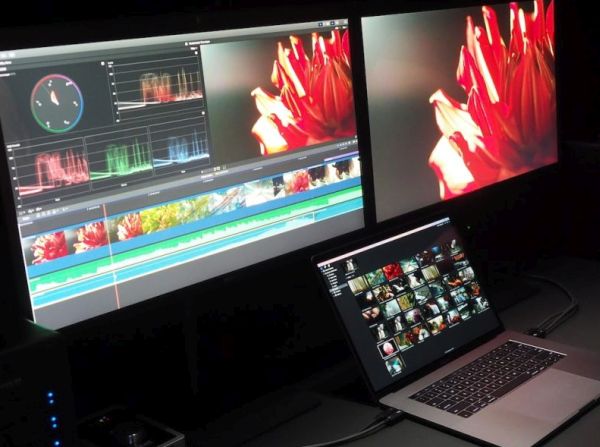
Some Apple fans dream about Mac 5K display and you can learn how to connect one well-known monitor to your ‘fruit’ machine. Not all users who are trying to perform this action enjoy the smooth procedure. Many do experience some bugs and issues. You might also come across possible known problems so you need to learn how to solve it before you start.

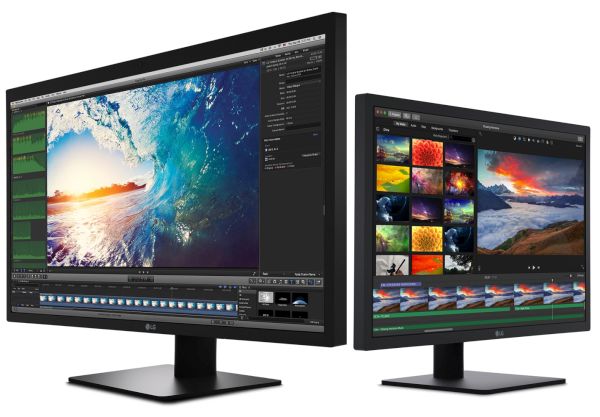
We are talking about LG UltraFine 5K display. This can be your Macbook Pro external monitor and you should follow the quick tips on how to start working with this display and make your computer even better with a powerful screen.

Remember that different problems are possible. Still you can fix them if you follow the detailed guide below. P.S. You can send amazing disappearing photos and videos on iPhone Instagram which is so cool.

LG 5K Display for Mac

Apple Display 5K Option

The new LG 5K monitor is a spectacular UltraFine 27-inch display. Users are more than happy to get this product to watch movies, films and various videos. This screen offers incredible 5120 x 2880 resolution, 14.7 million pixels and incredible P3 wide color gamut. It sounds very attractive and connecting it to your Mac could bring an unforgettable experience.

The really big display can be a perfect addition to any Mac computer. It can be if you can connect it without problem. Issues are possible so our main goal is to avoid or fix them. Some Mac users are able to bring Touch ID to old Mac models.
LG UltraFine 5K Display for Apple Mac computers

How to Connect LG UltraFine 5K Display to Apple Mac

Step 1. You should own a particular Mac model. So double check that your gadget is compatible with the LG 5K monitor. It currently supports the following models:

  • 13-inch or 15-inch MacBook pro released in 2016

Step 2. Make sure your Apple computer is updated to macOS Sierra 10.12.1 or newer operating system version.

Step 3. If you have the USB-C to Thunderbolt 2 Adapter or cable you are able to connect the monitor to a computer with lower 3840 x 2160 resolution screen:

  • 13-inch or 15-inch MacBook pro released in 2014;
  • Mac Pro released in late 2013;
  • 11-inch or 13-inch MacBook Air launched in the beginning of 2015;
  • iMac versions from 2014 and 2015;
  • Mac mini from 2014 with 3200 x 1800 resolution display.

Step 4. Connect the iMac, MacBook Air or MacBook Pro external monitor using the cable and enjoy the amazing 5K resolution.

How to Connect LG 5K Monitor to Apple Mac Computer

How to Fix Mac 5K Display Problems

The first problem with Apple display 5K connection is the compatibility. If your Mac model doesn’t support this product you won’t be able to connect it. So check once again if you own the correct Mac computer.

The second major issue you could have is related to your macOS Sierra version. Experts say that it is better to update to macOS Sierra 10.12.2 or newer for smoother results.

The LG 5K display can become your second Mac monitor however it could turn on only after you start using macOS version on your Mac Pro or Mac mini or other ‘fruit’ computer you have [it is possible to charge iPhone 7 with MacBook Pro 2016 version].

Double check if you have the correct cable. For example, your Mac won’t get power from the LG screen if it is connected via the Thunderbolt 3 to 2 adapter. You might need to use the original Apple power supply to charge your computer and use the cable that arrives with 5K display to connect without issues. The Thunderbolt 3 that can offer 5A of power might also be a good choice.

Some options might not work well or not work at all. The Display might not support different pre-boot options. For example, there could be issues with macOS Recovery feature and Boot Picker option.

If your display doesn’t work after you made sure your computer, version of operating system and cable are compatible you should contact LG since this is the company that stands behind the UltraFine 5K display. The firm could help you.

There is LG support page you can visit to fix the problem or get help with the software / user’s manual.

How to Gift iMessage Stickers on iOS 10 iPhone 7

Is it your friend’s birthday or any other holiday you want to celebrate in an unusual manner? You can take advantage of iMessage stickers that are perfect for iOS 10 iPhone and iPad. Have you heard that you can send sticker pack telegram via your ‘fruit’ device? It’s simple, fast and it can be a wonderful gift idea for any special occasion you can think of.

Follow the instruction below and you’ll find out how to send sticker pack for iOS 10 iMessage. Firstly, make sure you have installed iMessage app on your gadget. If your version is an old one you should upgrade it to the most recent release. Secondly, learn more about iMessage stickers and how they can be useful to you. By the way, you can easily transfer files from Evernote to iPhone notes.

iMessage Stickers iOS 10 iPhone

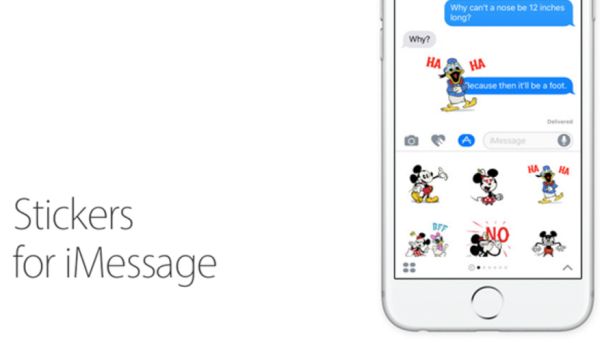
About Stickers for iMessage

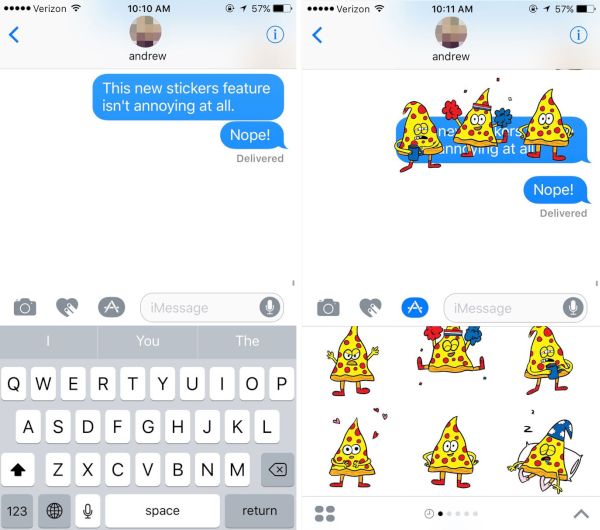
There are a lot of great iOS 10 iMessage effects you can enjoy. Using iMessage apps and iOS 10 stickers you can create joyful moments for your friends and family member. Apple presented new iOS 10 in early fall. The company spent the whole summer testing it and trying to fix all known issues and bugs. There are some iOS 10 problems that need to be resolved yet still there are also many interesting changes you can try.

Improve your iMessage iOS 10 app and start the entertainment. This program has the coolest things to offer and sticker pack is one incredible feature you should give a try. Sometimes you can’t find the right words to express yourself. However a cute or funny sticker can show your emotions even better than simple words. No additional efforts are required when you have a step-by-step guide to follow.

iPhone iMessage sticker pack iOS 10

iMessage Stickers Tutorial

Step 1. Open iMessage app on your iPhone or iPad [learn more about single sign-on technology].

Step 2. Select the contact (any contact is good for now since you are not selecting the recipient of the iOS 10 stickers gift yet).

Step 3. Look at the text field. You should see the App icon. Do you see it? Click on it to proceed.

Step 4. Now look down at the left lower corner. There is an App drawer. You should click on it.

Step 5. Press on Store option and choose the sticker pakc you like the most.

Step 6. Click on the Share option that can be found at the upper right part of summary.

Step 7. You are so closer to sharing iOS 10 iMessage effects with other iPhone 7 users. Click on Gift option in the share field.

Step 8. Provide the email address of the gift recipient now [make sure this is the email related to Apple ID].

Step 9. Once the email is entered you can add a message to personalize your virtual gift.

Step 10. Choose the date when you want the gift to be sent.

Step 11. Click on Next at the upper top part of the screen.

How to Gift iMessage Stickers iOS 10 iPhone

Step 12. Select the theme for the gift card you are creating. Click on Next option.

Step 13. Double check all the information and click on Buy option (can be found at the upper right part of the screen).

Step 14. Press on Buy once again and provide your Apple ID passcode.

Step 15. To complete this iMessage stickers guide you should press on OK.

Step 16. Click on Done to complete your purchase.

Send sticker pack telegram as a gift and those who will receive it can use those stickers for free (since you are the one who is paying for the service). Do you think it can be a fabulous holiday gift?

A lot of iOS 10 iPhone 7 / iPhone 7 Plus users should be glad to receive hilarious messages with nice stickers. There are always so many great packs to select from that you’ll love creating exclusive text messages through iMessage. By the way, you can easily find new packs to share in the App Store.

Cool iPhone Instagram Tips: Learn How to Send Disappearing Photos / Videos

It’s always great when you can surprise your friends with disappearing photos Instagram feature. Have you heard about this possibility? Are you a fan of Instagram network? Do you enjoy iOS new features on your iPhone? Have you upgraded to iPhone 7 or iPhone 7 Plus and wish to explore all the possibilities these models offer?

There are a lot of good Instagram feed ideas you can use. It’s nice to post interesting images and share incredible things you love with other. There are also many different Instagram tips for beginners and some of them let you use the impressive disappearing videos Instagram feature on both iPhone and iPad.

We’ll tell you how to post on Instagram from iPhone using the cool disappearing photos or videos feature. This is not complicated and you’ll love what you can do with the ‘fruit’ gadget and updated iOS 10 firmware version. By the way, Apple presented several new upgrades since it first introduced this operating system in September 2016. A lot of users have already installed the latest update and keep finding new options and things to do. By the way, remember that you can stop Facebook from accessing your iPhone data.

iOS 10 New Features iPhone 7 Photos

Disappearing Photos Instagram / Disappearing Videos

There are a lot of additional things you can do on your social network account. Thus, you are able to live stream videos on Instagram, mute different stories. You can take advantage of Boomerang and make animated GIFs. The iOS 10 message features also allow you sending disappearing images and video files.

You can also send Direct Messages with disappearing videos and photos on Instagram. Such interesting messages can be sent to your friends or even groups of people. The whole idea of such iOS 10 features is simple. The person sees the image or watches the video and it automatically disappears from the inbox. Isn’t it awesome? You will know if the file was watched or seen by you.

Are you ready to learn details about iPhone Instagram tips and how you can send the wonderful surprising message to your friend or share the disappearing photograph with the group of users?

How to Send Dissappearing Photos Videos iPhone 7

How to Post on Instagram from iPhone: Disappearing Files

Step 1. You should find Instagram download link for iOS 10 firmware and install it. If you already have this social network installed on your iPhone 7, 6s, 5s or other model you should make sure the version is the most recent one.

Step 2. You need to access your camera now. Just swipe to the right on your phone display.

Step 3. Take a photo you would like to share. You can also record a short video instead if you prefer sending a video file instead of a picture.

Instagram iOS 10 Dissappearing Photos

Step 4. When you are happy with the photograph or video you need to click on the arrow to proceed. You’ll find this option at the lower right part of the display.

Step 5. Now decide whether you want to send your image or video to one friend or several users at once. Choose your option.

Step 6. Click on Send option you’ll find at the bottom and your message will be sent.

Of course, you should also learn how to use iOS 10 message features to the fullest. When you send someone a disappearing photo or video you would love them to watch it and hope to also check it, right [you can download YouTube videos on iPhone 7]? Learn how to view such files:

Step 1. There is an airplane icon you should click on. You’ll see it at the upper right part of the display.

iOS 10 Airplane Icon iPhone 7

Step 2. The disappearing file should appear in the top bar.

Step 3. You can click on the images with blue rings. This way you can see the files shared by your friends. For videos and images sent to group, you can click on the faded friend’s profile image and respond.

What do you think about the iOS 10 new features? Would you like to share disappearing files through Instagram or not?

Apple iPhone 8 Rumors and Features: Beautiful Concept Ideas

The release of long-awaited iPhone 7 and iPhone 7 Plus makes users wonder about next iPhone 8 features and future Apple iPhone 9. What customers expect to see in 2017? How do experts imagine the next year’s model? The famous Cupertino-based company is already working on its new generation handsets and millions of eyes are closely following all the rumors, news and photos that appear on the web.

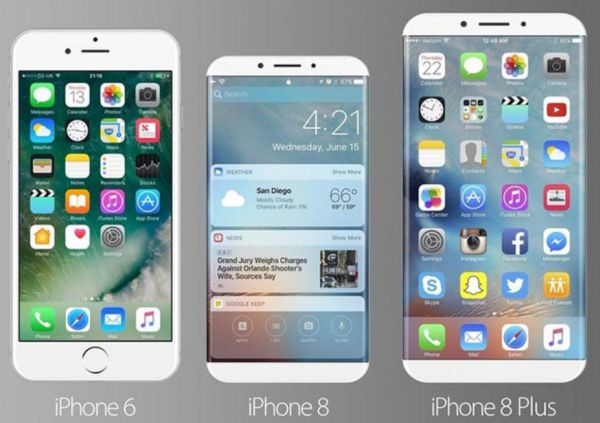
It’s hard to speak about iPhone 9 yet because this model is yet to arrive. The official iPhone 9 release date is most likely to happen in 2018. The next 2017 should bring stunning iPhone 8 features as this model should be different from iPhone 6, 6s and 7. At least, this is what designers and users hope for.

Everyone wants to see changes in iPhone 8 images with improved design and fascinating options. What does your imagination tell you? How do you see the future device? Are your ideas differ from numerous iPhone 8 concept versions?

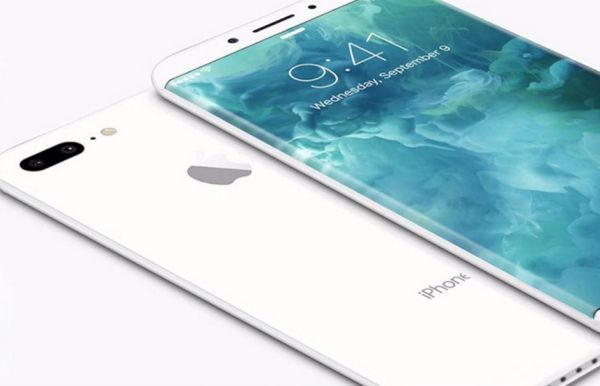
iPhone 8 Concept

iPhone 8 Rumors

Apple does’t show its future gadgets before the official presentation. Still there are many leaks and rumors that turn to be right about the device and reveal its features, real images and specs long before public is introduced to the new ‘fruit’ phone, tablet or computer.

The iPhone 8 price is still not know but many customers already can’t wait to purchase this phone as soon as it arrives. Some users are simply willing to upgrade their older phones and others just enjoy updating to the newest and impressive Apple iDevice.

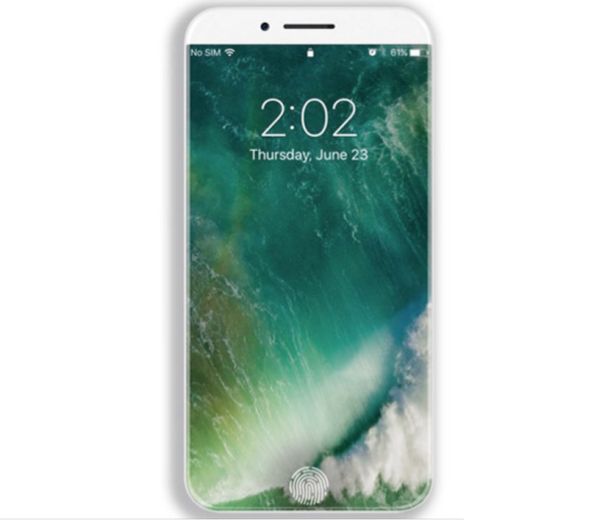
Concepts don’t promise anything. This is just the curious way to suggest what could be coming in the future. Most concepts stay design ideas but it’s always great to take a glance at amazing and beautiful renders while waiting for the official release. By the way, there are many concepts that are based on rumors and suggestions on what the future model could look like.

iPhone 8 Concepts Images

Possible Apple iPhone 8 Images

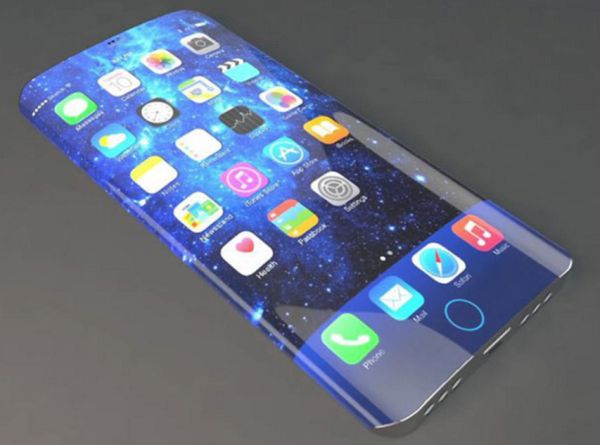
The stunning pictures make us wonder what real iPhone 8 video could be like. Wouldn’t it be awesome if the iOS giant presented its own iPhone concepts before releasing the next phone? Well, for now we can only enjoy the design ideas created by third-party companies and individuals.

The model that will celebrate iPhone’s 10th anniversary in 2017 could get the impressive brand new design. It could even look radical to those who are used to the minimalist look of current iPhone 6s and iPhone 7 / 7 Plus.

Edge to Edge Display iPhone 8 Concept

List of Possible iPhone 8 Features

There rumors about edge-to-edge display that preceded iPhone 7 launch are now following the iPhone 8 release. Could it be possible that Apple chooses to use a bezel-free screen or not?

Another rumor promises OLED display and improved fingerprint recognition system. The iOS company could possibly present three iPhone 8 versions with OLED and LCD displays and different screen sizes.
We have already heard about not just fingerprint scanner being embedded into the screen but also a front-facing camera being embedded. Can you imagine this?

iPhone 8 Rumors

Users and designers also dream about wireless charging technology so this is one of the features shown in concepts. There are many smartphones in the market that support wireless charging however Apple still hasn’t introduced it for iPhone 7 so potential customers hope to see it in 2017.

The new gen chip could be A11 processor that will make new iPhone much faster compared to current models.

The concepts also show a version with facial scanning option. Such technology requires special iris-recognition chips so chances Apple would bring such authentication are pretty low since this would increase the price of the device. At the same time, the company likes to surprise the market with innovative technologies that is why designers and users expect something very special about iPhone 8.

There is also an idea about all-glass-body gadgets with stainless steel or aluminum frames. Of course, these are just the ideas and we’ll definitely hear more about the possible iPhone 8 specs, features and options in 2017.

How to Transfer Files on iPhone: iOS Notes App Tutorial for Evernote Users

Would you like to transfer files to iPhone without iTunes? There are a lot of different iPhone transfer software you can use. Everything depends on the type of files you wish to move between your phones or between iPhone and Mac. For example, if you are using Evernote that is believed to be a wonderful note application – there is a simple way how to export Evernote to Apple Notes on both your handset and ‘fruit’ computer.

We know how you can use your iPhone Notes app to move all files from Evernote to your iOS 10 program [learn more about new single sign-on iOS 10 feature]. This instruction will also work for your Mac computer. Follow the iOS Notes app tutorial below and you’ll quickly explore all interesting Apple Notes tips for users with products released by the Cupertino-based company.

How to Transfer Files on iPhone 7 iPhone 7 Plus

Best iPhone Transfer Software Details

Do you need to use any third-party program to transfer files to iPhone without iTunes? With Evernote, there is no need to install any additional tools when you wish to move your notes. Everything can be done within the program itself. Are you excited to give it a try? You’ll find the step-by-step guide for using your notes iOS 10 below.

Unfortunately, there is no way how you can export all files at once. The process takes a lot of time and you’ll have to be patient. Still you can manage everything eventually. By the way, AT&T iPhone users should learn how to check their mobile data usage.

How to Use Best iPhone Transfer Software

How to Export Evernote to Apple Notes on iPhone

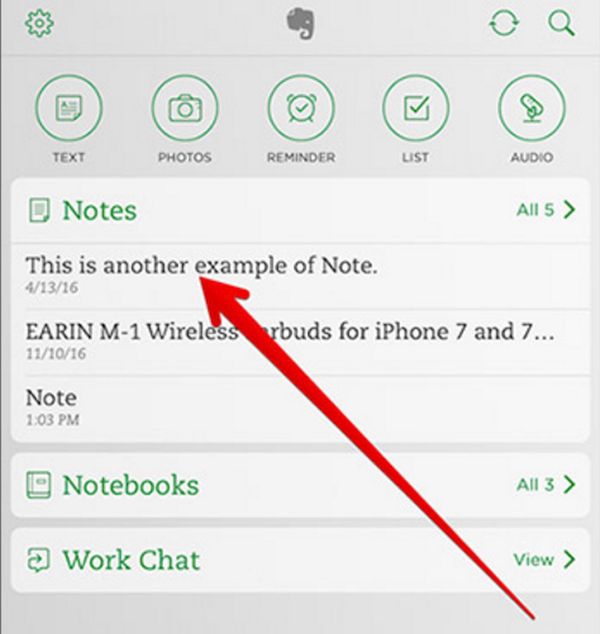
Step 1. Being to export Apple notes by opening Evernote application on your iPhone 7, iPhone 7 Plus or other handset model.

Step 2. It’s best to choose one Note you want to export. If you want to export multiple files you’ll have to repeat this guide several times.

Evernote iOS 10 iPhone App

Step 3. Click on More option that looks like 3 dots. You’ll see it at the lower right part of the screen.

Step 4. Click on ‘Share’ option that is available in the Evernote menu.

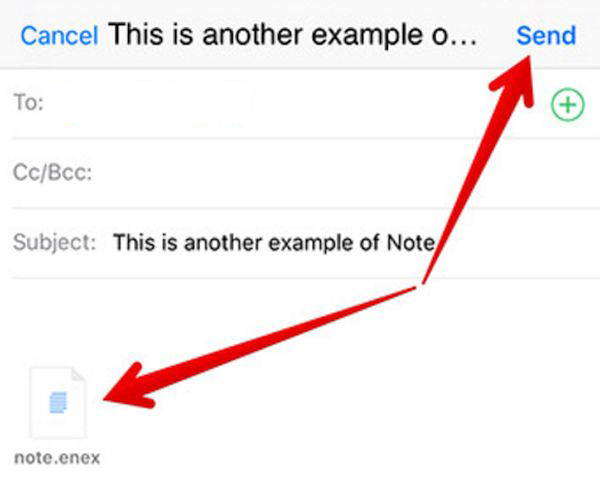
Step 5. To transfer files on iPhone you’ll have to choose ‘Export Note’ option. This feature should open a new Mail window that has the Note attached as .enex file. Just type in your email address and click on ‘Send’ to email the file.

Transfer Evernote to iOS 10 Notes App

Step 6. Now you can close the app.

Step 7. Don’t put your iPhone away yet. Launch Mail application on it.

Step 8. Select the email you have sent (the one that contains the .enex file).

Step 9. Long-click on this file and you’ll access the extensions window.

Step 10. Click on ‘Add to Notes’ option. This way you can export the file to your iOS 10 iPhone Notes app. There will be a new pop-up window that shows ‘Import Notes’ option. Press on it to continue.

Step 11. You can exit Mail program.
Step 12. Launch iPhone Notes and click on Imported Notes folder.

Step 13. Find your file (in case there is more than 1) and enjoy your note.

How to Transfer Files Mac Evernote to Notes App

How to Move Evernote Files to Apple Notes App on Mac

Step 1. Make sure your computer uses OS X 10.11.4 version or newer operating system.

Step 2. Open Evernote on your Apple machine.

Step 3. You should sign in to Evernote account.

Step 4. Look at the Menu and press on ‘Edit’ option. You’ll be able to move all Evernote files to Notes at once which is impossible on iPhone.

Step 5. Click on Select All option.

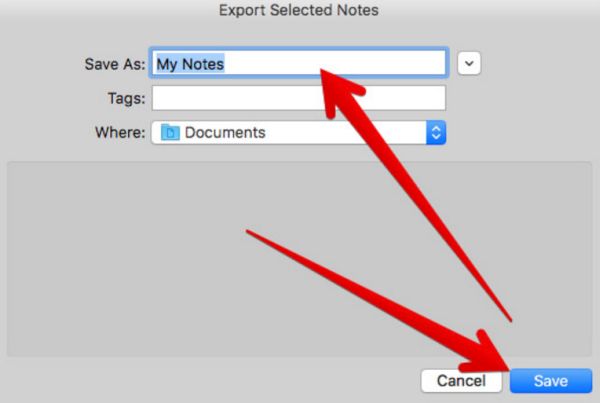
Step 6. Select ‘File’ in your Menu and press on ‘Export Notes’. Remember to Name your file.

How to Export Notes Evernote

Step 7. Choose where you wish to have the file saved and press on ‘Save’ option. All your notes will be exported as .enex files just as it happens on iOS 10 devices.

Step 8. Open Notes program on Mac and press on File – Select – Import to Notes.

Step 9. Find the .enex file and press on Import.

Step 10. Confirm your decision by clicking on Import Notes and all your files will appear in iCloud folder ‘Imported Notes’ – isn’t it cool?

You see that it is possible to easily move files from Evernote to your iOS 10 iPhone 7 or Mac Notes app.