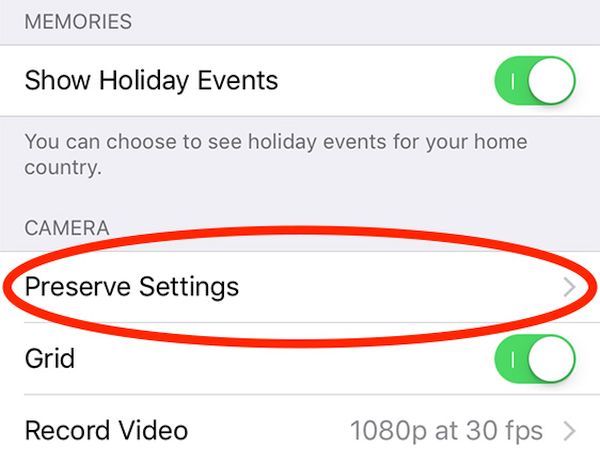
Cool iOS 10 Features to Preserve iPhone Camera Settings

There is a list of iPhone 7 hidden features that become available after particular firmware versions update. For example, once updated to iOS 10.2 you’ll be able to play around with your iPhone camera settings and preserve changes. This can be done on different smartphone models and Apple iPad devices.

There is an awesome addition to iOS 10 settings (have you heard about single sign-on iPhone option?) that is called ‘Preserve Camera Settings’ and you can use it to not allow applications to reset the changes you have applied. This is a great thing to do if you have a lot of iPhone camera apps that could possibly reset your default settings. You can now control even more features on your Apple devices.
iOS 10.2 Features Settings for iPhone Camera

What’s New in iOS 10 Settings in Version 10.2

The new operating system update brings not only new iPhone camera features but also ability to use single sign-on option, make emergency calls via Emergency SOS and enjoy the great TV program. Still there are some amazing hidden features you must know about and ‘Preserve Settings’ is one of them.

The incredible iPhone 7 Plus camera tips we’ll talk about below can work on iPhone 6, 6s, 7 and your iPad because the changes are brought by iOS 10.2 firmware and once you install it on your ‘fruit’ gadget you’ll be able to apply the changes.

You can also order factory SIM unlock for your iPhone 7 or 7 Plus. This is the simplest way to become SIM free from AT&T or other carrier.
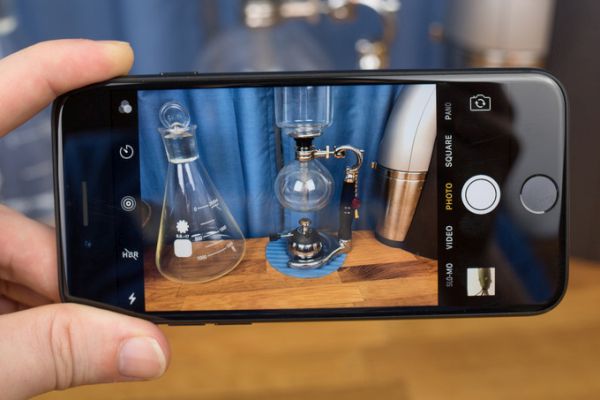
iPhone Camera Settings

iPhone 7 Plus Camera Tricks

How can you take full advantage of the new iPhone 7 camera settings? What happens when you turn on the latest iPhone 6s Plus camera settings to ‘Preserve’ mode? In other words, users who like to work with Square mode in their iOS 10 Camera on iPhone will see this particular mode when they launch Camera program (if the mode was preserved). No default camera settings iPhone 6, iPhone 6s, iPhone 7 won’t return unless user chooses to change something manually.

Without this mode, your settings will go back to ‘default’ the next time you launch Camera app.
Now it’s time to explain how to use iPhone camera and enjoy the interesting new filter. While iPhone 7 Plus can boast the most powerful camera ever (this is the quick answer to the question ‘which iPhone has the best camera’ ever since the original Apple smartphone release) other handset models can also offer nice photo experience.
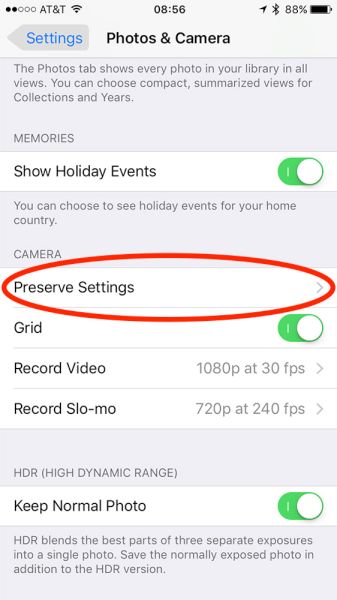
iPhone Camera Preserve Settings iOS 10.2 Feature

iPhone 7 Camera Tips for Using Transfer Filter

Step 1. Install iOS 10.2 as this is the only firmware version that currently supports amazing ‘Preserver’ option on iPhone.

Step 2. Once you are updated to iOS 10 you can click on Settings.

Step 3. You need to scroll down a little bit. Find Photos & Camera and click on this section.

Step 4. You need to look under Camera menu.

Step 5. Do you see Preserve Settings, the new iOS 10.2 feature? Click on it.

Step 6. There will be 3 options to choose from. You’ll see Camera Mode, Live Photo and Photo Filter.

Here are some details about these three features. You can click on Camera Mode if you want to save your last mode (Square, Video and not Photo option set up by default). You might wish to click on Live Photo feature if you need to preserve your settings created specifically for Live Photo and not use the default settings. It is also possible to choose Photo Filter if you need to save filter that was used for the last time (Fade, Process or Transfer).

Let’s practice now. Launch Photos application on iOS 10 and set the filters you wish to use. There is no need to remember your settings and set everything up each time you launch one of the iPhone camera apps for your platform. Test this feature and you’ll like how the filter works and preserves your preferences.

What do you think about the upcoming changes and improvements you can enjoy?
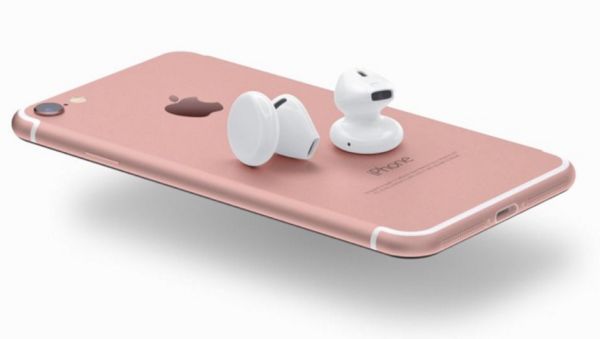
Guide on How to Pair AirPods with Different Apple Devices

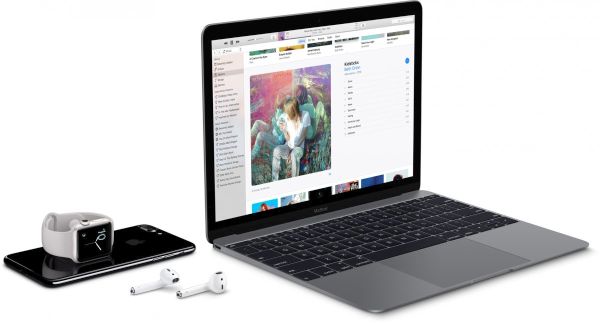
Have you read the AirPods review? Are you interested in using the new Apple wireless AirPods accessories with the iPhone 7 or other compatible device? This newest product works great with the iPhone, iPad, Apple TV and Mac. The first thing you should always do when looking for the best AirPods price is to get all the details about this accessory. The second thing you must learn is how it works. Then you need to learn how to pair AirPods with your devices [here are some useful iPhone 7 Instagram tips and tricks].

Pairing AirPods Apple accessories makes you enjoy all the interesting features these new wireless headphones have to offer. The Cupertino-based giant brings the high quality sound to all users who love listening to music and watching movies. We will explain how you can pair and unpair iPHone AirPods with different ‘fruit’ gadgets.

iPhone 7 AirPods How to Pair

How to Pair AirPods with iPhone iOS 10, iPad

Step 1. The whole thing is pretty simple. Make sure you have installed iOS 10 ipsw through direct links or on your iPhone and unlock the device.

Step 2. Open AirPods case.

Step 3. You need to hold the accessory next to the smartphone.

Step 4. AirPod Apple should show setup animation on the phone and you can click on Connect.

Step 5. Press on Done and your iPhone will be successfully paired [it is easy to manage iPhone 7 files even without jailbreaking, did you know this?].

To pair Apple wireless AirPods with iPad you need to update your tablet to iOS 10. Then you should login to your iCloud account (the same one you are using with the iPhone that is already paired) and the syncing will start automatically when you sign into this account from your iPad.

How to Unpair AirPods

How to Unpair AirPods from iPad or iPhone

The new Apple Airpods price might look a bit expensive still once you purchase this accessory you should learn how to unpair it.

Step 1. On your iDevice, go to Settings.

Step 2. Click on Bluetooth option.

Step 3. There will be an info button next to AirPods. Click on it.

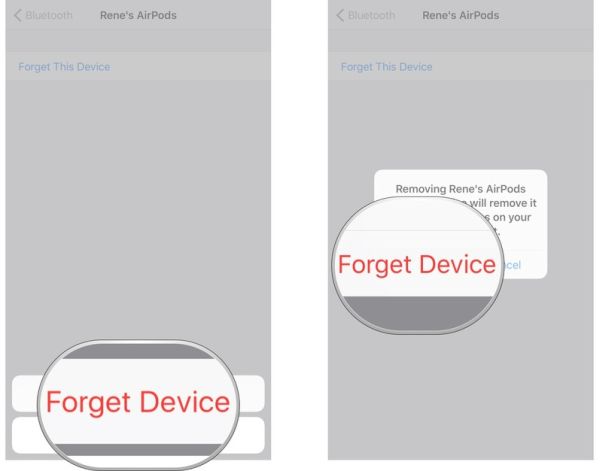
Step 4. Click on Forget this Device feature.

Step 5. Confirm your decision and unpairing will be complete.

Apple Airpods

AirPods Cost

It doesn’t matter what gadget you own as AirPods price is the same for different devices. These headphones were released in October. They cost $159. AirPods bluetooth support makes this product interesting to customers who prefer cord-free in-ear headphones to ordinary headphones.

How to Pair Airpods with Apple Mac Watch

How to Pair and Unpair Bluetooth Headphones with Apple Watch, Mac

This is so simple. You only need to pair your smartwatch to iPhone or iPad after updating to watchOS 3, install macOS Sierra on your Mac to sync via iCloud.

When you wish to disconnect the headphones from your watch or computer you should simply unpair AirPods from your new iPhone 7 or previous model. Sometimes you wish to only unpaid the earphones from computer (without unpairing from your handset):

Step 1. Use your Mac. Click-hold Alt key + Bluetooth icon from the menu.

Step 2. Simply press on AirPods.

Step 3. Select Remove option.

Step 4. Confirm that you want to remove the connection.

How to Pair Unpair Apple AirPods

Airpods Compatibility with Apple TV: How to Pair

Step 1. Take the AirPods case. There will be a pairing button on its back. Click-hold it.

Step 2. Now you should open Settings on Apple TV.

Step 3. Select Remotes and Devices.

Step 4. Click on Bluetooth section.

Step 5. Choose AirPods. That’s it.

How to Unpair Headphones from ATV

Step 1. You should select Settings on your TV.

Step 2. Choose Bluetooth from Removes and Devices section.

Step 3. There will be a list where you can choose headphones.

Step 4. Press on Forget Device.

Step 5. Confirm the previous step by selecting Forget Device for the second time.

By the way, if you own a blocked handset there is a way how to officially unlock a blacklisted Apple iPhone without issues.

How to Protect Facebook Mobile Version from Accessing iPhone Data

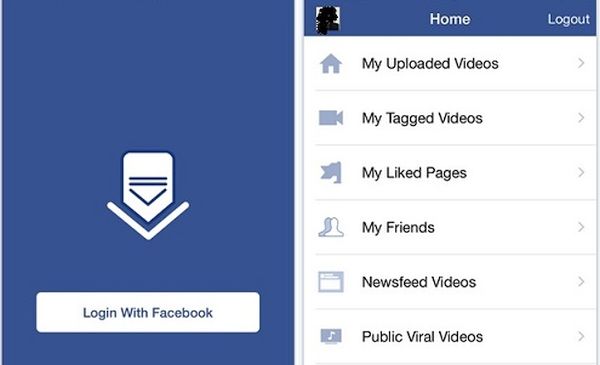
Are you using Facebook for iPhone? Here come iOS 10 tips that help you to prevent the social network from accessing your iPhone address book and contacts. Follow the step-by-step instruction and learn more about Facebook privacy. There are so many secrets to explore when you update to iOS 10 firmware version. This is the most recent update presented in the fall 2016 for a number of supported Apple devices.

Firstly, let’s make sure you are running iOS 10. All users who have gotten the latest iPhone 7 and iPhone 7 Plus get the new firmware already pre-installed. Those who have previous models (iPhone 6s, SE, 6 and other) that are compatible with the operating system can find direct links to this platform and install it through iTunes or directly on the smartphone.

Secondly, you should know that your iPhone address book can be protected from access by Facebook mobile version. Enjoy the interesting iOS 10 tips and restrict the access to your personal data.

Facebook Mobile App for iPhone 7 Tricks

About Facebook Privacy

Sometimes you see people you don’t even know if Facebook chat. Is it something you are greatly annoyed with (learn how to fix unpleasant iOS 10 bubble effect problem)? Well, Facebook always suggests different people you might want to be friends with even though you have no idea who they are. Your iPhone contacts are uploaded to the social network once you gain this app an access to the smartphone address book.

If you are tired of friend suggestions option you can stop iPhone Facebook program from offering you new friends and accessing your contacts list. There is nothing difficult. It is a quick solution so you can take full advantage of it right now.

Facebook iPhone Contact Access Don't Allow

How to Prevent Facebook for iPhone from Gaining Access to Your Contacts

First Thing to Do: Remove Synced Contacts

Step 1. iOS 10 secrets are unveiled. You need to delete the contacts synced with Facebook from this social network.

Step 2. On your iPhone launch your favorite web browser and visit https://www.facebook.com/mobile/messenger/contacts/.

Step 3. There will be a list for all contacts that are uploaded to the social network. Look under Uploading and Managing Your Contacts and you will find a Delete All button. Click on it. This way you’ll delete all the synced contacts.

Step 4. You need to confirm your decision. Then all the contacts will be removed and you will get no information about your friends beginning to use Messenger.

Step 5. Make sure you disable Continuous Uploading feature in Messenger. If it is turned on all the contacts you have just removed will be automatically uploaded again when the applications is synced with Facebook.

Step 6. Remember to log out and clear your cache (compare iPhone 7 vs iPhone 7 Plus) before the changes will fully apply.

Facebook iPhone Settings Contacts Access

Second Thing to Do: No Access to Addresses

Step 1. The Facebook iPhone tricks continue when you tell the social network to not access your addresses. So launch Settings on your ‘fruit’ gadget.

Step 2. Select Facebook section.

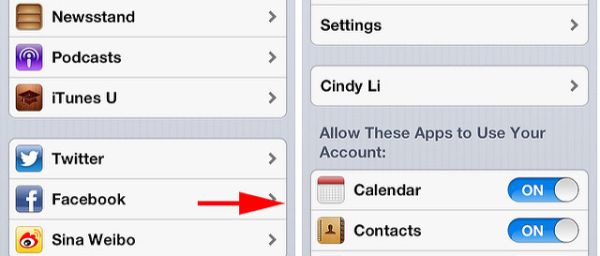
Step 3. There will be a switch near Contacts. Disable this feature. This way Facebook should not get into your addresses ever again.

Third Thing to Do? No Access to Contacts List

Step 1. You should protect iPhone contacts now (remember to back up iPhone). Once again, this can be done directly on your iOS 10 handset.

Step 2. Go to Settings.

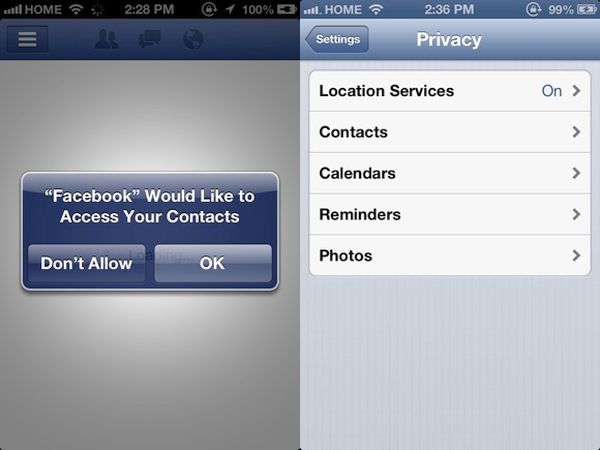
Step 3. You’ll have to scroll down so that you can get to Privacy menu and click on it.

Step 4. There will be Contacts section. Press on it.

Step 5. There is another toggle near Messenger. You need to toggle it. Now the popular social network will have no way to get to your contact information and use it to suggest you new friends.

How to Use Single Sign On Technology on iPhone and iPad

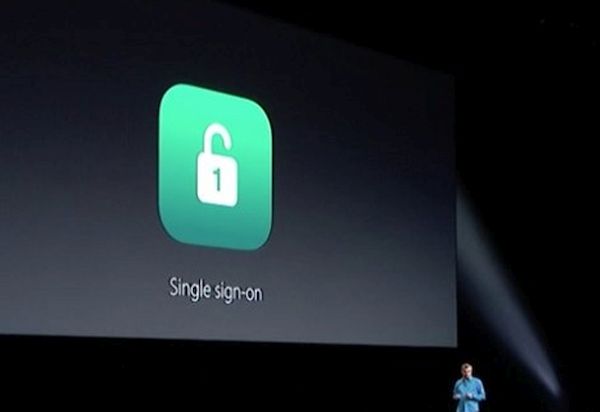
The long iOS 10 features list is growing fast. There is a new edition in iOS 10.2 firmware version and it uses single sign on technology for both iPhone and iPad. Apple offers its customers single sign on solutions and the first example arrives with operating system update. By the way, you can fix iPhone 7 storage full issue in case you have this problem.

What is this option about? What are the benefits of single sign on? We are happy to answer these questions and explain how you can enable the long-awaited feature on your iDevice. Nothing is complicated and you’ll love how you can access your applications so much easier.

Would you like to get more freedom on your ‘fruit’ device? By the way, you can turn on the new option on both iOS 10.2 gadgets [iPhone 6s battery replacement can be free to you] and your Apple TV running tvOS 10.1 version. The simple access to your TV content or iOS programs is incredible can be achieved after you enter your credentials only one time (all other accesses will happen automatically on any supported apps).

Single Sign on Implementation Providers

Single Sign on Implementation Providers in U.S.

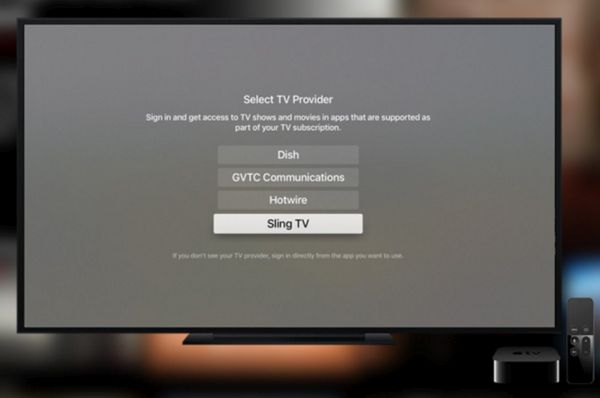
Only several providers support the new feature in the USA. They are Hotwire, Sling TV, Dish Network, DirecTV, Hawaiian Telcom, GTA, GVTC, MetroCast and CenturyLink Prism. This list will most likely grow in the future so you’ll get more options pretty soon. See the single sign on example below.

Single Sign On iPhone 7 Enable Guide

How to Enable iOS 10.2 Single Sign On Technology on iPhone / iPad

Step 1. Remember that you can turn on the latest option only after you install iOS 10.2. [Learn how to check AT&T iPhone data usage].

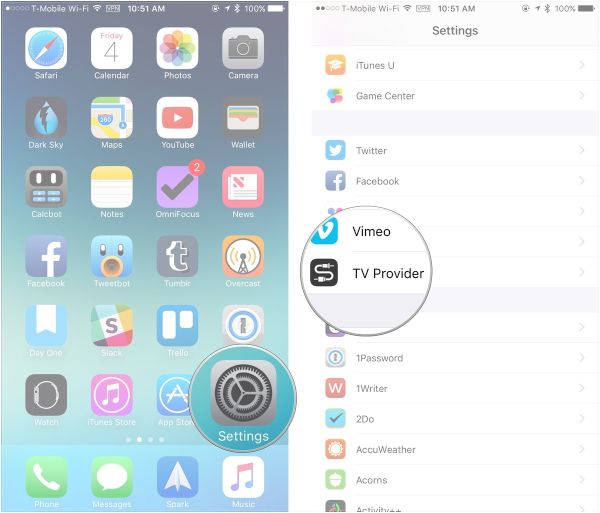
Step 2. Take your iPhone or iPad. Go to Settings to start using fun iOS 10 features.

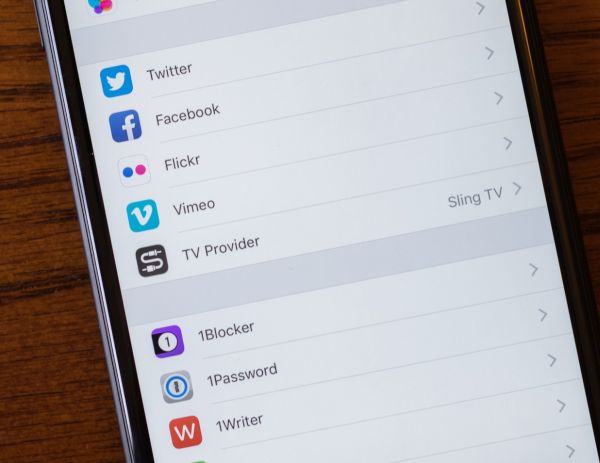
Step 3. Click on TV provider section.

Single Sign On Settings TV Provider iOS 10.2

Step 4. Choose your TV provider (after you made sure it is supported).

Step 5. You’ll have to enter your credentials.

Step 6. Now you should find the applications that are compatible with your subscription on iDevice. Open Settings again – TV Provider section – Find More Apps.

Step 7. You’ll see all the compatible programs on the App Store you’ll be taken to.

There will be NBC, USA NOW, E! Now, Telemundo, Watch Travel Channel and other apps. Some of them support only Apple TV and others are created for iOS platform. There are also titles that work on both platforms (for example, Hallmark Channel Everywhere or Watch DIY).

All iPhone 7 users can factory unlock AT&T iPhone 7 / 7 Plus and use any SIM card.

The great single sign on solutions is not full without you being able to disable this option:

Step 1. Launch Settings on iDevice if you loved the benefits of single Sign on but wish to now disable this option.

Step 2. Select TV Provider.

Step 3. Choose your account.

Step 4. Press on Sign Out option.

Single Sign On Apple TV Feature

How to Implement Single Sign On for Apple TV

Step 1. Install tvOS 10.1 and double check the name of your provider. Only supported cable providers work with the feature. Also keep in mind that only U.S. users can enjoy both advantages and possible disadvantages of single sign on.

Step 2. Launch Settings on your ATV.

Step 3. Go to Accounts.

Step 4. Choose TV Provider section.

Step 5. Choose your provider.

Step 6. Press on Sign In option and enter username / password.

Step 7. Just as it happens with the iPhone (have you heard about secret iPhone 6s codes you can unlock?) or iPad you should launch Settings on Apple TV and choose Accounts – TV Provider once again.

Step 8. Select Find More Apps option to visit App Store and download the programs that are compatible with the feature.

Step 9. You won’t have to sign in by providing your credentials each time you log into one of such apps. This will happen automatically when you enable single sign-on option.

Single Sign On Sign Out Feature

How to Disable Single Sign-On for ATV Running tvOS 10.1

Step 1. Launch Settings on your device.

Step 2. Choose Accounts menu.

Step 3. Select TV Provider section.

Step 4. Press on Sign Out option.

Keep in mind that once you turn off the option you’ll be asked to individually sign in to every application that supports your subscription with one of the nine U.S. providers.

What do you think about these tips and tricks? Do you like the advantage of saving time while logging into your favorite apps? The disadvantage is that anyone who has access to your iPhone, iPad or Apple TV can also sign into your apps without your help.

Tips to Fix Mac OS Sierra Problems with Launchpad Apps Missing

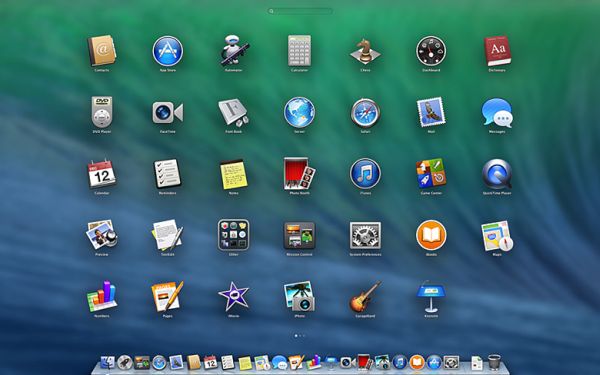
Useful Mac OS tips and tricks are must-know for all users who are interested in fixing various Mac OS Sierra problems. Take a look at your Launchpad [not Touch ID which you can get on old Mac models]. Do you notice any applications missing from it? This is one of the Mac Launchpad issues you might come across. We know how you can solve everything and return your apps back to where they belong to.

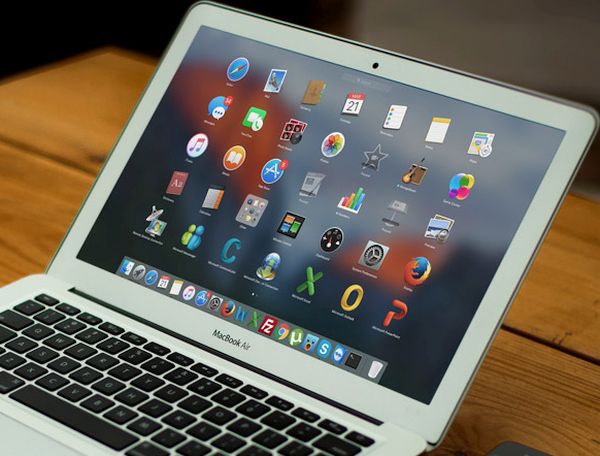
What is launchpad Mac? This is so easy. Take your computer and take a look at it. There is a special platform with a launching option. In other words, this is the structure to launch apps on your OS X machine. It can be compared to iOS options as you can use your Launchpad on Mac as if you were managing your iOS 10 applications. Pretty similar for Apple consumers who own both iPhone and Mac [you can learn how to sync iPhone to your personal computer].

What should you do with launchpad manager to fix the problem? Follow the Mac tips and tricks and you could overcome the problem.

How to Reset Launchpad on Mac

How to Reset Launchpad Mac OS Sierra Guide

This is the first method you can use to reach your goal. Use your macOS Sierra features and complete the reset instruction. It helps when you download a new third-party application, install it on your computer and… don’t see it showing up in the Launchpad interface even on the new MacBook Pro with Touch Bar. You’ll love how simple this is.

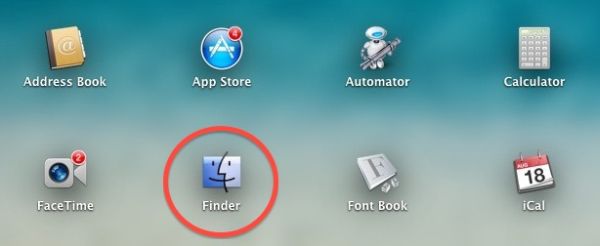
Step 1. Are you sure you are running macOS Sierra? Double check the version of your operating system. Now press on your desktop.

Finder Go Launchpad Mac Settings

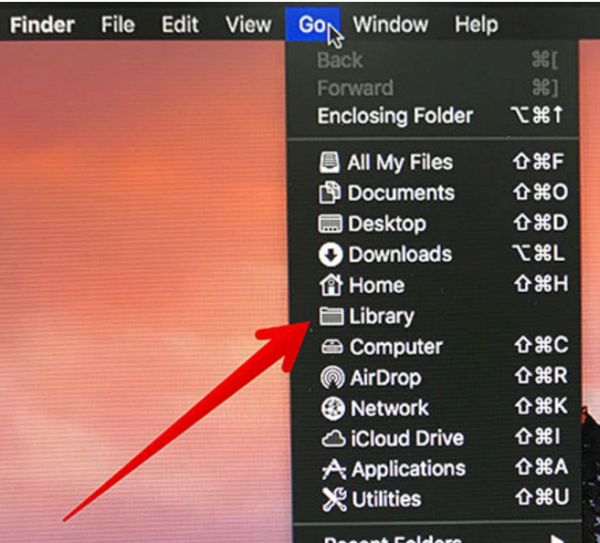
Step 2. You should press on Go section. You’ll find it on the menu bar. This is necessary for Launchpad resetting.

Step 3. Click-hold Option and press on Library section.

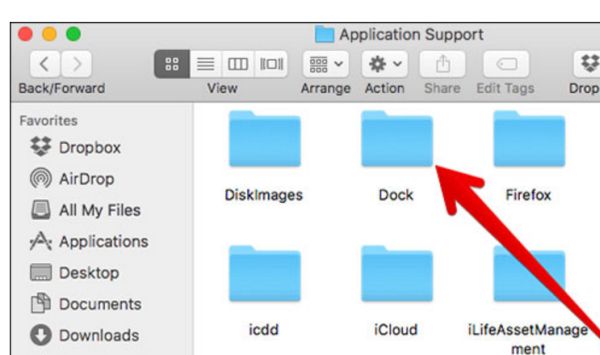
Step 4. You will see Application Support folder. It’s necessary to double press on it.

Dock Folder Mac OS X Launchpad

Step 5. You see your Dock folder. This is what you should double press on.

Step 6. Mac OS Sierra system has some .db files and you’ll have to drag them all into your trash on the computer.

Step 7. There will be an Apple icon at the upper left part of the screen. Press on it.

Step 8. Press on Restart menu.

Step 9. Confirm your decision by clicking on Restart button.

You need no launchpad cleaner as simple reset can fix Mac OS Sierra known issues with launchpad icon missing. In case you still don’t see the apps you can try a second method.

How to Fix Mac OS Sierra Problems via Default Locations

There are other Mac OS tips and tricks you can enjoy. Your Mac Launchpad shows applications that are found in default Applications folder. You can simply drag the app out of this folder. Then you need to log out – log in as this way you can restart Mac Launchpad settings. Then you should return the app back to the default folder and hopefully fix the bug.

Launchpad Mac OS X Tips and Tricks

Other Mac Launchpad Secrets

It is possible to create Launchpad Mac shortcut. Just assign any shortcut you wish to use and launch System Preferences – Keyboard preference – Keyboard Shortcuts and press on Launchpad & Dock. Yo have to choose Show Launchpad option then click on either Return or Enter and provide your chosen shortcut.

There is also another problem that prevents apps from showing in your Launchpad. Maybe the issue is with the database that is controlled by macOS Dock [here are some details about cool iOS 10 bubble effect]. It is possible to rebuild the database and solve the bug:

Mac Finder Folder

Step 1. Click-hold Mac Option key. You will open Finder – Go section where you can choose Library.

Step 2. Launch Application Support section.

Step 3. Choose Dock folder where you will find a lot of names saved as alphanumeric characters. You need to remove the files.

Step 4. Log out the account.

Step 5. Log in.

Step 6. This is how Launchpad resets along with Dock.

Step 7. Resetting will let the program scan your Application folders and apps will be shows in your Launchpad once again. Just let your computer reboot on its own before the changes take place.

Try all tips and tricks to make the issue disappear. If nothing solves the problem you should wait until Apple updates the version of macOS Sierra to newer version that fixes the bug by default. It often happens with different releases of mobile and desktop operating systems created by the iOS giant and other well-known companies.

Guide on How to Sync iPhone with Windows 10 on PC

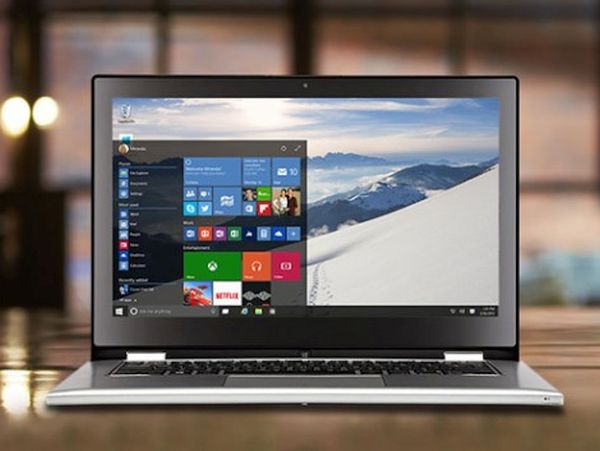
It’s great to have files from your phone saved on your computer [it is also possible to download videos from YouTube to your phone]. This way you will not lose them in case anything happens after firmware update, restore or other processes. Are you ready to sync iPhone to PC when Windows 10 not recognizing iPhone? It can happen unless you follow the step-by-step guide on how to sync the handset to personal computer with the most recent operating system version.

Keeping files up-to-date is possible and you can do this after you download iTunes for Windows 10 64 bit. Not every Apple fans has a Mac computer. There are people with iPhone and PC. This means you should use your personal computer and iTunes for Windows 10 (make sure the program supports this platform otherwise you won’t be able to use it). Learn how to reduce iPhone mobile data usage without issues.

Windows 10 iTunes program

iTunes Download for Windows 10

This is the easiest thing to do. You should search for iTunes download 64 bit for your operating system, get the link, download the program and install it. Maybe you already have this desktop tool. In this case you should upgrade it to the most recent release on your computer.

It’s not necessary to keep all your music files, films and TV shows on your smartphone. It’s much better to sync the iPhone to PC and and keep your content on the computer.

How to Sync iPhone with Windows 10 PC

How to Sync iPhone to Windows 10 via WiFi Network

Step 1. It becomes possible to transfer content between iPhone and Windows PC once they are synced. Take your Lightning to USB cable and connet the handset to your computer.

Step 2. You need no Windows 10 iPhone driver since you only need the right iTunes version.

Step 3. Launch iTunes. The program will take a moment to recognize your iDevice.

Step 4. Press on the iPhone button that is available in the upper left menu.

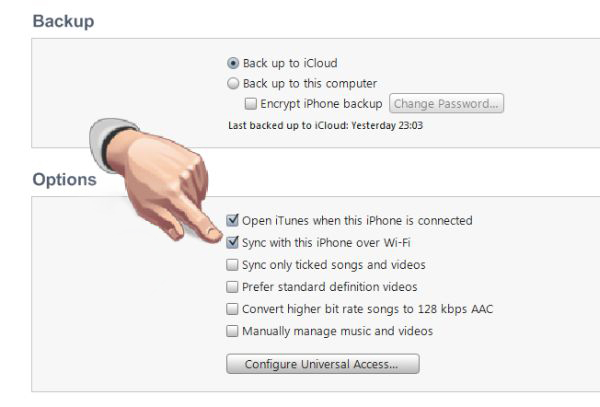
Step 5. Scroll down. You should get to the bottom so that you can turn on WiFi option.

Step 6. You should check boxes next to several menu options. Firstly, this includes Sync with this iPhone over WiFi connection. Secondly, you should press on Music that can be found on the left and enable the box next to Sync Music. Repeat the same step for other content such as Photos, TV Shows and Movies.

Step 7. Press on Apply feature.

Step 8. Now click on Sync to enable it.

Congratulations! You have successfully synced your handset (maybe iOS 10 iPhone 7 or one of many previous models) with Windows 10 machine. Now when you connect to WiFi your gadgets will be automatically synced if they are connected to the same network.

Sync Windows 10 iPhone 7 Guide

Guide for iPhone Syncing to PC via Cable

Sometimes you have no internet connection. Is there a way how you can sync your phone to Windows 10 without WiFi? You can use your Lightning cable or 30-pin USB cable depending on the model of your handset. Here is what you should do:

Step 1. Your iTunes program should be updated to the most recent release. Update it if necessary before you launch it.

Step 2. Take the cable to connect your iDevice [here is how to factory SIM unlock your iPhone 6s] to your Windows PC.

Step 3. Select your phone from the upper left menu.

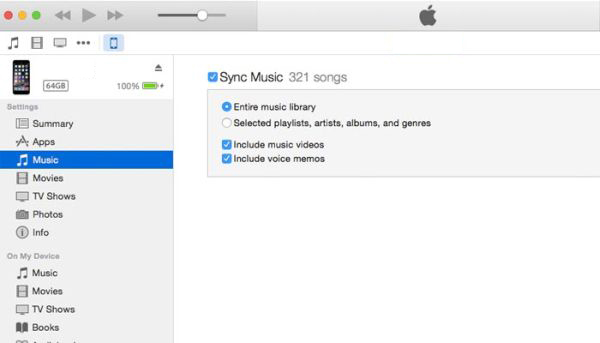
Step 4. There will be Music option on the left menu. Click on it.

How to Sync iPhone Music on Windows 10 iTunes

Step 5. You can now enable Sync Music feature. This way your music can be synced with your computer.

Step 6. Enable Sync options for Photos, TV Shows and Movies.

Step 7. You’ll have to confirm your decision by pressing on Apply.

Step 8. Now complete the procedure via Sync button.

That’s it. Use one of the methods described above to sync your files between the phone and PC. By the way, if you want to do the same thing on your Mac you can [here are some great MacBook pro touch customization tips]. Just use the iTunes version for your Apple machine and you’ll be happy with the results.

It is wonderful when you can transfer your files between devices but also remember to back up your iPhone via iTunes or iCloud once in a while. This way you can protect not only your music, movies and other files but also contacts and personal information.

iPhone 7 Storage Full But Not… How to Free Up iPhone Cache

Is your iPhone storage full but not? It’s important to get iPhone cache cleaner and clean your memory once in a while. This way you can remove junk files and free up so much space you’ll be surprised (it is easy to reduce mobile data usage on Apple phone).

Is it possible to deal with iPhone storage full issue without jailbreak? What tool can you use and where to download it? All these questions are to be answered in this post. Hopefully you’ll find the process of how to free up storage on iPhone and iPad running iOS 10 firmware version pretty easy and quick.

iPhone iCleaner Pro no Jailbreak

Great iPhone Cache Cleaner App

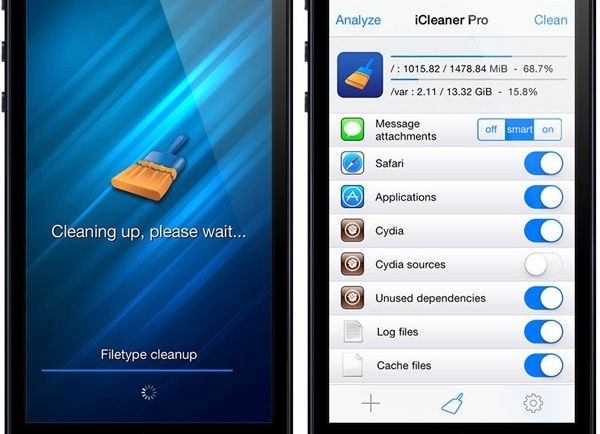
iPhone 7 and iPhone 6 storage full problem can be solved with iCleaner no jailbreak program. It is available for your iOS device. Users who were using iOS 9 and older platform versions remember that there was no iCleaner app for them unless they were jailbroken.

At the same time you are not able to perform jailbreak on iOS 10 iPhone 7 because there is no working solution. Luckily, you can use iPhone cache cleaner even without jailbreak once you update to the latest firmware (you can download iOS 10 ipsw for your gadget).

You cannot install the iCleaner App Store program because this programis not present in iTunes. There is a way how to use iCleaner source and obtain the application for your device.

How to Clean Cache on iPhone

How to Free Up Storage on iPhone or iPad: Install iCleaner Pro

Step 1. You should search for iCleaner Pro IPA file. It is available online. Download it for iOS 10 iPhone or iPad.

Step 2. Install the tool to deal with iPhone storage full issue.

iCleaner Pro for iPhone

Step 3. You will have to rely on Xcode as this is the only way to install iCleaner Pro. Where can you find Xcode 8.2 for Mac computer? Visit Apple Dev program and install this addition.

Step 4. Launch Menu on your computer and go to Preferences where you can select the Xcode.

Step 5. Read Terms and Conditions and agree to this information. You’ll be asked to type your admin password (the one you are using for Mac) and select Accounts – Preferences. Press on ‘+’ and get the Add Apple ID so that you can add a new account.

Step 6. You should use your Apple ID to log in.

Step 7. Open Terminal on Mac and type in the command:

sudo gem install cocoapods; git clone http://bitbucket.org/rileytestut/icleaner pro.git; cd icleaner pro; pod install

What does it do? It allows you downloadand launching Swift / Objective-C source code of the program.

Step 8. Now install iCleaner Pro on the iPad or iPhone.

Step 9. Launch the iOS 10 application.

Step 10. Open Settings – General menu and select Profile & Device Management. You’ll have to choose dev name to proceed afterwards.

Step 11. Click on Trust so that your system can accept the certificate. You are ready to clean your system. Proceed with ‘How to get more storage on iPhone 6s, iPhone 7, iPad’ and learn how to remove all the junk from your device.

Learn how to replace iPhone 6s battery for free.

iCleaner Pro App for iOS 10

How to Clean iPad Memory, iPhone Cache

Step 1. Now let’s deal with ‘iPhone storage almost full’ problem. Open iCleaner Pro tool on your mobile device.

Step 2. There will be ‘Allow temporary files cleanup option’ you should allow. It will appear on the main screen.

Step 3. Believe us, this How to free up space on iPhone 6s instruction is simple.

Step 4. Click on Confirm when you receive a notice.

Step 5. Let’s begin. Press on Start cleaning option. The process of cache clearance should start in Fast mode. Remember to press on Continue.

Step 6. Don’t do anything while the clean up procedure goes on. You will see the progress bar that shows how it is going.

Step 7. How do you know if it’s over? You will see the Wiping Completed message. Confirm it. That means you have successfully deleted unimportant files and freed up some space on your handset or tablet computer.

Have you fixed storage almost full iphone 6 or iPhone 7 issue? Find out the information about your space used via iPhone – Settings – General menu – About / Storage & iCloud Usage. Hooray!

Find Out If You’re Eligible for iPhone 6s Battery Replacement from Apple

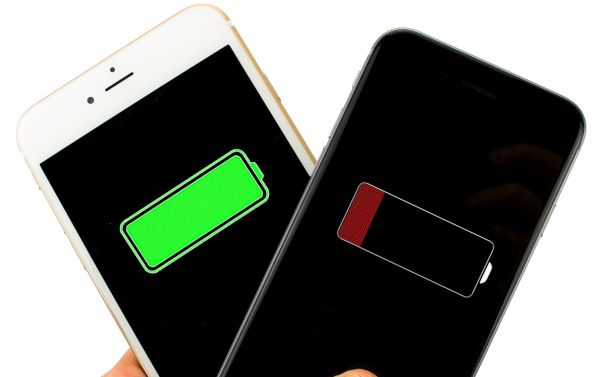
Some Apple users come across iPhone battery replacement issues eventually. How do you know it’s time to repair your decide? Are you eligible for the free iPhone 6s battery replacement service offered by the Cupertino-based giant?

The iPhone 6s was released in 2015. The latest iPhone 7 is an upgrade Apple sells this year. Not all users are eager to purchase the iPhone 7 or iPhone 7 Plus. Some are happy with their previous model however the battery problems could be the one big obstacle you have to deal with. So what is your decision? How much does it cost to repair the phone?

There are several ways you can try. There is the free Apple battery replacement program you could be eligible for. There are also services that can fix the issue but it would cost you money.

iPhone 6s Battery Replacement Free

iPhone 6 Battery Replacement Cost

The prices could be different depending on your country. U.S. customers can officially repair their iPhone 6s at $129 (if they wish to replace the screen). The battery replacement service would cost $79. By the way, the price doesn’t change if you wish to repair your screen or change the battery for older iPhone 6, 5s or iPhone SE.

iPhone 6s Battery Size

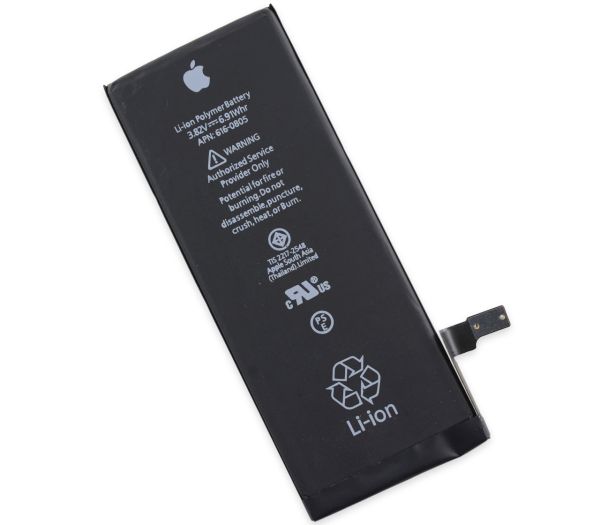
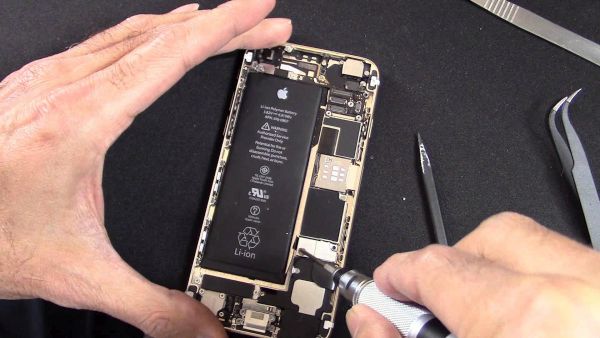
Let’s recollect information about iPhone 6s battery mAh. This handset has the Li-Ion 1715 mAh battery that is non-removable. You cannot replace it if you are not professional enough. There are big chances you’ll break the phone so it’s better to solve iPhone 6s battery problems with Apple’s help or through third-party repair services. You cannot fix iPhone 7 issues this way.

iPhone 6s Battery

iPhone 6s / iPhone 6s Plus Battery Life

It lasts for about 8 hours if fully charged and actively used. Even the bigger 2915mAh battery built-in iPhone 6s Plus doesn’t last longer. In fact, a lot of users state that their phones’ life drains even faster especially after iOS 10 update.

You can run iPhone 6s battery life test on your own. If you are not happy with your gadget’s one-time-charge life you can try to replace the battery free of cost. Not anyone can get this service for free, but there is a way and it could be a perfect solution if your smartphone starts to reboot without any reason and it happens repeatedly.

If you have the newest device you can factory unlock iPhone 7 from AT&T and other networks.

How to Replace iPhone 6s Battery for Free

iPhone 6s Battery Replacement: How to Get It for Free

Apple reported that a small number of phones (limited serial number) has had manufacturer problems. Only the devices that were manufactured in September-October 2015 and phones that were released later on have no similar bug.

How to find out if you can get the replacement at no cost:

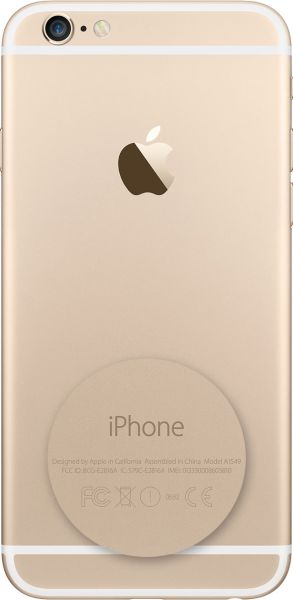
Step 1. Find your iPhone serial number. Launch Settings app if you don’t want to look it up on the back of the handset, choose General menu and visit About section.

How to Find iPhone Serial Number

Step 2. Be attentive as you have to closely study the 4-5th characters in the serial number.

Step 3. Do you see any of the following characters in it? We are talking about Q3, QJ, Q4, QH, Q5, QG, Q6, QF, Q7, QD, Q8, QC or Q9.

Step 4. You can take the phone with the serial number with numbers from Step 3 to Apple Authorized Service Provider (or your local Apple store) and get the free battery replacement for problematic device.

It’s great that even if you are out of warranty you can still get the service and pay nothing for it. Some users like to fix everything themselves. If you are like this you should definitely backup your iDevice before applying any changes. Do this through iTunes desktop program or iCloud.

Disable Find My iPhone

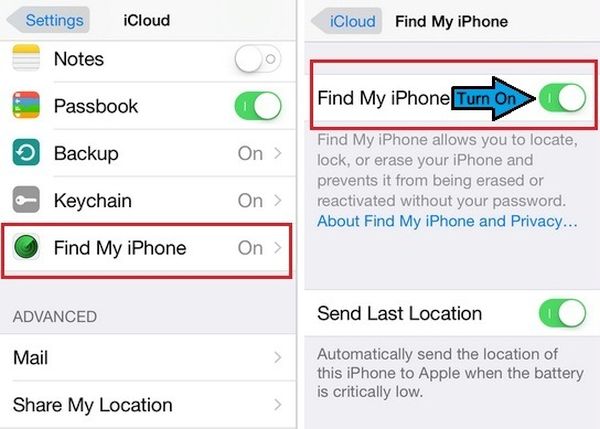
You should also disable Find My iPhone:

Step 1. Launch Settings on the iDevice.

Step 2. Select iCloud section.

Step 3. Turn off Find My iPhone feature.

It’s also necessary to erase your information before taking the gadget to the service center:

Step 1. Open Settings on your smartphone.

Step 2. Select General menu.

Step 3. Press on Reset.

Step 4. Click on Erase all Content and Settings.

P.S. If your gadget unexpectedly shuts down after you tried to reboot, reset it and install the most recent version of iOS firmware – it could be time to send it to Apple service center. Learn more about iPhone 6s tips and tricks.

Fun Guide for Using iPhone Wallet Passes and Mac Apple Pay Cards

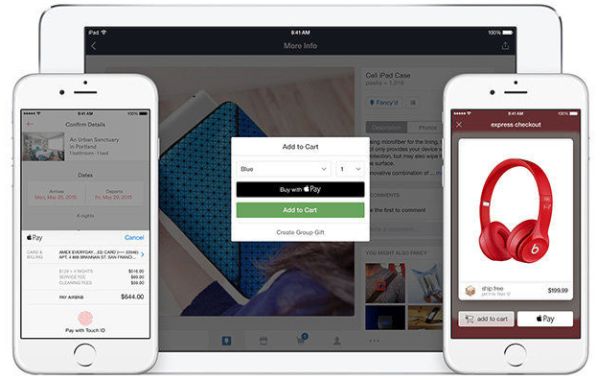
How does Apple Pay work on iPhone 7 and other ‘fruit’ devices? This question has been answered for so many times. Now it’s time to talk about Apple Wallet app and how you can share your Wallet pass on different iDevices. There is also great Apple Pay on the Web feature that becomes useful on new Mac computers. Users who have the smartphone, tablet and computer from the famous Cupertino company can enjoy all the awesome payment features without issues.

Are you going to the event and have extra pass you would like to share with a friend? It’s easy to do on the iPhone and iPad if you follow some simple steps. There is no need to cancel the tickets you have booked if your plans suddenly change. Offer them to your family members or friends and quickly share the pass or several passes.

Apple Wallet for iPhone 7 iPad

How to Share Wallet Passes on iPhone 7 and iPad

What is Apple Wallet? This is a cool application that lets you book tickets for different programs and movies. Its supports iOS 10 firmware devices and earlier versions such as iOS 9, 9.x. It can book tickets and you are ablet to share PassBook iPhone invitations with others.

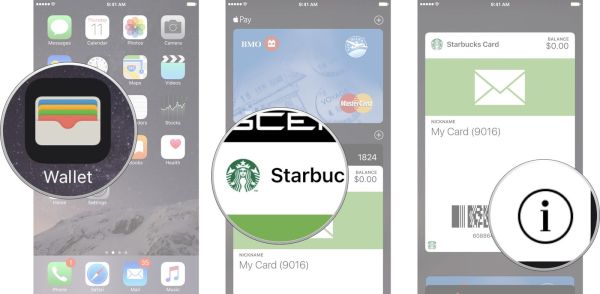
Step 1. We won’t focus on how to use Apple Wallet. We’ll pay closer attention to how you can share your passes with others. So launch Wallet application on your smartphone or tablet device.

Step 2. Find the pass you are planning to share.

Step 3. Click on the pass and press on ‘i’ icon that you’ll see at the lower right part of the screen.

How to Share Pass on iPhone 7 iPad Wallet

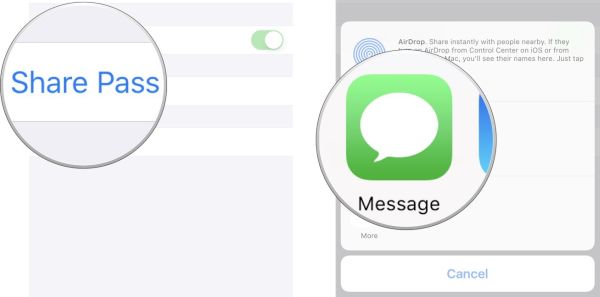
Step 4. Choose ‘Share Pass’ and select the one of the few options. There is iMessage, AirDrop, email and you can choose the most suitable. Thus if your friend with his or her iPhone is near you you should click AirDrop. If not, you can send an email or share the pass through iMessage.

To enjoy your Passbook iPhone options you need to add the pass your friend shared with you. Here is how you can complete this goal:

Step 1. Click on the pass you have received via email or other method.

Step 2. The shared ticket will pop-up and you’ll be able to click on ‘Add’ option.

Step 3. The pass will appear in your Apple Wallet app on iOS 10 platform.

Apple Pay iPhone Mac iPad

Great Apple Pay on the Web

There are several Apple payment options you can enjoy. It is possible to buy and share wallet passes and shop with numerous retailers with your iDevice. You are also able to manage your Apple Pay cards on your Mac computer.

It’s not the time to explain how to use Apple Pay on iPhone, this time it’s more interesting to explore Apple Pay cards. How does Apple Pay work on your Mac after you install macOS Sierra? Manage your cards and you’ll figure everything out.

Users who purchase the new MacBook Pro 2016 and wish to use Apple Pay should manage their credit / debit cards.

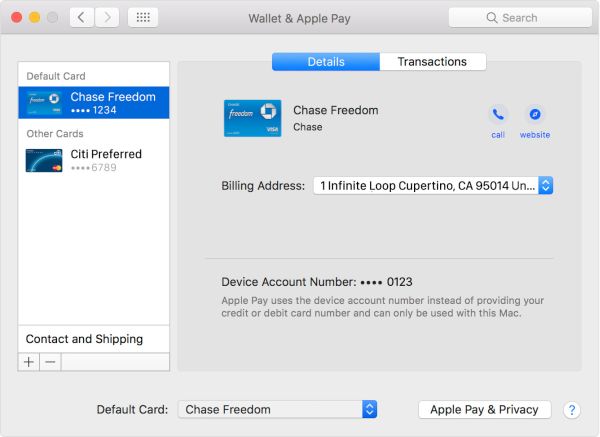
Step 1. You should go to System Preferences on your computer.

Step 2. Select Wallet & Apple Pay option (icon).

Step 3. You will see all the information you need on the sidebar. It includes your transactions, contacts, billing data etc.

Step 4. When you wish to manage your cards on older computers you’ll have to do this on your iPhone.

Apple Pay Manage Cards

Step 5. Follow Steps 1 and 2 when you have plans to change your Apple Pay default card. There will be drop-down list at the lower part of the screen. Here is where you select that card to make it your default payment option.

Step 6. Use the same sidebar when you have plans to delete the card you were using.

Step 7. With the card selected you will find the Delete option at the lower part of the sidebar. Click on this button.

Step 8. Confirm your decision. The credit card will be removed from your Apple Pay account.

You see how easy it is to share your Wallet passes with new iPhone 7 and iPad users and manage your Apple Pay cards on the brand new MacBook Pro 2016 model.

Control Your iPhone Mobile Data Usage for iOS 10 TV App

A lot of Apple customers want to learn more about iPhone reduce data usage. This is important even if you don’t want videos on-the-go. However it becomes even of more importance when you enjoy such iOS 10 features as TV app streaming since this option can ‘eat up’ all your data.

It is actually possible to reduce your iPhone mobile data usage and still enjoy watching movies and videos via TV program. This app could be a great addition to your brand new MacBook Pro that boasts Touch Bar feature or the most recent iPhone 7 and iPhone 7 Plus. Still it might be handy to learn some secrets, tips and tricks to not overuse your previous mobile / cellular data.

Are you a fan of interesting iOS 10 apps? Do you have the TV app installed? There are so many advantages of using additional programs. You can watch TV shows, the movies you love, different videos and switch between films via single sing-on option. You can use WiFi connection as this is the best choice for cheap iPhone mobile data usage. What do most of us do when there is no active WiFi nearby? That’s right. You start streaming videos and TV shows via mobile data. Its consumption can be rapid and you could need to adjust the setttings.
Reduce iPhone TV Data Usage

How to Reduce Mobile Data Usage on iPhone: for TV App Users

Remember that you can also reduce data consumption on your iPhone AT&T or other carrier and get more of the impressive iOS 10 features and newest iOS 10 apps. But this is a different story. Right now let’s explore the TV app settings and make this program use less cellular data. By the way, this guide works on both iPhone and iPad devices and it doesn’t matter if you own iPhone 7, 7 Plus or earlier iPhone 6s, 6s Plus 6, etc. You should update to iOS 10.2 before you can run the application. For your ATV you need to update to tvOS 10.1 (it is available in beta stage).

Step 1. When you wish to know how to reduce data usage on iPhone 7 TV app the first place to head to is your iPhone Settings.

Step 2. Now you should scroll down a little bit. You will find TV option so click on it.

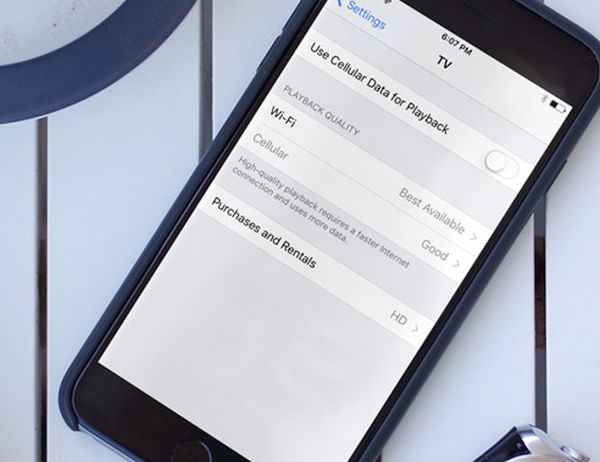
Step 3. Do you see the feature ‘Use Cellular Data for Playback?’ You should toggle its switch.

That’s not the end of the adjustments. It’s also important to reduce iPhone streaming TV data usage while you are watching a program online. There is a simple method a lot of people prefer choosing. It has its one big disadvantage and some benefits (you’ll enjoy one more advantage once you stop iPad from ringing).

How to Reduce Video Quality on iPhone

How to Reduce Mobile Data Usage on iPhone: Video Quality

It is extremely easy. When you want to know how to reduce data usage you should play with the quality of the videos you’ll be watching.

Step 1. Take your iPhone or iPad and launch Settings. You might want to backup iPhone before you apply any changes.

Step 2. Select TV app.

Step 3. Double check that you have successfully enabled ‘Use Cellular Data for Playback and proceed.

Step 4. Click on Playback Quality – Cellular.

Step 5. The default option you should notice is called ‘Best Available’ and it consumes much data than you wish. You should switch to ‘Good to let videos consume less data’ and you are done.

iOS 10.2 Beta Version for iPhone iPad

It’s also possible to mess up with the definition quality. You don’t need High Definition quality when you have plans to reduce data consumption:

Step 1. Open Settings and select TV app.

Step 2. Click on Purchases and Rentals.

Step 3. There are two definitions. You should select Standard Definition quality for videos instead of the default High one.

Now you can watch all that you want. The video quality won’t be perfect but your data will be preserved.