Fix iMessage Activation Error That Occurred During Activation on iOS 10

Do you also experience the issue with your iMessage waiting for activation on iPhone with iOS 10 or 9 even after you learned how to improve iPhone 7 performance? There is a number of users who have this problem once in a while. Let’s learn how you can fix this activation bug using the simple and easy-to-follow workarounds.

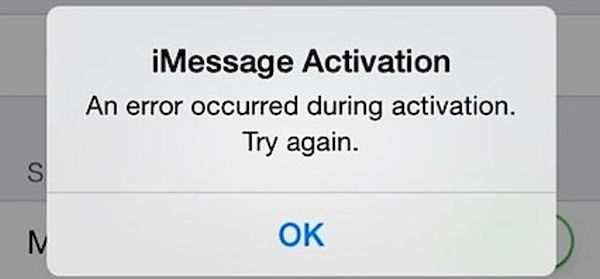
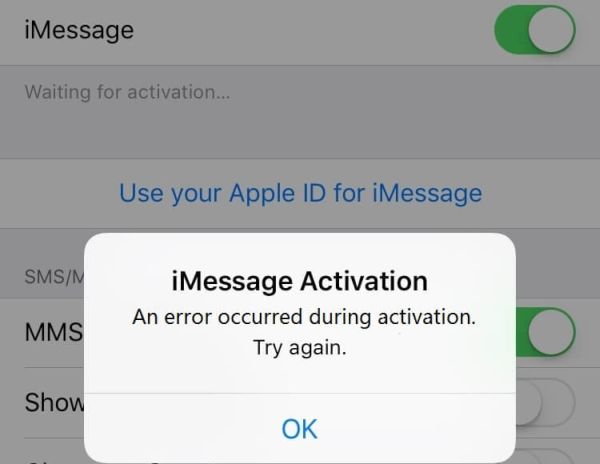
iMessage Activation Unsuccessful

There is more than one solution for iMessage activation problem. You might need to test a couple of methods before you succeed. Don’t give in because one of the solutions could hopefully solve the issue.

It’s curious why iMessage can be such a pain. Sometimes it is so easy to activate it, and sometimes the situation becomes horrific. You are doing your best, follow the step by step guides, and watch multiple videos on how to fix iMessage activation, but nothing works.

Unfortunately there is a big number of fixes that are no luck to Apple users. If you notice that no matter what you are doing your iMessage won’t activate you’ll have to probably try to upgrade to the most recent iOS 10.3 firmware [here is how to factory unlock iPhone 7 or iPhone 7 Plus] or wait for iOS 11 launch in the fall.

iMessage won't activate

How to Fix iMessage Waiting for Activation Problem on iOS 10

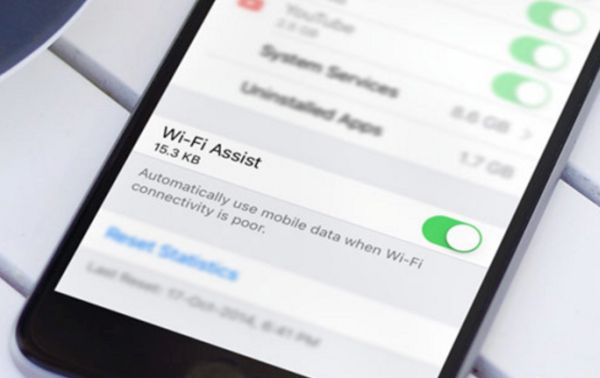
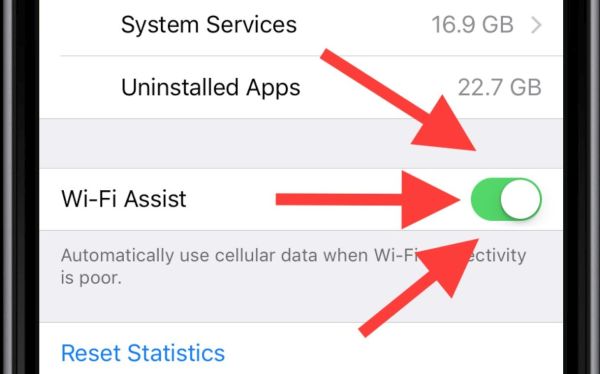
Method 1. Internet Connection Failed

How long does it take to activate iMessage? Are you waiting way too long? This feature requires fast and good connection so you need to double check on this. How can you do this?

Step 1. We recommend you go to Settings on your iPhone 7 or other model.

Step 2. Select WiFi / Cellular section.

Step 3. Disable this option.

Step 4. Reboot the phone.

Step 5. Enable your WiFi / Cellular connection.

Step 6. Try to activate iMessage and see if it works.

There is another thing you can try. However it will remove all the network settings you have. You’ll need to set up everything manually after this procedure.

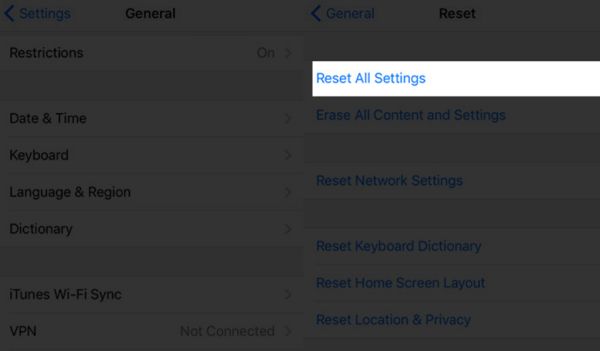
Step 1. Open Settings on the iDevice.

Step 2. Go to General section.

Step 3. Select Reset option.

Step 4. Click on Reset Network Settings.

Waiting to Activate iMessage Problem Fix iOS 10, iOS 9, iOS 8

Method 2. Apple ID Issues

You might have to try log out of Apple ID and sign back in. Sometimes you can solve activation failed iMessage problem this way.

Step 1. Go to Settings on your handset.

Step 2. Choose Message option and find Send & Receive feature. Click on it to proceed.

Step 3. Choose Apple ID and Sign Out of your account.

Step 4. Disable iMessage app.

Step 5. You should be patient. Play with WiFi by enabling and disabling it and wait for 5-10 minutes because you enable iMessage back.

Step 6. Now you can use your Apple ID to try reactivate the program.

How to Turn Off Airplane mode on iPhone

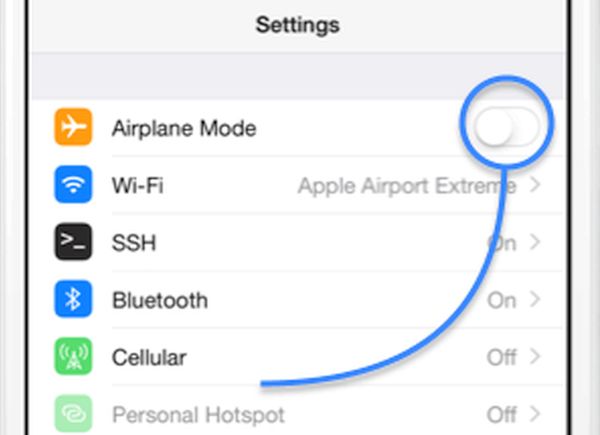
Method 3. Disable Airplane Mode

If nothing helps when your iMessage activation error occurred this fix idea could work. Also learn how to check your iPhone Activation status.

Step 1. Open Settings on iPhone 7 or 6s, 6 with iOS 10 or 9, or 8 platform.

Step 2. Go done to Messages app and disable it.

Step 3. Enable Airplane mode which disables WiFi for you.

Step 4. Now turn on WiFi connection.

Step 5. Return to Messages app and enable iMessage.

Step 6. Add your Apple ID if it hasn’t been added earlier and return to Settings menu.

Step 7. Disable Airplane mode now.

Step 8. Press on OK when you get a warning that you might be charged for SMS by mobile operator.

Step 9. Your iMessage should now activate itself.

These are main methods you can try when you see iMessage Waiting for Activation iOS 10 problem. You can also give a call to your iPhone carrier for support and explain that iMessage activation error occurred during activation. Maybe your network will ask you to update your settings through Settings – General – About section.

If this also doesn’t help to deal with iMessage Activation failed bug you can either upgrade to newer iOS version or contact Apple Support to get ideas how to solve the problem.

5 Methods to Speed Up iPhone 7 and Improve Your Performance

Would you like to improve performance on your iPhone 7 or older phone? Sometimes you just need to use a couple of tricks and your mobile device will run much faster. Of course, this is important to do on old models and still even newest 7 and 7 Plus gadgets can require some additional work if you notice that your smartphone has suddenly slowed down.

Improve iPhone Performance

The age of the gadget directly influences how it performs. Firstly, the issues can appear after you update your firmware to the newest available. Some of the features might not support your device or be not compatible with it.

Why should you run an iPhone performance test once in a while? It will tell you if anything is wrong with your productivity and whether it is time to think about the speed-up methods described below or you are good to continue using your phone the way it is now.

If you notice the you have unexpected problems with phone battery, have little storage left or notice that your apps are loading much slower then it used to be it is time to follow the nice 5 secrets and tips to magically improve your smartphone experience.

How to speed up iPhone 7

How to Improve iPhone 7 Performance

There are several tips on how to improve performance on iPhone 6, 7 and other models.

Disable App Updates

Method 1: No App Updates on iPhone

A lot of applications and games on your iOS 10 device are being updated automatically. This can however slow down your handset. Thus it is better to disable this popular feature if it causes problems and issues. So open Settings on your iDevice and choose iTunes & App Stores option where you can find Automatic Downloads – Updates menu. Just turn it off.

Reduce Motion how to guide

Method 2: Reduce Motion on iOS 10

This is the most recent firmware version introduced by Apple in September 2016. The next iOS 11 will only be released in the fall 2017. The system comes with a lot of interesting additions such as parallax affect, animation support however all these options do not support iPhone 5s and earlier devices. Turn them off through Settings on your phone. Go to General menu and select Accessibility section where you can choose Reduce Motion feature.

Method 3: Close Background Apps on iPhone

Another way to speed up your iPhone 6 or 7 is to close all the apps that are running in the background. They all can significantly slow you down. Double click on your Home button to see the full list of such programs and swipe up on each application so that it closes.

Method 4: Remove iPhone Apps that Eat Memory

There is always a number of applications that take too much space. It is best to clear such memory-eating tools through Settings – General menu. Select your Storage & iCloud Usage and go to Manage Storage. You’ll see how much space is taking by this or that app. Don’t keep the titles that take up the most space on your phone.

Turn Off Apps that Use Location

Method 5: iPhone Location Apps Limitation

There are a lot of programs that can track user’s location. Disable the ones you don’t really want to use location tracking via Settings where you can select Privacy option and go to Location Services to stop some applications from accessing this feature.

Other Methods to Speed Up your iPhone

You can also try other tips and tricks on iOS 10. For example, it is possible to reset the phone to remove memory data that you don’t really need. Just always backup your iPhone before you add any changes like it. Or you can reboot the lagging handset to help you gain some speed while loading files and apps.

How to Use Read Later On Mode on iPad and iPhone in Chrome

There are several great apps that let you read your web pages offline. You can also save your favorite page to read later on directly on iPhone or iPad. This task is as simple as sharing analytics data on your mobile device. You’ll quickly master everything and become an expert in saving amazing stories, news and blogs through Google Chrome right on your Apple device.

Save Chrome Pages to Read Offline on iDevice

iPhone Read Later Offline

There are a lot of users who prefer Chrome browser to Safari. Still you’ll be happy to learn that both browsers have a similar option to read later offline. It is called ‘Read Later’ in Chrome and is known as ‘Add to Reading List’ in Safari.

We all enjoy browsing. Sometimes you find a very interesting article you wish to read however you are busy, hurrying somewhere or cannot devote 5 minutes right here right now. You can tell yourself you’ll read it later and forget about it. If you don’t save your article for quick access later on you will most likely never get a chance to read it.

It’s incredible when you can save pages to read later on and it doesn’t matter much if you are using a mobile phone or tablet computer. Both iPhone and iPad support this feature so let’s learn what exactly you need to do to activate and use it.

P.S. Remember to check your activation lock status on iPhone 7 since this option is available at no cost.

Update Chrome App on iPhone iOS 10

How to Use Read Later On iPhone and iPad

Step 1. You can enjoy the awesome Read Later Chrome feature on iPad and iPhone. There is no need to find the Getpocket Chrome application since you can do everything using the native mobile option offered in the latest browser edition. Just make sure you have upgraded your mobile Chrome version to the most recent release.

Step 2. Open the update browser on your mobile gadget.

Step 3. Find the article or articles if you want to save several web pages to read later.

Step 4. Look at the upper right part of the display. There you’ll see Chrome menu. Click on it.

Step 5. Select the Share option on the left.

Read Later Chrome Option

Step 6. Choose ‘Read Later’ feature that replaces apps that let you read web pages later on.

Step 7. Your story is now saved.

Fans of Chrome can also install Google Voice on their ‘fruit’ gadget.

How to Read Web Pages Later on iPad or iPhone

Once you master how to save web pages to read later on iPad or your phone you should learn how exactly you can access your saved articles to enjoy them offline.

Step 1. Launch browser on iDevice. Remember that we are using Chrome.

Step 2. Click on the menu option.

Step 3. Choose Reading List which displays all the articles you didn’t read.

Step 4. Click on the story you wish to read right now.

Step 5. Read your saved page offline.

How to Remove Pages Saved to Read Later on iPhone Chrome

How to Delete Saved Stories for Offline Reading

Step 1. Launch your Chrome mobile browser.

Step 2. Choose your menu.

Step 3. Select Reading List option.

Step 4. Choose Edit from the lower right part of the screen.

Step 5. Choose an article you plan to remove.

Step 6. Click on Delete option.

Step 7. The saved page will be successfully removed from your Read Later list on iDevice.

How to Mark Saved Pages as Read or Unread in Chrome on iOS 10

Step 1. Launch Chrome browser on iOS 10 iPhone or iPad.

Step 2. Choose menu.

Step 3. Click on your Reading List.

Step 4. Click on Edit option which is located at the lower part of your screen.

Step 5. Choose Mark All feature.

Step 6. Now you have to either click on Mark (All) Read or Unread depending on how you wish to mark articles that you saved for reading offline.

Step 7. Click on Done.

You see that there is no need to download apps to read articles offline because Chrome browser has this feature built-in its latest iOS 10 updates.

How to Check Your iPhone Activation Lock Status for Free Online

A lot of us still remember the Activation Lock status web-site created and later removed by Apple. It was a quick way to get details about your iPhone Activation lock. Unfortunately those days are gone while millions of iPhone owners still have the need to check their iPhone IMEI status and wish to find another simple and fast solution.

Check iPhone Lock Status

How can you do this task? Is there a method that makes everything possible online without any additional software? We know one great free option you can use. It is an easy method you can use on-the-go. You don’t have to install any programs, tools or third-party apps on your iPhone, Mac or Windows PC. You only need active internet connection and your favorite browser.

The previous free iPhone IMEI check online service wasn’t perfect. It could be possible to hack the tool and even activate smartphones that were bricks. Some experts assure that that web page could allow hackers to even change the iPhone serial number by entering the handset’s IMEI number and successfully bypass the iCloud Activation Lock.

You can no longer use that status page however there is another loophole in the Cupertino-based company’s site which you can take advantage of and perform a simple iPhone activation lock check procedure for your personal needs.

How to Check Activation Lock on iPhone

How to Check iPhone iCloud Activation Lock Status

Keep in mind that this particular iPhone check service works only for some of us. It might not work for you because the loophole can be fixed by Apple at any moment. Give it a try and maybe you’ll successfully check your activation lock status by IMEI.

Step 1. Use any mobile web browser you like. You can do this on your iPhone or computer. It doesn’t matter which device you are using.

Step 2. Visit Apple Support page.

Step 3. You’ll get a list of gadgets where you can point to your smartphone.

Step 4. You should select any hardware category and problem. For instance, you can click on Battery, Power & Charging section and click on battery issue.

Step 5. No matter which category you choose you’ll get the choice to Send or Bring your device for repair.

Step 6. You can now type your serial number or IMEI for activation lock check. The service is free and you don’t have to complete the repair request.

Reasons to Check Activation Lock Status on iPhone

Possible iPhone IMEI Check Issues through Apple Service

There could be situations when the service works well but you see the following issue: ‘Sorry but we can’t create a repair while Find my iPhone is active.’ What does it mean? Why can’t you use the free iPhone lock status check at no cost?

This message means that you have either turned on Activation Lock or enabled Find My iPhone service on the phone. Disable these features and check your status once again.

There are many paid services that can answer the question about your Activation Lock status. It’s surely easier to find a no-cost option but if the loophole is fixed you’ll have to search for alternative methods and solutions. Right now you still have a chance to figure out your status using your iPhone IMEI code and Apple Support web page.

Such services are very useful when you are planning to buy a used phone. It’s always great to know that its IMEI is clean. In other words, it’s nice to double check that your used iPhone hasn’t been stolen or lost. Am I right?

How to Easily Share iCloud and iPhone Data via iOS 10.3 Analytics Tools

Users who are running iOS 10 are surely following all the firmware updates. Apple is improving its mobile operating system for iPhone and iPad and you can share iCloud data on iOS 10.3 which is impossible on earlier platform versions. It is also possible to share your iPhone analytics data using the same method.

Why would anyone want to share iPhone data with Apple anyway? Firstly, you might not like your gadget or program performance. This is the reason to send your iCloud analytics direction from your phone. Secondly, it’s easier for the Cupertino-based giant to track the quality of its services and apps and enhance the performance, fix bugs and improve the overall experience of ‘fruit’ users with their ‘fruit’ devices.

Analytics Data Sharing on iOS 10.3 iPhone

iOS Analytics Tools

The fun options tested in iOS 10.3 beta sound really interesting and curious. They should simplify your life since it becomes even quicker to share analytics data on iPhone and iCloud not only with Apple itself but also with application developers. The information will be secure. Besides, you can control whether the data sharing is available or not. Enable and disable it when you wish. The whole idea does look attractive, doesn’t it?

Since you already know about the new feature let’s figure out how to use it.

Share Data Analytics on iCloud or iPhone

How to Share iPhone Data with Apple

Keep in mind that this option is present only in beta version for now. As soon as Apple officially updates its firmware to version iOS 10.3 [learn more about interesting iOS 10 features] you’ll be able to apply the knowledge on-the-go and send your analytics data on iPhone to the ‘fruit’ giant or devs.

Step 1. Once you install iOS 10.3 beta now (or the official 10.3 firmware once it is released) you can open Settings.

Settings - Privacy section on iPhone

Step 2. Get down to Privacy section.

Step 3. Find Analytics section.

Step 4. Choose Analytics data feature.

Step 5. Now you will get to your Analytics data.

Step 6. If you wish to share your information with either Apple or your app developer you need to launch Settings again.

iPhone Settings - Analytics

Step 7. Select Privacy – Analytics section.

Step 8. There will be a switch for Share iPhone Analytics option. Enable it by toggling it on.

How to Share Analytics Data on iPhone with Apple or Developers

Step 9. If you need to share everything with devs choose Share With App Developers feature.

Step 10. If you need to share your iCloud Analytics you should get to Privacy – Analytics and enable Share iCloud Analytics option.

Now you know how to share iPhone data and it’s time to learn how you can improve this experience even more. You can also add some security to WhatsApp program on your smartphone.

iOS 10.3 Analytics Sharing

How to Improve your Sharing Analytics Data Feature

Step 1. Take your iPhone and go to Settings.

Step 2. Choose Privacy feature.

Step 3. Select Analytics.

Step 4. You’ll see Improve Activity option which you can enable.

Step 5. Get back to Analytics section.

Step 6. You’ll see the option called Improve Wheelchair Mode which you can enable.

This way you can share workout information and wheelchair activity with the iOS company so that it can enhance its health services.

Is it safe to share your data with devs or the iPhone maker? Of course, it should be. It won’t harm anyone. This is just a way to control possible problems, issues and bugs on iOS gadgets. When you send the analytics information about the app or service Apple and developers will be able to make their products much better. It’s a win-win and hopefully this will be useful to all of us.

How to Type Special Symbols on iPhone 7 or iOS 10 iPhone 6

It’s hard to keep in mind all the iPhone keyboard symbols. Do you also search for how to type copyright symbol each time you need to use one in a text message? Personally I do. I also search for registered and trademark symbols while it’s so much easier to use iOS 10 symbols offered by your mobile keyboard. I have just learned this awesome trick and am about to share it with you.

Let’s get into details how to type symbols on iphone without performing any extra search. You’ll enjoy how quick and fun this task is once you know some amazing iOS 10 tips and tricks I am about to share with you.

iPhone Special symbols

iPhone Special Characters

I’ll explain the idea of typing iPhone keyboard symbols much quicker than you are used to. There is a great emoji keyboard which gives you an idea how to get emojis on your iPhone 7 or iPhone 7 Plus. Still the same keyboard can be used for creating the special symbols on-the-go and this includes copyright, trademark and registered signs.

Isn’t it incredible? Only one feature brings so many advantages that you’ll enjoy working with it every day. Now your special notes will always look neat and cute while you can save your nerves and time.

You can always type any symbol with your predictive keyboard option. This is one way to complete this task. We will talk about an alternative method on how to get symbols on iPhone emoji keyboard. You can choose either way since your goal is to type the registered symbols. Are you ready to explore the possibilities?

iPhone emoji keyboard

How to Add Symbols on iPhone Emoji Keyboard

Step 1. To get iOS 10 symbols with your emoji keyboard you need to first launch any application on your smartphone.

Step 2. You should now access your iOS QuickType keyboard. You might also use it for symbol suggestions however there are some special characters that are not displayed by this option. Thus you need to continue and explore iPhone emoji keyboard features.

How to Select Emoji Keyboard on iPhone

Step 3. Click on emoji image you’ll see at the lower part of your mobile keyboard. Sometimes you see no emoji icon, this means you have to click – hold the globe button in order to choose Emoji feature.

Step 4. Once you see the emoji keyboard selected you have to do the following thing. Swipe from right to left. You’ll have to repeat this action till you get to the Symbols section.

Select emoji symbols on iPhone emoji keyboard

Step 5. Look for the symbol you need. Choose it and it will appear in your message.

If you don’t want to use the emoji symbol trick you can try working with simple QuickType feature. Sometimes this option doesn’t work, so keep this in mind just in case nothing happens.

How to Type Symbols on iPhone with QuickType Option

Step 1. Open an application on your iOS 10 iPhone 7. It can be just any program that supports QuickType. For example, launch your Messages tool.

Step 2. Access your QuickType virtual keyboard.

Step 3. Launch any conversation.

Step 4. Click on your text field.

Step 5. If you need to use trademark symbol you should type “TM”.

Step 6. If you wish to type the registered symbol you’ll have to type (R).

Step 7. If you are looking for copyright symbol you need to type (c).

Step 8. Once you type the character it will automatically turn into the symbol or your keyboard will suggest the symbol for you. In this situation you need to click on the image and it will be added to your text message.

It’s great how many wonderful features are offered by iOS 10 update [learn how to activate iPhone after you unlock it]. You can use special characters and symbols without internet connection. In other words you don’t have to search for the symbol in order to add it to your message. Just use either QuickKeyboard with predictions or Emoji Keyboard feature and you’ll love the quick results.

How to Make WhatsApp iPhone Messenger More Secure with 2 Step Verification

Not all users are happy with the default iMessage. Some users prefer working with third-party programs. If you like using WhatsApp iPhone program you might also wish to learn how you can enable the two step verification on this iPhone 7 application [learn how to set up Google Voice on your smartphone]. It’s a simple, fast and great thing to do because you can improve your account security.

What will happen exactly once you enable the two step authentication on WhatsApp? Your iPhone will ask for the passcode each time you decide to use your WhatsApp account on a different gadget with your phone number. In other words, people who don’t know your password and associated iPhone number will not be able to access and use your account. Would you like to implement this idea into life?

WhatsApp Tips for iPhone 7

WhatsApp iPhone Tips

Once you decide to download WhatsApp for iOS 10 device you’ll definitely have to learn how you can turn on the security feature and protect your account. Similar protection is used by many other services and apps. For example, ‘fruit’ fans like the two step verification system for their Apple ID on both iDevices and Mac computers. It is also possible to use the 2-step authentication for your Gmail account.

Anytime you enable such protection you’ll have to provide your passcode (it usually consists of 6 digits) which you create on your own. Most programs that support the 2 step verification feature do not generate the code to verify your personality. In other words, you are the one who makes up this code and uses it for future authentication. You can also easily turn words into emojis while typing.

How to turn on two step authentication on WhatsApp iOS 10

How to Enable WhatsApp iPhone Two Step Authentication Option

Step 1. Open WhatsApp once you download and install this iOS 10 application for iPhone 7.

Step 2. Go to Settings. You should see this section at the lower right part of your screen.

Step 3. Click on your Account.

Settings for WhatsApp on iPhone

Step 4. Choose the Two-Step Verification menu.

2 step verification option for WhatsApp iPhone 7

Step 5. You need to Enable it.

Step 6. Create a 6 digit passcode that will be used to protect your account. Think about the code you’ll remember.

Enter passcode for two step verification on WhatsApp

Step 7. Enter the same code to confirm it.

Step 8. Sometimes you might forget the password that is why it’s nice if you can also add your email address to the same account. It will be used to reset the passcode if you ever decide to do so. You can also skin this step if you don’t want to tie the email to your WhatsApp account. Keep in mind that you do not protect the account with an email you won’t be able to reverify the account for 7 days once you can’t remember your password. You’ll use your phone number after a week passes by however any pending messages you’ll receive during this week will be permanently deleted.

Step 9. Confirm the email in case you entered it and click on Done option.

Step 10. Use your passcode to verify your account and use WhatsApp just as you ordinary do.

Turn off two step verification on iPhone 7 WhatsApp

How to Turn Off Two Step Verification for WhatsApp on iPhone

We want to also share some WhatsApp tricks for iPhone 2017 users who wish to disable the verification in two steps:

Step 1. Launch WhatsApp application.

Step 2. Choose Settings.

Step 3. Go to your Account.

Step 4. Select the Two-Step Verification menu.

Step 5. Disable the service.

Step 6. Confirm your decision by clicking on Disable once again. Now you won’t have to enter the passcode when you wish to register your phone number with this application on a new device or decide to factory unlock your AT&T iPhone model.

If you cannot reverify your WhatsApp for iPhone 7 30 days after you forget your passcode you’ll have to use a new account. The program will delete your old account and make up a new one for you.

How to Set Up Google Voice on iPhone 7 or iPad

iOS 10 update has improved Apple features on iPhone and iPad still there are users who are big fans of Google and would like to install Google Voice on iPhone 7. Is it possible? How much does Google Voice cost on iDevices? How does it work? Let’s answer these questions and learn how to set up the service on your ‘fruit’ smartphones or tablets.

It’s not difficult to go through Google Voice sign up procedure because everything can be done from within the iOS 10 application. By the way, it is simple to check your iPhone data usage with WiFi Assist enabled. All you need to do is download, install and set up your program.

Google Voice Setup Guide

Short Google Voice Review

This app is VoIP program that makes it possible to place calls, send text messages and leave voicemail. Google Voice is similar to many voice-over-internet-protocol tools. It boast a simple design and easy-to-understand options.

When you first follow the link for Google Voice download and install this application on your iOS 10 iPhone or iPad you’ll have to sign up for a new account. There are a couple of things you must know about this program. Firstly, GV is available in the U.S. only. Secondly, its rates for international calls are believed to be cheap compared to other VoIP-tools.

AT&T iPhone users can reduce their data usage per month.

Set Up Google Voice iPhone

How to Setup Google Voice on iPhone 7

Step 1. Download and install Google Voice app on your iPhone 6, 7 or other model.

Step 2. Launch the application and follow our iOS 10 tips.

Step 3. Do you see Google Voice sign in feature at the bottom of the tool? Click on it.

Google Voice Sign In

Step 4. Use your Gmail account to sign in. If you don’t have one you should create an account.

Step 5. You can now read the Terms and Conditions and accept them to continue.

Step 6. Your Google Voice iPhone 6 or iPhone 7 tool will allow you choosing your voice number. Just click on Search – enter your city – and decide which number you wish to use. Press on ‘Select’ next to it.

Link Google Voice How to Guide

Step 7. Your new voice number has to be linked to your account. So click on Next to proceed.

Step 8. Enter your phone number. How does Google Voice work? The program will send your texts and guide phone calls to your phone number. Your account has to be verified. Just enter the code you’ll receive now.

Step 9. You have set up your account.

Google Voice on iPhone 7

How to Use Google Voice on iPhone

Google Voice on iPhone has 4 tabs you can use. They are located at the app’s bottom. You should click on the chat bubble and then on the plus to send your message. When you wish to call someone you have to click on telephone icon and then on the ‘plus’ and then you’ll be able to select a contact. The voicemail option can be accessed through voicemail icon. It is also possible to send your calls to voicemail when you cannot answer the call.

Is Google Voice Free?

You can download the iOS 10 Google Voice program for free however you’ll have to pay for calls and text messages. The rates vary by country. You can always lookup the rates before placing a phone call. Just enter the phone number and select ‘Find rate.’

You can easily check your credit balance right on your handset:

Step 1. Launch the app on iDevice.

Step 2. Click on Menu.

Step 3. Your balance will be shown next to Credit menu.

Google Voice Credit Menu

Step 3. To add money to your balance you should go to More menu from the Google Voice app.

Step 4. Choose Settings and select Payments.

Step 5. Press on Add Credit option and choose Add credit under Calling credit option.

Step 6. Pay with Google account and you’ll have money added to your GV.

By the way, you can always know that you are calling via Google Voice because the program always lets you know when your call is not free. If you are connected to AT&T network you can also SIM unlock iPhone 7 AT&T and start using different SIM cards with ease.

The updated Google Voice iPhone 7 app is simple to use. Just control how much money you spend on your calls.

How to Check Your iPhone 7 WiFi Assist Data Usage on iOS 10

Learn how to check data usage on iPhone 7. It is easy and must-do when you have no idea how much data is consumed by your WiFi Assist. This feature was introduced by Apple to let you never lose connection when WiFi is poor or lost. Your smartphone can automatically switch to cellular data and your AT&T iPhone bill can quickly grow. This is one of the reasons why you should control WiFi Assist iOS 10 feature once in a while.

iPhone data consumption can get ridiculous with WiFi Assist being turned on. A lot of users prefer turning it off just in case but you might still take advantage of this option if you need to browse web and experience no problems or are waiting for an important phone call and can’t miss it because of poor WiFi.

iOS 10 Wi-Fi Assist Feature iPhone 7

How to Turn Off WiFi Assist on iOS 10

Step 1. Launch Settings on your mobile device.

Step 2. Choose Cellular menu.

Step 3. Get down till you see WiFi Assist. Disable the switch next to it.

You can find a lot of guides on how to reduce data usage on iPhone 7 AT&T model or handsets locked to different carriers. Below we’ll explain how you can check WiFi Assists iOS 10 data consumption to control your bill.

You can also fix iOS 10 battery problems with battery widget missing on iPhone lock screen after firmware update.

Check Cellular data Usage iOS 10

How to Check Your Data Usage on iPhone 7 with WiFi Assistant

Step 1. Go to Settings on the AT&T iPhone 7.

Step 2. Choose Cellular or Mobile Data option.

Step 3. Look for WiFi Assist option (you’ll have to scroll down).

Step 4. Now you can see how much data you have consumed via WiFi Assist.

iPhone WiFi Assist Data Usage Settings for Statistics

It is easier to check your monthly data consumption by resetting your statistics. Here is what you should do:

Step 1. Launch Settings application on your smartphone.

Step 2. Click on Cellular or Mobile Data section.

How to Reset Wi-Fi Assist Statistics

Step 3. You’ll find Reset Statistics option at the bottom of the screen.

By the way, this section also show the last time you applied changes.

Step 4. Click on Reset Statistics and confirm your decision.

You can see how simple iPhone data usage check instructions are. Follow them once in a while and you’ll take care of your bill and avoid possible extra charges.

By the way, you can easily reduce your cellular data usage after you upate to iOS 10 or newer iOS 10.2. There are some useful tips that can make it possible. It is surely nice when you can avoid any unusual and unexpected data overuse.

Reduce Cellular Data Usage on iOS 10 iPhone 7

How to Reduce iPhone Data Consumption

Tip #1: Disable Cellular Data

Sometimes you don’t really need your mobile data at the moment. It is easy to let only some applications use cellular data and turn it off when it is not in use.

Step 1. Go to Settings on your iPhone.

Step 2. Choose Cellular option.

Step 3. Turn off the switches next to iOS 10 apps that should not consume your mobile data.

How to Disable Background App Refresh iOS 10

Tip #2: No Background Application Refresh

By the way, this same method can also save you some battery life.

Step 1. Launch Settings and choose General section on the handset.

Step 2. Choose Background App Refresh feature.

Step 3. Disable the option.

Tip #3: Use iPhone Data Usage App

Control your data consumption. Use the method described above or find data usage program that will help you keep an eye on how much money you spend monthly on your mobile data.

Disable Auto-Downloads Updates iOS 10

Tip #4: No Auto-Downloads

Save mobile data by turning off your automatic downloads and updates.

Step 1. Launch Settings program on iPhone AT&T.

Step 2. Choose iTunes & App Store section.

Step 3. Disable Use Cellular Data option.

Step 4. Now get back to Settings and choose iCloud.

Step 5. Click on iCloud Drive and disable Use Cellular Data option here.

Disable Cellular Data for Apple Music

Tip #5: No Cellular Data for Apple Music App

Step 1. Go to Settings and select Music section.

Step 2. Click on Cellular Data menu.

Step 4. Disable Cellular Data.

Hopefully these iOS 10 tips will help you save some mobile data.

How to Fix iOS 10 Issues with Battery Widget Missing on iPhone 7

Is your battery widget missing? It often happens to iPhone 7 / 7 Plus users after iOS 10 upgrade to newer version (iOS 10.1 or 10.2). It can also occur on previous smartphone models that come across iOS 10 problems. Is it possible to bring the widget back? How can you fix the bug and find your battery on iPhone lock screen?

There are iOS 10 tricks [for example, you can turn words into emojis] you can follow to fix iOS 10 issues that are experienced by many users. It’s one of the common problems you can face. Luckily, there is simple fix you should keep in mind. It can save you time and nerves since you can get your battery widget back as quickly as possible.

iOS 10 Battery Widget Missing Bug

iOS 10 Bugs

Different things can happen to your new or older iPhone model. It’s not a secret that all mobile operating systems are buggy. Some issues can be fixed by users and some can be only solved by the company. When you suddenly notice no battery widget on your iDevice you can bring it back.

You can surely try to turn this widget on (in case you have disabled it) however this doesn’t mean that your widget will appear on the Lock screen. Even being enabled doesn’t promise it will be shown up.

Batteries Widget iPhone

iOS 10 Battery Widget

Why would you need to see the iOS 10 battery widget on the lock screen? This option makes it easier to check some statuses. For example, you can take a look as know how your AirPods are charging. So if you wish to enjoy this feature just return your widget back and solve the problem.

iPhone Battery Widget Not Showing Fix

Step 1. You should do the following thing while your screen is locked. Just swipe from left to right on the iPhone display.

Step 2. You should scroll down. There will be ‘Edit’ option you need to tap.

Step 3. Click on the red button. You’ll see it next to battery widget.

Remove Batteries Widget iOS 10

Step 4. You should press on ‘Remove’ option.

P.S. Some users haven’t turned on this widget and thus they will only see the plus “+” instead of a read button. So click on this Plus under More Widgets feature.

Step 5. Now click on ‘Done’ option that is located at the upper right part of the screen.

Step 6. To fix your battery widget missing problem you should now repeat the same guide until you get to the ‘+’ option near iOS 10 battery widget.

Step 7. You should click-hold the rearrange widget button which should be dragged to the top. Now you need to press on ‘Done’ option.

Step 8. You should now make sure you have turned on Battery Percentage after iOS 10 upgrade. So open Settings on your iPhone and choose Battery option where you can click on Battery Percentage. Double check that it is enabled.

Step 9. Reboot the iDevice. This is must do. If you have the iPhone 7 or iPhone 7 Plus which are the most recent Apple phone releases you have to click – hold that On / Off and volume buttons at the same time. For older models you should click – hold your Power and Home buttons at once and count till ten.

Step 10. Your iPhone will restart. Stay patient.

Step 11. Now you can unlock iPhone 7.

Step 12. Go to your Lock screen mode.

Step 13. The battery widget should be available again.

Sometimes the simple trick described above doesn’t help you return your missing widget. You can try to reset your iOS 10 iPhone as this might solve the bug. You can do this pretty quickly:

Reset All Settings iPhone

Step 1. Launch Settings.

Step 2. Select General menu.

Step 3. Click on Reset option.

Step 4. Press on Reset All Settings.

Step 5. Confirm your decision.

Step 6. The problem should be fixed.