Simpe Way to Set Up New MacBook Pro 2016 Model

New Apple customers who just purchased the most recent device might wonder how to set up MacBook Pro painlessly. This is not something you have to repeat once in a while thus ‘setup’ instructions are popular and must-have when you get a new smartphone (for example iPhone 7 running iOS 10 version), tablet or computer.

There is a simple instruction you can follow to avoid any possible MacBook Pro setup problems. We’ll share the guide below so that you can enjoy the amazing design and incredible new features instead of searching for the best MacBook setup assistant online.

Apple presented its latest device for 2016 with cool Touch Bar option. These are amazing changes that are already loved by many users from all over the world even though this is a brand new gadget. You shoud also learn how to get a refund from iTunes on your new Mac.

How to Set Up Apple MacBook Pro 2016

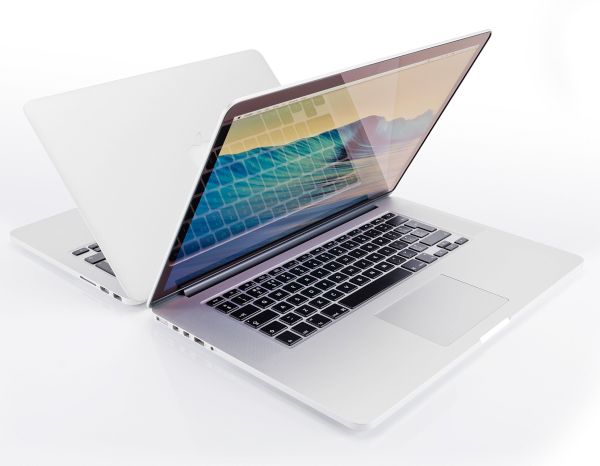
How to Set Up MacBook Pro Retina 2016 Model

Step 1. Open your new MacBook Pro 2016. This way your device will automatically turn on. Tip: when you wish to turn off MBP you should press on Touch ID button that is placed near the Touch Bar.

Step 2. Let’s continue setting up a new MacBook Pro by choosing the language. Now press Continue option.

Step 3. Select the keyboard layout you like and choose to Continue again.

MacBook pro 2016 Setup How to Instruction

Step 4. Choose your WiFi network and provide its password before you can proceed. Users who are using Ethernet connection should go wih Other network Options – Ethernet.

Step 5. MacBook setup assistant will suggest you want to set it up as a new computer. If this is what you wish to do you should choose Don’t transfer any information now and proceed. Still it is always possible to move your data from old computer to the new device [if you are a fan of Apple smartphones you should learn what the difference is between iPhone 7 and iPhone 7 Plus].

Step 6. You’ll see the box Enable Location Services on this Mac. You should check it.

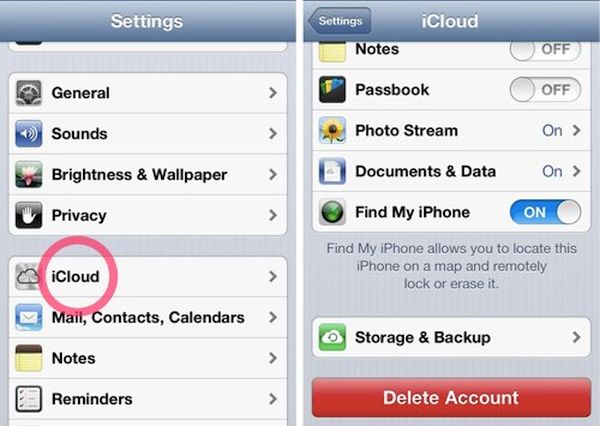
Step 7. Now you’ll be asked to sing in using your Apple ID and password. It’s best to use the same ID for all your iDevices in order to sync data, files and services. Also, if you use this method your full name will appear as your Mac and Account name.

Step 8. You’ll see Terms and Conditions that you have to Agree to in order to continue.

Step 9. You need to register Touch ID to protect the device from being accessed by third-party people. If you have problems with remembering your passwords you are highly advised to check the option ‘Allow my Apple ID to reset this password’ just in case you ever forget it.

Step 10. It’s good to check the option for setting time zone based on your current location if you enable Location Services.

Step 11. Our simple MacBook Pro setup guide goes on and you need to check the option ‘Turn on FileVault disk encryption’ that is responsible for encrypting your computer’s hard drive information. It is important to secure your contents and this is one of the ways.

Step 12. There are several more things you need to complete. Just check the box for ‘Allow my iCloud account to unlock my disk’ and a couple of more things.

Step 13. Make sure you allow Store files from Documents and Desktop in iCloud as this MacBook Pro setup feature is very useful. It is a wonderful option for optimizing your storage on macOS Sierra platform. Still you have to think twice before you use it because it requires enough iCloud storage space to fit your Documents and Desktop folders. If you have so much space, choose it.

Step 14. You need to turn on Siri on your computer. Do this by checking the window for ‘Enable Siri’ feature.

Step 15. You have successfully set up your MBP. Now just wait a bit as the process should complete pretty soon.

Apple MacBook Pro 2016 Setup Guide

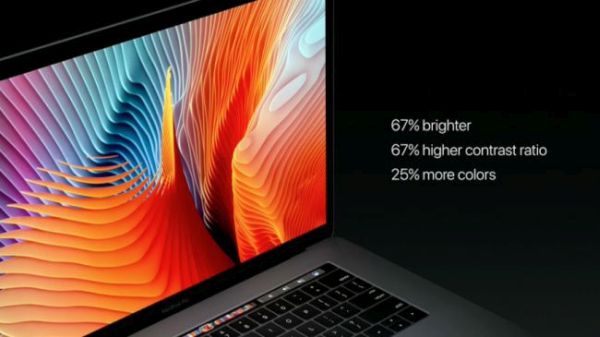
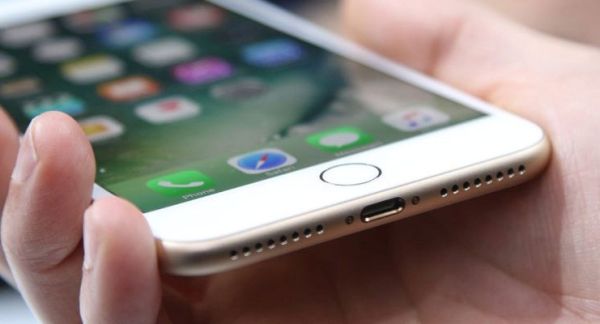
New MacBook Pro release date was October 27. This device is sold in two colors: Space Gray and amazing Silver. You can find it with a 13-inch and 15-inch screen along with Touch Bar option that replaces older function keys. The prices start at $1,499. This could be an interesting gift for the upcoming holidays. Even if you don’t own this computer yet you might want to keep the instructions on how to set up MBP 2016 in case you are planning to purchase this new Apple computer or iPhone 7 [don’t forget about amazing iPhone IMEI checker services that are must-use before you decide to SIM unlock your handset].

How to Fix iOS 10 Features Not Working: Get Bubble Effects Back

Do you enjoy iOS 10 features? Some users liked everything Apple offered this fall however those who updated to iOS 10.1 version notice some difference. Right after this iOS 10 download their iMessage stops sending cute messages with bubble effects. This takes place on both iPhone 7, 7 Plus, other iPhones and iPad devices.

Are you unhappy with iOS 10 update because of this problem? You can fix bubble effect and enjoy it again on your iDevice. There are some simple tips and tricks you can follow. No one guarantees that your issue will be solved right away but you risk nothing to try. Hopefully your iOS 10 problems with iMessage will be gone as soon as possible.

iOS 10 Bubble Effects in Messages iPhone App

It is nice when you can text your relatives and friends with messages that have the bubble effect, isn’t it? Of course, you can always go with the WhatsApp instead and a lot of ‘fruit’ fans prefer this program over the default iMessage. Still the latest operating system has improved iMessaging so much that you could find it even fantastic.

By the way, all Verizon iPhone owners can learn how to restrict their data usage and save some money on monthly bills. This is pretty simple and can be handy in times for the holidays season.

How to Fix iMessage Effects Not Working

Sometimes bubble effect doesn’t let you enjoy all the magnificent iOS 10 features as it stops working. It could be related to the Reduce Motion option. If you enable this particular spec it automatically decreases the parallax effect of different icons. In other words, it directly influences bubble effect and this is why you face issues.

Step 1. Open Settings on your iPhone 7 or other handset / tablet model to enjoy iOS 10 options including the updated iPhone Health app.

Step 2. Choose General menu to proceed.

Step 3. Select Accessibility option.

Reduce Motion iOS 10 Guide

Step 4. If iOS 10 iMessage effects not working for you you need to click on Reduce Motion.

Step 5. Now disable this feature by simply toggling it off.

Step 6. You need to also disable Auto-Play Message Effects.

Step 7. To let the changes take the effect you need to reboot the gadget. This can be done by pressing both Volume down and Sleep / Wake buttons at ones if you have iPhone 7 model or Home button + On / Off buttons on older versions.

Step 8. Now when the phone is back on you should enable Auto-Play Message Effects again.

Step 9. Now create your new text message and enjoy the awesome bubble effect as it should start working.

Don’t worry if iOS 10 problems with iMessage ‘bubbles’ continue. It means you should try a different method and we’ll talk about it below. Keep in mind that the latest version of ‘10’ firmware makes it possible to enjoy message extras while also using Reduce Motion feature. Mac users can also learn how to get a refund from iTunes store.

How to Fix iOS 10 Bubble Effects

What to Do If iMessage Screen Effects Not Working

There is a second trip that could fix iOS 10 bubble effects not working issue on the ‘fruit’ gadget. It’s simple and it deletes nothing on your phone. Still it can help you out.

Step 1. To enjoy all the iOS 10 message features you should reset your settings. This could ‘restart’ the options and make them perfect again.

Step 2. Launch Settings as this is the place where all the changes happen.

Step 3. Go to General menu.

Step 4. Find Reset section.

Step 5. Click on Reset All Settings feature.

Step 6. Sometimes you should enter your passcode before you can use Reset All Settings option. So confirm that you wish to reset the settings and enjoy the bubble effect.

Bubble Effects Fix iMessage iOS 10 Problems

Is it worth to download iOS 10 and update to this latest platform or not? iPhone owners should be glad to enjoy the impressive features such as new Emojis, Digital touch update, Markup feature and various superb extras that make it so much cooler to own the Apple device.

Texting with animations is cool but if something stops working you become frustrated. In case the two methods described above don’t help you to solve the issue you can either downgrade iOS 10.1 to iOS 10 or wait until Apple presents the new official iOS 10.2 firmware version. It’s up to you what to do but we all believe that everything will be all right and your cute bubbles will appear on screen when you send your text messages via iMessage program.

How to Solve Haptic Feedback iPhone 7 Not Working Problem

Is haptic feedback not working on your iPhone 7 or iPhone 7 Plus model? This could be a rather unpleasant issue for those who took their chance to upgrade their Apple phone this year. The company released the new generation iPhone 7 with improved battery, camera, bigger storage capacity [same iPhone 6 and 6s design though] and other interesting specs that make users willing to purchase it. Still experiencing iPhone 7 problems is not great.

Are you ready to fix iPhone 7 issues with the haptic touch [learn how you can reduce your iPhone data usage with any carrier]? It’s not that difficult to do if you follow the guide below. We’ll make sure to explain all the details and make the walkthrough as ease as possible.

iPhone 7 Haptic Feedback Not Working

Haptic Meaning

What does Haptic Feedback mean for iPhone users? Actually the word ‘haptic’ means the sense of touch. It is relating to devices and various objects that have the sense of touch and it can be explained as ‘manipulation’ or ‘perception’ of such gadgets. Modern technology helps creating various haptic feedback devices that offer amazing virtual world to users but at the same time brings the real source of force illusion and impression of substance within.

A lot of Apple fans are happy with their magical iPhone haptic touch feature. Other companies also produce similar smartphones and thus haptic feedback gadgets are not surprising any more. By the way, if your older iPhone 6 restarts unexpectedly you might want to upgrade it to the 7th model.

How to Fix Haptic Feedback iPhone 7 Problem

If Haptic Feedback Not Working

Sometimes even the new handset models can have unexpected issues. Haptic feedback iPhone 7 bug could be one of the problems you need to deal with. If it stops working you will not feel any vibratory feedback while using your device. Luckily you might be able to bring it back to live to enjoy the cool iPhone 7 features at fullest.

Both new ‘7’ handsets boast System Haptics option [here is how you can set up your iPhone 7]. When this feature is turned on you feel the vibratory feedback every time you toggle switches on and off for various applications, both stock and third-party programs. It works within Settings, browser and other tools.

How to Fix Haptic Feedback:

Step 1. Let’s go to Settings on you phone.

Step 2. Choose Sounds & Haptics menu.

iOS 10 Settings System Haptics

Step 3. Find the System Haptics section and disable it.

Step 4. Now you should reboot iPhone 7 by pressing on sleep / wake button along with volume down button, count till 10 and you will see the ‘fruit’ logo on the display. This is how the latest gen device reboots.

Step 5. Now with the phone back on you should toggle on the System Haptics.

Step 6. Is the feature working again?

How to Reset Network Settings iOS 10

If haptic feedback problems are not gone yet you can try a different method. Maybe it will be a better solution for you. Here is what you can try:

Step 1. Go to Settings and choose General menu.

Step 2. Click on Reset. You’ll have to reset iPhone to factory settings which will not remove your personal data or various files.

Step 3. Press on Reset All Settings. If you are asked to enter your passcode, do so and confirm your decision.

iOS 10 Settings iCloud Find My iPhone

Has haptic feedback stopped working and doesn’t come alive after both methods? Ok, there is another solution. Here is how to fix iPhone 7 issues [just remember to backup your iDevice before you continue]:

Step 1. Launch Settings once again.

Step 2. Go to iCloud section.

Step 3. Choose Find My iPhone and disable this feature.

Step 4. Now connect the handset to your computer.

Step 5. Open iTunes desktop program and choose the iPhone.

Step 6. You’ll need to Restore iPhone as new.

Hopefully your haptic feedback iPhone 7 feature is working again. If not, you can also try to update to the most recent iOS 10.x release. Sometimes older firmware versions [all new iPhone 7 and 7 Plus versions arrive with the original iOS 10 that has been updated by Apple since handset release] get prolems, bugs and issues that are fixed with newer upgrades.

There are a lot of interesting iOS 10 tips and tricks that can make your iPhone experience better. There are also many options to explore as this version of operating system has been significantly enhanced if compared to last year’s iOS 9. You can easily SIM unlock iPhone 7 from your carrier or third-party companies.

The iPhone 7 lineup isn’t a major upgrade as its design is so similar to iPhone 6 and iPhone 6s. Still users are happy to get dual-camera lens, 256GB of storage, better battery and other improvements.

Learn to Edit Photos on iPhone 7: Explore iOS 10 Features & Portrait Mode

There are so many iPhone 7 features that you can keep exploring them forever. This time we want to pay attention to portrait mode on newest iPhone 7 Plus, 7 and other models as well as your tablet that is updated to iOS 10 firmware version. Using the nice extra options you can always capture better photos and even use amazing blur effects to even improve them more.

Let’s learn how to edit photos on iPad or your smartphone and explore the possibilities you can enjoy on both new and older phones. A lot of users are willing to upgrade to iPhone 7 Plus because of the new dual-camera system it brings. Many customers are also amazed by 256GB storage space Apple finally offers to users. Previous models could only boast the 128GB storage at maximum so doubling that number was a good decision taken by the Cupertino-based company in 2016.

How to Unlock iPhone iOS 10 Portrait Mode

How to Unlock iPhone Portrait Mode on iOS 10

Before you can enjoy the amazing iPhone 7 Portrait Mode you should install iOS 10.1 as this is the most recent operating system version for iDevices that was presented in the end of October. The new iPhone 7s feature is amazing and it’s nice that the newly released Portrait Mode option works on iPhone 6s, 6 Plus, iPad and other gadgets.

If you are planning to get more from iOS 10.1 update you can look at FabFocus camera program that is sold at $1.99 on the App Store.

Step 1. Download and install the tool FabFocus to enjoy the Portrait Mode and increase the number of iPhone 7 Plus specs.

Step 2. With the installed application you can open it.

Step 3. You should let the program access to iPhone Camera and Photos to enjoy all the features of the updated mobile firmware.

Step 4. Now you should create a photograph. Just click on your shutter button which is located at the lower center part. Users who prefer taking selfie should click on the front camera icon and then tap on the shutter button when you have taken your best pose.

Start Option in Portrait Mode iOS 10 Features

Step 5. Since we wish to blur our background you need to click on the Start which you’ll see in the lower center part of the app. If there is no face or the application cannot find it you will be able to manually apply blur effect to where you wish.

How to Use Portrait Mode iPhone 7 Guide: Photo Editing

Step 1. Take an image with your iPhone 7 camera to enjoy the following features.

How to Edit Pictures in Portrait Mode on iOS 10

Step 2. Click on Edit and choose the area using the brush tool. This aread will be highlighted once you drag the brush over the image.

Users are able to paint the parts of the photo on their own via Paint option which can be found at the bottom [it’s a paint button]. The size of the brush can be changed by dragging the top button to the left or right [this way you can decrease or increase it]. Now grad the tool over what you painted and this area will be selected.

Increase Size of the Brush iOS 10 Portrait Mode

If you plan to erase the part of the image you need to highlight it and click the Eraser option. Make sure you also tap on tick mark.

Step 3. Extra features are located under the ‘arrow’ at the lower left corner of the screen. Here you can control the ‘blur’ shape and adjust its intensity. Press on the same arrow to get back to the normal screen and continue editing the image.

Step 4. Save the changes via tick mark. Do this once you like how you edited the photograph with the blur effect.

The iOS 10 features add more options to iPhone 7s as some users refer to real iPhone 7 Plus specs. The great new camera allows taking beautiful pictures. Using the Portrait Mode is your key to incredible DSLR-style blurry photographs.

Extra Settings for Portrait Mode iOS 10 Features

iPhone 7 portrait mode also lets users add some ‘blur’ to their current images. This also works on other handset models.

Step 1. Launch FabFocus which you downloaded earlier.

Step 2. Click on albums and choose the image that needs ‘blur’ effect.

Step 3. Add this effect manually by editing the image.

Step 4. Once you are done, save the changes through tick mark.

Share iOS 10 Photos Portrait Mode

The cool portrait mode iPhone 7 Plus feature offered by the application can be shared with your friends. There is ‘Share’ option you can use to post it on Facebook, save to camera roll or attach to the email.
This is an interesting iOS 10 option that becomes richer when you use an additional application to enhance its power.

WhatsApp Emoji Tricks: Enjoy Texting on iPhone and Apple Watch

There are so many great emojis for WhatsApp and texting on both iPhone and your Apple Watch. Are you ready for some curious iOS 10 tips and tricks to make your holiday messages pretties and much funner? We’ll share some guides with you to help you take full advantage of iPhone emoji keyboard and improve your wearable texting experience.

The updated WhatsApp iPhone iOS 10 version allows you sending text messages with emojis, draw on your videos and photographs. It’s amazing especially when your emojis Apple Watch feature cool additional options for you to enjoy. Let’s see how to get emojis on iPhone 7, 7 Plus or any other model.

WhatsApp Emoji iPhone iOS 10 Guide

How to Add Emoji to WhatsApp on iPhone

We hope you’ll find this instruction handy and easy-to-follow. The simple WhatsApp emoji tricks are perfect for your SMS messages.

Step 1. Open WhatsApp on the iOS 10 iPhone 7 or other model that is updated to this firmware version.

Step 2. Choose who you wish to chat with.

Step 3. Click on Plus ‘+’ where you can select an image.

Step 4. You can use WhatsApp iPhone emoji via top menu where you are able to add smiley faces or other emojis. There are iPhone emoji meanings you can learn more about if you wish to. It’s always nice to know what the picture means.

iOS 10 Emojis List iPhone

Step 5. Once you click on the Smiley icon you will see the list of available emojis. Choose the one you like and drag it where you would it to be placed.

Step 6. Now you can add text via Text menu or send the message as it is. Just click on the Send option.

How to Draw on iPhone iOS 10 Emoji

Emojis for WhatsApp and Texting: Draw on Videos or Photographs

Now as you have learned how to easily add emoji to WhatsApp let’s start with more complicated steps [learn about factory SIM unlock service that can make your iPhone never-locked forever]. It is possible to share pretty images and videos if you draw on the. Here is how to do this:

Step 1. In order to scribble on the images or videos you want to share with your friends you should go to WhatsApp on the handset and choose who you wish to send the message to.

Step 2. There is no need to search for iPhone emojis copy and paste links as you need to click on the ‘+’ and choose one of the options from the bottom menu you’ll see. It can be ‘Share Contact’, ‘Take Photo or Video’, ‘Share Document’, ‘Photo/Video Library’ etc.

iOS 10 Emoji WhatsApp Guide iPhone

Step 3. For example, let’s go with Photo/Video Library where you should tap on the video file or your image before you can share it.

Step 4. From the top menu you can choose what you want to do with the photo: rotate it, add emoji, adjust the size etc.

Step 5. If you select emoji via Smiley icon and drag it to any place. You can also add Text, color it the way you like, and drag it to the desired place.

Step 6. You can click on the Pencil [upper right part of the screen] in order to draw something on the photo or video.

Step 7. Remember to click on ‘Send’ to send the text message to your friends.

You can easily enjoy Apple emojis copy and paste option and it is definitely cool to create funny images and video files. Use WhatsApp iPhone iOS 10 emoji tips and tricks and also explore all the possibilities of your wearable gadget.

Apple Watch Emoji How to Use

Emojis Apple Watch Instruction

If you are not a big fan of iPhone emoji keyboard you can also send emojis using your wearable device. While WhatsApp emoji tricks are perfect for smartphone owners, the Apple Watch users can use animated emoji images via Messages application.

Here is how you can make animated emojis live if you are running watchOS 3:

Step 1. Open Message program on the iWatch.

Apple Watch How to Add Emoji

Step 2. Go to conversation – Create Message or just Force Touch the screen so that you can start a new message.

Step 3. Click on smiley face and once you see emojis you should swipe to the left until you see characters and choose the emoji you like.

Step 4. Press Done – Send and your message will be sent.

It is also possible to use standard emoji image via Messages – Conversation – Emoji and located the icon using the Digital Crown. Besides, you can always limit your Verizon data usage on iPhone which is simple and pretty quick to achieve.

Verizon iPhone Users Can Limit or Restrict Their Data Usage

Apple users who are using Verizon as their carrier should know how to limit dat usage on iPhone Verizon. It’s also important to know how to restrict cellular data on iOS 10 which can only be handy and useful.

What is cellular data? Let’s put it in simple words. When your cellular connection is on your network provider allows receiving and sending text messages, making phone calls and viewing the 3G / LTE icon in your iOS 10 iPhone status bar. Once you turn off your cellular data this icon will disappear and you will only be able to get and send SMS messages via Wi-Fi connection. All the phone calls would also be only possible via web-apps and working Wi-Fi.

iPhone Verizon Cellular Data Info

How to Restrict Cellular Data iOS 10 Guide

This is pretty simple. It doesn’t matter if you have iPhone 7, iPhone 7 Plus or other ‘fruit’ gadget you can set up iPhone cellular data restrictions through Settings:

Step 1. So open Settings and choose General menu.

Step 2. Go to Restrictions and go to Cellular Data Use.

Step 3. Disable Don’t Allow Changes if this option is still on.

Step 4. Choose Settings again and select Cellular section.

Step 5. Disable Cellular Data and after a moment or two enable Cellular Data.

Step 6. Now it’s time to Reset Network Settings which can be completed through Settings – General section – Reset.

iPhone 7 Verizon SIM Factory Unlock

How to Set Data Limit on Verizon Family Base

Firstly, your account shouldn’t be prepaid in order to use this option. Secondly, you need a computer, internet connection and web browser. Thirdly, you should use your My Verizon ID [although the phone number could also work if it has access privilege].

Here is how to limit data usage Verizon using your PC or Mac:

Step 1. Once you sing in to your account you need to go to My Verizon and choose My Plan & Services.

Step 2. Select Manage FamilyBase and choose Controls. You need to tap on Usage Limits to continue.

Step 3. Tab on Data which you will find under Set limits and view usage.

Step 4. Once you locate your mobile number you should proceed by tapping on the right arrow.

Step 5. The minimum data usage limit for FamilyBase More Everything option is 500 MB. This is the reason why plans with less data become restricted. So choose Stop all data usage.

Step 6. Now you should enter the limit you wish to use.

Unfortunately not all Verizon FamilyBase accounts can limit their data usage. You can find more information on the official Verizon site.

iOS 10 iPhone Features

iOS 10 Features: How to Restrict iPhone Cellular Data with Restrictions

Now as you have learned how to limit data usage on iPhone Verizon [find out if your iPhone is locked or unlocked] it’s time to deal with newest iOS 10 firmware version.

Sometimes this guide can help you with iPhone cellular data restrictions not working issue. There are also situations when users wish no one to mess with their Cellular data on iOS 10 platform and luckily you can set up your own restrictions. Yes, the awesome iOS 10 feature called Restrictions allow you deciding what parts of the system and apps you don’t want anyone to access on your behalf.

iPhone Data Restrictions iOS 10

Data Restriction Instruction for iPhone 7, iPhone 6s

Step 1. Go to Settings on iPhone 7 that is running iOS 10 as this is the tool where you start your changes.

Step 2. Select General – Restrictions.

Step 3. Provide your Restrictions passcode and choose Mobile / Cellular Data under Allow Changes.

Step 4. There are two options: Allow and Don’t Allow Changes. You need to select the second one with the ‘don’t’ part.

Step 5. Now you can see three more features: Volume Limit, Accounts and Background App Refresh. It’s up to you if you wish to restrict them as well or not.

It’s great that you can reduce your iPhone data usage as well as restrict mobile data usage as well. It should improve your experience with Verizon or any other U.S. network you are locked to. Still remember that distant factory IMEI unlocking service can make you carrier free at an affordable price and pretty fast. This is something a lot of locked users eventually do in order to connect to any carrier at any time and switch between different networks with ease.

By the way if you wish to set your data allowance for Verizon, here is how to do this:

Step 1. Go to My Verizon app and select My Plan & Services.

Step 2. Go to Family Safeguards & Controls as this is where you can find the option for View Details & Edit.

Step 3. Locke your plan or cell phone number and choose your desired Data Allowance.

Step 4. Remember to save the changes.

Best File Manager Tips for iPhone 7 Without Jailbreak

Just like it happens with the file manager for iPhone 6 you can easily manage files on iPhone 7. Apple presented several new phones in 2016 including iPhone 7, 7 Plus and smaller iPhone SE. The latest generation handsets are running iOS 10 and you should know how to free space when your memory space gets limited by numerous files.

Sure, your might not need any iPhone explorer or file manager for iPhone 7 if you have 256GB storage which is an amazing upgrade offered to both ‘7’ versions this year. Still there are users who went with the 32GB version and might need to deal with the cluttered smartphone.

Of course, the need to quickly find file manager for iPhone without jailbreak was more common with 8GB and 16GB models [like new iPhone SE that offers 16GB of storage]. The Cupertino-based company finally stopped producing such phones as modern customers like to take tons of images, record 4K videos, download numerous iOS 10 apps and games and keep everything on their pocket device. We’ll explain how to manage files on iPhone if you really need to free up some space on your 32GB iPhone 7 or iPhone 7 Plus right here right now.

iPhone 7 iPhone 7 Plus File Manager

iOS File Manager No Jailbreak Guide

There are different companies in the market that offer extended memory slots to smartphone owners. Not Apple. The ‘fruit’ giant customers have to deal with their files on their own. We hope that the tips and trick you’ll find below can help with your iPhone file transfer and management.

What is the simplest way to keep a track of your files? Firstly, you should decide if you need iPhone file manager Mac or Windows version. Both exist. Secondly, you can perform some actions and free up space on the smartphone.

You know that even if you have big storage capacity you cannot store everything you enjoy on one device. There are too much data these days so you definitely need good file manager for iPhone 7 or 7 Plus.

How to Manage Files on iPhone

There are so many various files on the iDevices, including songs, images, videos, movies, presentations etc. If you can’t find a perfect iPhone file manager app you can manually help yourself and remove or delete what you don’t need every day.

iCloud File Managing iPhone 7 iOS 10

• iCloud Storage Tips

Any Apple fan can use iCloud for storing all the files. It doesn’t matter if you have iPhone, iPad, Mac or other ‘fruit’ gadget – use iCloud storage and your iCloud account to backup all the data and store ‘excess’ number of files. This particular program can be used for your documents, video files, tunes, songs, other audio files and anything else you want to keep.

Remember to delete old backups if you have newer ones saved. Also get rid of your old messages, emails and other files you don’t really need.

• Extra Folders and iOS 10 Files

Be strategic and don’t keep the old files that are unnecessary. Remove the folders and all the files as soon as they are not needed. It does take some time however if you save them all you will have to spend even more time while deleting everything at the same time.

• Erase Backups

There are many multimedia and backup files that could ‘eat up’ too much of space on your handset. You should backup everything you wish to erase before you delete any files. Some programs get repeated files so check on your WatsApps and similar tools to make sure nothing is doubled.

iPhone Dropbox File Storage Management

• Dropbox

There is another file manager for iPhone without jailbreak. Do you remember the Dropbox? It’s a great manager for your iOS 10 documents, music, videos. The basic program offers 2GB of space but you can easily eatend it to 1TB [not for free though].

• Old Messages

Remove all messages that are old. These could be promotions, product ads, unnecessary messages, iOS 10 spam. This way you can organize free space for important documents, photos and other files.

All the actions require your time. But this is the best way to manage your files and stay organized.

Save on iPhone 7 Mobile Bill by Reducing Data Usage

You probably know how to reduce data usage on iPhone 6 so it’s now time to learn the details about the iPhone 7 and 7 Plus. The latest generation smartphones were presented by Apple in September. A lot of customers decided to update to this handset even though it doesn’t look like major upgrade. Of course, the device has its advantages such as impressive 256GB storage option, improvements within the system and hardware, better battery and camera. Still many users hoped to see a contemporary and innovative phone that stands out in the market and sounds much better than similar products.

Still if you got the update you need to learn more about iPhone data usage per app and what is cellular data in common [learn how to set up iPhone 7].This will help you to turn off mobile data in order to save on your bill. Let’s learn more about iPhone data usage check and other things you should know in order to spend less money on cellular connection month after month.

iPhone 7 Data Usage How to Reduce

What Uses Data on iPhone

This is a simple question to ask so you shouldn’t be surprised to learn that your applications use data as well as email, social networks and internet surfing. Your cellular / mobile data could be eaten too much on iOS 10 firmware version. Luckily you can turn off mobile data and lower down your monthly bills.

Sometimes you are ok with your monthly data consumption. However when your bill suddenly exceeds your expectations you should recollect your data usage iPhone 6 experience and do something similar with the 2016 iPhone model.

It’s important to deal with unusual data consumption on-the-go otherwise you can lose your money. What are the most ‘hungry’ options on the phone? What uses data on Verizon, AT&T, Sprint, T-Mobile and other carriers? Here is the list:

  • background application refresh loves to eat data
  • location services are always ‘hungry’ for more data
  • social networks also play a big role and consume much data

The following iOS 10 tips and tricks can do you a favor and help you deal with data usage on iPhone 7 or bigger iPhone 7 Plus.

iPhone 7 Cellular Data Usage

Select Apps That Consume Data

What is cellular data? This is the data provided by your network. It can be consumping and it costs way more than simple WiFi. In order to reduce data usage on iPhone 7 you should choose what apps use and what applications don’t use your mobile data. Thus you are advised to disable it when you don’t need it:

Step 1. Your iPhone data usage per app can very depending on the program. Make sure you select the apps that can use your cellular data and disable it by going to Settings menu.

Step 2. Choose Cellular or Mobile option.

Step 3. You will see toggles next to different applications that are using your data.

Toggle off the ones you currently don’t need to use.

Remember to turn your data back on when you need to use it.

Awesome Reduce Data Usage iPhone Guide

You can improve your iPhone data usage check results one you turn off Location Services:

Step 1. Go to Settings.

Step 2. Choose Privacy option and go to Location Services section.

Step 3. Disable Location Services by toggling off this feature.

Reduce Data Background App Refresh iOS 10

Just as it goes in how to turn off data on iPhone 6 instruction you need to disable background refresh for apps on iPhone 7:

Step 1. Launch Settings and go to General menu.

Step 2. Go to Background App Refresh and disable it by toggling it off.

How to Turn Off Data on iPhone 7 for Auto-Downloads:

Step 1. This is simple. Settings is where you should go to.

Step 2. Choose iTunes & App Store section.

Step 3. Disable Use Cellular Data feature.

Step 4. Turn off your mobile data for iCloud.

Wi-Fi Tricks

There are some things you can do with WiFi settings so that your cellular data usage current period looks more attractive and less expensive:

Step 1. Go to Settings – iCloud and choose iCloud Drive where you need to disable the Use Cellular Data option.

Step 2. Now in Settings you should select Cellular and disable WiFi Assist so that your handset stops using your mobile data when your WiFi connection isn’t good.

iOS 10 Social Networks Reduce Data Usage

Mail & Social Network Tips

Step 1. Choose Settings and go to Mail where you can disable the option called Load Remote Images.

Step 2. For Facebook you should launch this app and go to More in order to get to your Settings – Account Settings. Click on Videos and Photos – Video Settings and choose Auto-play section where you can enable either Never Auto-plays Videos or On Wi-Fi Connections Only.

Step 3. Launch Instagram and select Profile – Gear where you can choose Mobile Data Usage and enable Use Less Data feature.

Step 4. For Twitter you need to choose Profile and click on Gear icon where you will get to Settings – Data and can either enable Use WiFi only or turn on Never play videos automatically.

You can now reduce your mobile data and save money on your monthly 256GB iPhone 7 bills.

How to Use iOS 10 Shortcuts: iPhone Magic Tricks

The list of iPhone secret codes tricks and iOS tips and tricks is constantly growing because Apple continues to release new smartphone models and firmware versions. The company updated mobile operating system earlier this fall so you can now enjoy various iOS 10 shortcuts once you install this firmware.

Right now we want to talk about accessibility shortcuts you can enjoy using. These iPhone magic tricks are amazing and they simplify your everyday smartphone usage. It becomes faster and easier to perform various actions when you can access them using iPhone accessibility setting and some little secrets.

iOS 10 Shortcuts

You can quickly master new iPhone secrets codes on iOS 10 within Accessibility section. It’s perfect for both iPad and your handset. Once you learn how to use iOS 10 shortcuts you will love launching the features you love the most by triple-clicking your Home button. Besides it will become so much easier to switch between iOS 10 features you’ll be surprised. Let’s get into details and explore the world of your beloved handset.

There are so many interesting and useful iPhone accessibility settings you need to explore. Still you know that the first thing you should do is turn on this amazing feature, right?

iOS 10 Accessibility Shortcuts How to Use

How to Enable Accessibility Shortcuts on iPhone Running iOS 10

Step 1. Anything you are trying to setup on your iPhone goes through Settings.

Step 2. Choose General menu and click on Accessibility option.

Step 3. Choose Accessibility Shortcut feature which you’ll find at the bottom of the screen.

Step 4. Select the features you wish to use. The list contains 7 various options you can enjoy and it is possible to choose several at once.

iPhone iOS 10 Triple Click Shortcut

How to Create iPhone Triple Tap Action

This is pretty easy to do. You need to only decide what action you wish to do during your iPhone triple tap performance:

Step 1. On your iPhone 7, iPhone 7 Plus or other model you should go to Settings program.

Step 2. Select General option.

Step 3. Access Accessibility section.

Step 4. You’ll find Accessibility Shortcut feature way-way down the menu. Click on it.

Step 5. Now select the action for your Home button triple clicking. You are done.

iOS 10 Color Filters

List of Accessibility Shortcut iPhone Features

Here are the options you can select from when you enable iPhone magic tricks for easy access.

  • Color Filters

This feature can help you customize your screen color layout. Just select the color you like and go with it.

  • VoiceOver

Would you like your display contents to be spoken? Your iPhone 7 is capable of this as well as other iOS 10 gadgets.

iOS 10 Shortcuts Zoom

  • Zoom

Sometimes it is cool to zoom in your screen content. Improve your visibility using this fun option on iOS 10 platform [learn how to backup iPhone manually].

  • Touch Accommodations

Choose how you want your display to respond to your taps and clicks.

  • Switch Control

This is another interesting motor accessibility option you can enjoy. Turn your handset display or external switch to your control.

  • Reduce White Point

You have most likely guessed that this particular feature allows adjusting the bright colors to your personal likes. Reduce the color intensity and improve your ‘fruit’ life.

  • Invert Colors

This is the simplest thing. This option can invert the colors across iOS 10 firmware.

Assistive Touch iOS 10 Feature

  • Assistive Touch

Simplify the control for some buttons and enjoy gestures. This is a great function for users with motor impairments.
Remember that you are able to select several features and they all will be assigned to your triple click action. However if you choose one option it becomes activated as soon as you click three times on your Home button. If you select more features you will see the menu with all the options to choose from. Use the same triple-click to disable the option.

We hope you enjoyed exploring the new iOS tips and tricks. Remember that they work only on the firmware version 10 and newer. The first official release was offered in September however Apple keeps improving its mobile operating system and presents newer updates to fix previous bugs and issues.

Does Apple Unlock iPhone 7 and 7 Plus Models? How to Become Factory Unlocked

When we speak about how to unlock iPhone 7 / 7 Plus you could think about two different procedures. You can unlock iPhone AT&T, Verizon, T-Mobile, Sprint to support other networks or unlock the handset locked screen which doesn’t allow you inserting unsupported SIM cards and getting the signal.

Does Apple unlock iPhone 7? Can you unlock iPhone AT&T without Apple’s help? Is it legit to do? These are main questions users ask when they search for unlocked iPhones for sale and find no unlocked iPhone 7 or 7 Plus at an affordable cost. We’ll explain what you should do and how two unlockings are different from each other.

iPhone 7 Unloked Model

How to Unlock iPhone 7 Without Passcode

You know that there are methods for bypassing the passcode lock screen and the most popular solution might work with the iPhone 7 and 7 Plus. At least, it is reported to support iPhone 6s and 6 as well as iPhone 5s and 5. Since the newest iPhone 7 lineup reminds of the iPhone 6s generation smartphones it could be possible to use the same guide for reaching your goal.

Here is how to unlock iPhone 7 passcode by simply bypassing it if the iPhone 6s method works on the latest handset mode:

Step 1. Click twice on the Home button which is integrated into the smartphone. This way you can get to slide preview [you might prefer pressing on Update and launch the last app instead].

Step 2. You should swipe over to the front screen.

Step 3. Now you should successfully bypass the passcode lock screen.

Still remember that this bypass will not SIM unlock the smartphone.

How to Unlock iPhone ATT TMobile

How to Unlock iPhone 7 Plus and 7 from T-Mobile, AT&T, Other Networks

In most cases the unlock iPhone 7 plus price is similar to the cost of iPhone 7 unlocking. Becoming SIM free is the main reason why a lot of users choose to become unlocked. This service has nothing to do with the bypassing lock screen so there is huge difference between the two processes.

Unlocked smartphones always cost more than the locked models. Still there are tons of amazing deals and discounts offered by carriers who sell models locked to their networks only. It often becomes cheaper to buy SIM lock handset and order factory unlock directly from the carrier or third-party company.

When you are planning to follow how to unlock iPhone 7 TMobile or other U.S. network guide you should decide what firm to select.

Slide to Unlock iPhone 7

*Advantages of Direct Carrier Unlocking

You have nothing to worry about when your unlocked GSM iphone has become SIM free thanks to the network’s efforts. There are many things you have to know about and a list of requirements is pretty long.

For example, you have to use that network and have an active account in good standing. Your iPhohe should be whitelisted. The service could cost you something and there are chances your request to unlock would be rejected.

*Pluses of Factory Unlocked Cell Phones

So does Apple unlock iPhones or not? No, the company itself offers no such services. It does sell already unlocked devices at the full price however you should search for third-party firm that will provide the service distantly.

The value of a handset that can connect to multiple networks with ease is higher. There are many customers who are looking for used unlocked iPhones for sale. You will be able to resell your gadget at a higher price and upgrade to the next iPhone 8, for example, as this handset should be a big improvement.

iPhone 7 How to Unlock Guide

GSM Unlocked iPhone 7 Instruction for Locked Model

Step 1. Find a company that is eager to unlock iPhone AT&T for you and read the requirements. Some firms are not working with blacklisted and blocked devices, others do.

Step 2. Provide your IMEI code if you are sure you are eligible for the service. It is best to first use IMEI network checker and all other possible checking service to get all the details about your carrier and phone.

Step 3. Request the service, pay for it and wait.

Step 4. The company will let you know as soon as your IMEI number is added to the official Apple unlocked whitelisted iPhones.

Step 5. You just need to activate your unlocked iPhone 7 status using iTunes.This is simple. Just insert a non-supported SIM and connect to this desktop program.

iPhone 7 AT&T How to SIM Unlock

How to SIM Unlock iPhone 7 from AT&T

If you purchased your handset at the full price you can try a different GSM unlocked phones guide.

Step 1. Firstly set up your brand new iPhone 7 account using iTunes.

Step 2. You will see the set up display so enter your zip code and SSN number [the last 4 digits].

Step 3. You’ll have to agree to terms of services for Apple and AT&T network.

Step 4. When you see the message about AT&T iPhone activation you should press on Continue.

Step 5. Now you should see the new message that congratulates you with ‘iPhone being successfully unlocked.’

Step 6. Now you can use any GSM SIM card to connect to different GSM carriers and not be locked to AT&T only.

Only remember to turn off the handset before you switch the SIM cards. Enjoy!