Are you ready to explore the most interesting options in the new Apple firmware version? Here come iOS 10 handwritten messages that can be used on both iPhone and iPad. It’s just a matter of time how quickly you’ll adjust to this option and find how to use it in your everyday life [it’s also time to select the best 2016 smartphone]. Typing is fast, but when you can send your handwriting to your friends and family members – it could be a wonderful note with your personal touch.
The option is brought by one of the default applications. You have nothing new to install. Just use the nice improvements added to Messages program. We’ll explain what you need to do in order to get the full advantage of the new iOS handwriting recognition system. It’s simple, fast and once you get used to it – you could truly save time on typing and make your text messages more interesting, beautiful and very unique.

How to Send Handwritten Messages on iOS 10 iPhone
Step 1. Take your iPhone 7 or any other iPhone model you have that is running iOS 10 version. Remember that you have to backup iPhone once in a while to not lose your personal data.
Step 2. Launch your Messages tool.
Step 3. Choose the contact. This is the person you wish to receive your handwritten SMS.
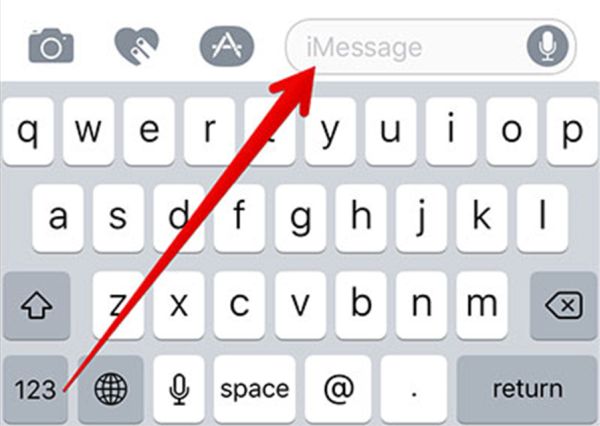
Step 4. Press on the iMessage field. This is where you can enter your text in the next step.
Step 5. It’s best to use Landscape mode. So turn your gadget to continue.
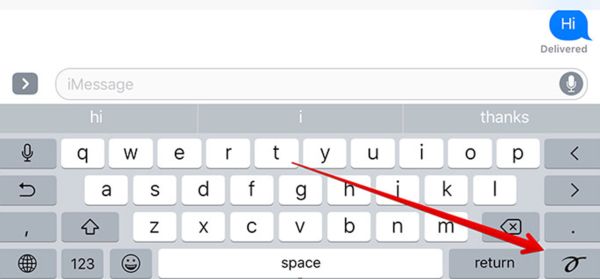
Step 6. You will be the handwriting canvas that is completely blank for now. Don’t see the new screen? You can always press on the small button in the bottom right corner of your display.
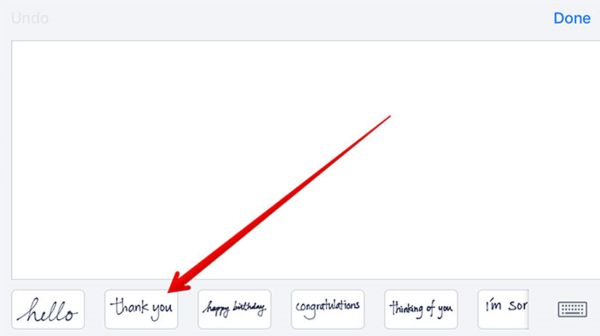
Step 7. Great, it’s time for creating your masterpiece. Draw (write) what you wish to send. In case you feel there is not enough space for you just press on the arrow and your canvas will get longer. If you need to use the regular keyboard you can press on the keyboard button that is located in the lower right part of your screen.
Step 8. If you need you can also use the Clear and Undo options. They are both located in the top left corner of your screen, right above the white canvas. Remember that when you ‘Clear’ you will delete everything you have written. If you only wish to remove your last doodled you should click on the ‘Undo’ button.
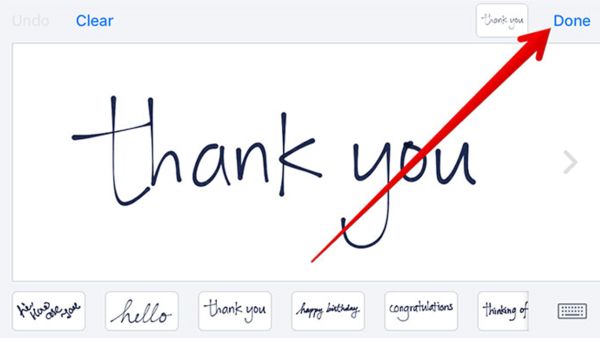
Step 9. When you have finished your writing you need to press ‘Done’ option that you’ll find in to upper right corner.
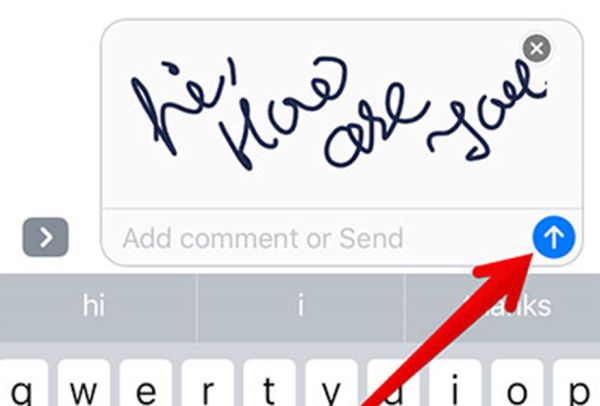
Step 10. iOS 10 is ready to send your handwritten iMessage so click on ‘Send’ to confirm this is what you want to do. Your text will be send. In case you have a broken iPhone 6s screen learn how to repair your device.
Isn’t it awesome? iOS 10 handwritten messages can offer even more possibilities to you. It is possible to create pre-written texts and send them instead of making a new one each time. Here is how it is simple and fast to complete:
Step 1. All the messages you have created will be saved automatically. So you can always choose them as they will appear at the bottom of your Messages application along with some pre-written messages are already available by default [‘thinking of you’, ‘happy birthday’, ‘thank you’ and similar common used phrases].
Step 2. Just click on the pre-written message and you’ll find its preview on your canvas.
Step 3. You can customize the message or send it as it is by pressing Done and Send buttons.
The similar guide is for your iPad however there are some minor differences. This is the reason why we wish to also add the fast step-by-step instruction for tablet owners.
iPad: How to Send Handwritten Messages iOS 10 Walkthrough
Step 1. Open Messages tool on the tablet device.
Step 2. Select the contact just as you did on the iPhone.
Step 3. Click on the ‘iMessage’ text window.
Step 4. Press on the hand-drawn-icon button you will find on the bottom line of iPad virtual keyboard. If you are tired of your iPad rings learn how to stop iPad from ringing.
Step 5. You will get the handwriting canvas and write your message. Use two fingers and swipe right or left and create a cute text message.
Step 6. If you wish to use handwritten texts you created earlier you need to press on the ‘Clock’ button that is located at the lower left corner.
Step 7. Use the new options offered by iOS 10 update and enjoy staying unique in every way possible.