How to Transfer Movies to iPad [PC and Mac Instruction]

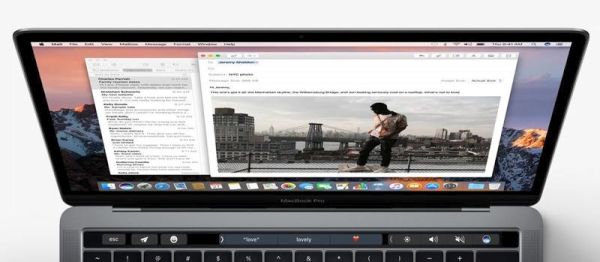
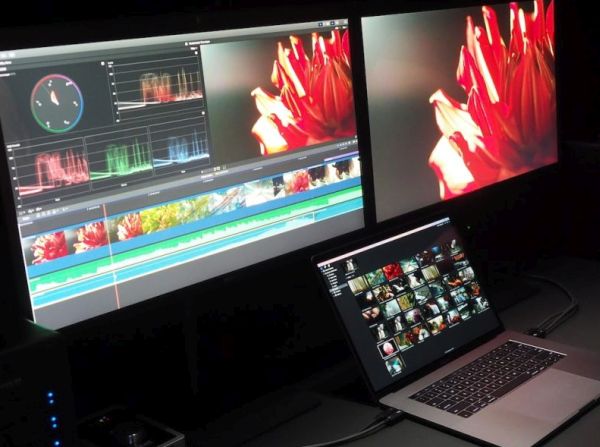
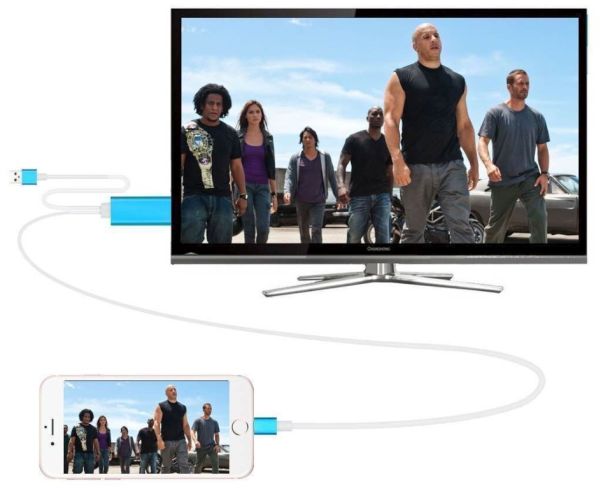
Would you like to transfer movies to iPad and watch offline? Sometimes you have so many interesting videos saved on Mac, PC or laptop that you think about ways how to add videos to iPad from PC or other computer and enjoy them anywhere you are right from the tablet screen. If you have the newest Mac you might want to explore Touch Bar tricks on MacBook Pro.

It is possible to find iPad movie format and convert your films and videos to watch on this mobile computer. It is also possible to download movies to iPad to watch offline or simply transfer the files you already have on your PC or Mac right to your tablet device.

Let’s discover how you can copy videos to watch on iPad. This could be useful when you are travelling or waiting in a long line. There is no need to sync your gadgets. The copying procedure is quick and simple. You just need iTunes [learn how to fix iTunes 12.4 problems if you face any], computer and your iPad. You also need some videos or movies to copy. While sometimes the copying process can take as long as syncing you still can enjoy it since movies can be transferred from one device to another one via drag-and-drop method. Are you curious to learn more?

Transfer Movies to iPad from Computer

iPad Compatible Video Formats

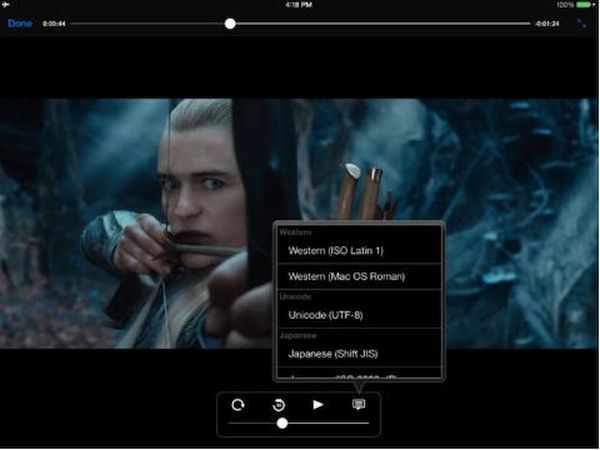
The Apple iDevice supports only a number of video formats at the moment. Its Video application can play MP4, MOV, MPEG-4, M4V, H.264 and M-JPEG files. Besides, even these formats are limited. Thus, if you wish to watch H.264 movies you’ll have to enjoy videos that are only 30 frames per second and 1080 pixels.

You can to keep in mind the supported video format for iPad when you plan to sync, add or copy movies to this gadget. P.S. iPhone users can send disappearing videos via Instagram app.

Copy Movies to iPad from iTunes

How to Transfer Videos from PC to iPad Manually

You don’t have to use iPad video converter if you have the right (supported) file format already.

Step 1. To transfer movies to iPad you should connect your device to your computer or laptop.

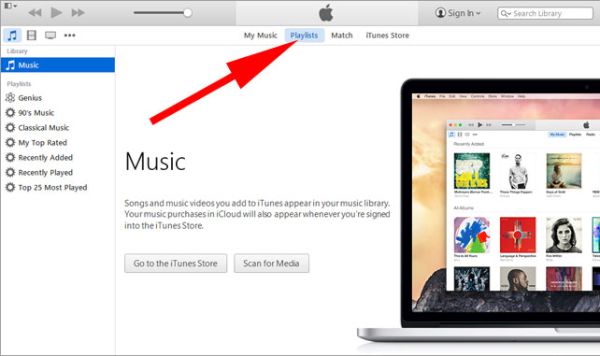
Step 2. Open iTunes desktop program.

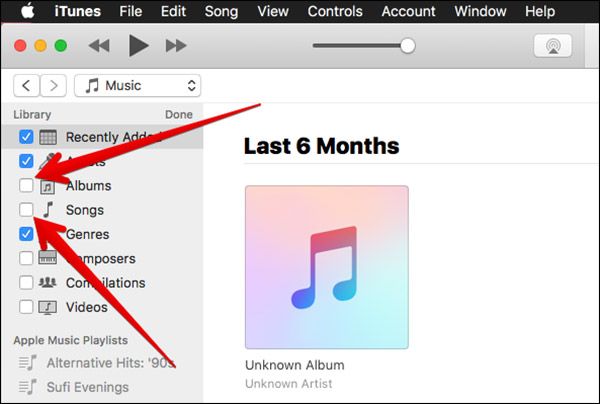
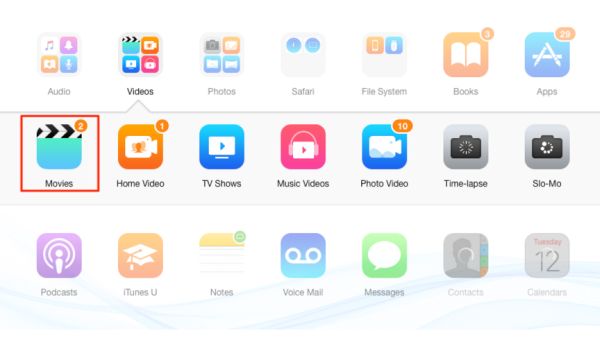
Step 3. Choose the movie or video file you wish to copy to the tablet. You should find it in your iTunes library since this is the instruction ‘how to transfer movies from PC to iPad using iTunes’ program.

Step 4. Choose your iPad from the left menu.

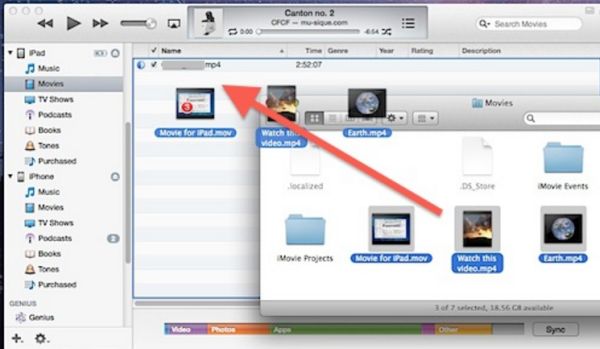
Step 5. Drag and drop the video file to copy it. Just remember to open the folder with the file beforehand and run iTunes in the background. The video will be copied into iTunes library.

Step 6. Wait for the copying to complete. All the correct file formats should be added without issues. The problems can be with the movies and videos that are not supported by iPad.

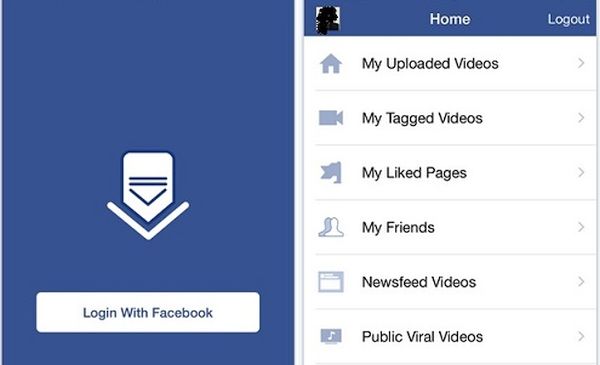
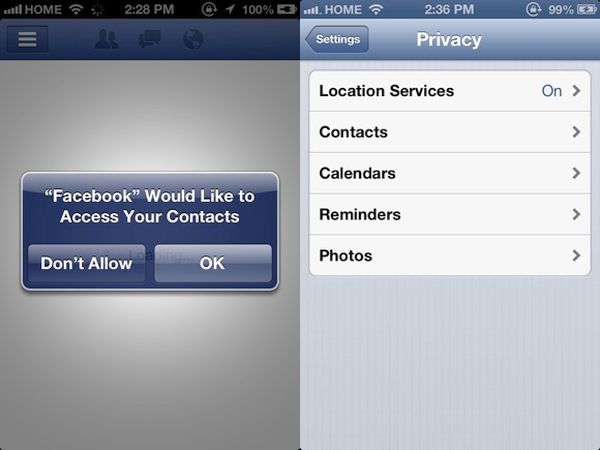
You should know that it is possible to add videos to iPad from a single iTunes library only. If you are a fan of social networks you can stop Facebook app from accessing your data on iPhone.

Add Movies from PC or Mac to iPad

How to Transfer Movies from Laptop to iPad: Method 2

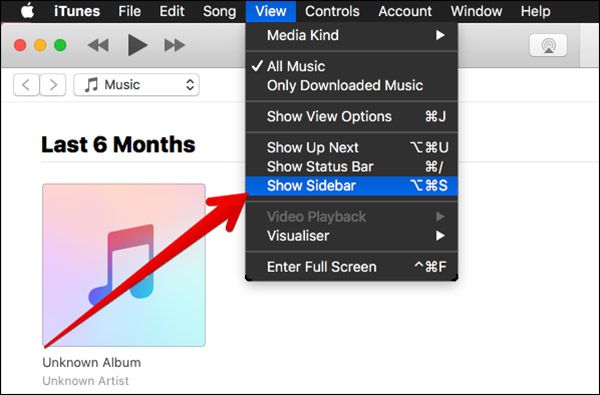
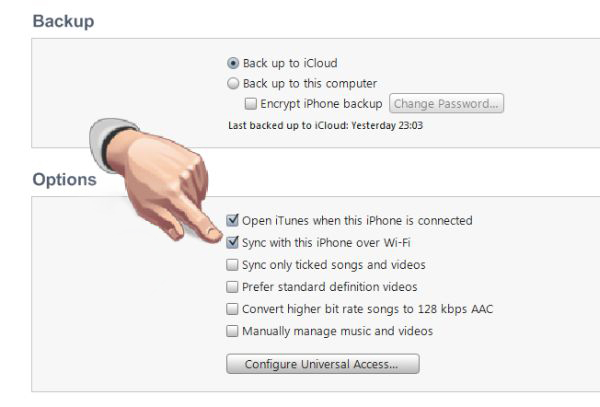
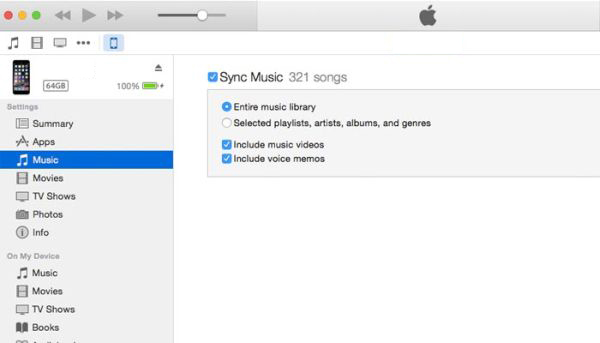
You can also do the following thing. Update your iTunes version to the latest release and use the feature called ‘Manually manage music and videos:’

Step 1. Connect iPad to your laptop, Mac or PC.

Step 2. Run iTunes.

Step 3. Choose your device in iTunes.

Step 4. Select Summary option.

Step 5. Scroll to ‘Options’ where you can enable Manually manage music and videos option.

Step 6. Press on Apply option.

Always remember to backup iPhone or iPad before adding any changes.

There are also additional programs that can help you add files from computer to iPad without iTunes. AnyTrans is one of them. You can also search for similar apps that support AVI, WMV and MKV video formats and can automatically convert your files to the format supported by your ‘fruit’ tablet device.

Hopefully the simple guide on how to add movies to iPad from computer was useful to you. Enjoy!

MacBook Pro Tips for Touch Bar Users and Notes Fans

Are you a big fan of Apple MacBook Pro 15 model? Do you own the MacBook pro 2016 version? There are a lot of ‘fruit’ customers who prefer using several computeres as well as mobile devices. iPhone, iPad, Mac are often owned in more than one model per user. Well, if you do have the Touch Bar on your machine and prefer using Apple Notes instead of other text programs you might wish to learn some interesting MacBook Pro tips.

It is actually useful to know your MacBook Pro specs as well as some popular tricks. This way you can simplify your work with various application, spend less time on your tasks and enjoy your everyday life. One great feature brought by Apple this year is Touch Bar on MacBook Pro. It lets you perform various actions much quicker with a single or a couple of clicks. For example, it is possible to use Touch ID to unlock Notes with Touch Bar, delete your notes or even add some customizations on-the-go.

We won’t describe all the new MacBook Pro specs as this time we plan to devote the post to Touch Bar tips and tricks only. This spec is a great addition to Apple computers. You just need to explore some possibilities. By the way, if you don’t see sidebar in iTunes learn how to fix iTunes 12.4 problems.

Mac Touch Bar Apple Notes Tips

How to Use Touch Bar with Apple Notes on Mac

You can work with Notes via Touch Bar. Just follow the step-by-step instruction below and you’ll master this must-have trick.

Step 1. You should launch Apple Notes on MacBook Pro 2016.

Step 2. Click on the new note icon and you’ll create a new Note on your computer.

Step 3. If you need to format an existing note you should click on Format icon (it reminds of capital and lowercase letters A). Then click on Title and you’ll work with H2 format option. Click on Heading and you’ll work with H3 format. If you wish to format body text you need to click on Body. Use Bullets icon when you need to create bullets list. If you prefer working with dashes list you should click on the Dash icon. For numbered list you should press on Numbers icon. If you need to close tools that format your text just hit the X.

Step 4. It is easy to create checklists via Checklist icon.

If you wish to connect 5K display to your Mac computer you’ll love the changes!

Here are some Touch Bar MacBook Pro tricks for Notes app:

*Use Indent when you wish to indent left / right margins

*Italics helps you italicizing words and sentences in Notes

*Place your cursor at the end of the sentence and click on the desired format to change text format with ease

*Bold icon helps you make words or whole sentences bold

*Underline icon can be used to underline a word or sentence

Apple Mac Touch ID

Unlock Apple Notes with Touch ID

Step 1. Launch the application.

Step 2. Select the locked note you wish to unlock.

Step 3. Place your finger on Touch ID (the one you have registered for your sensor) and you’ll unlock all your notes at once.

Step 4. If you want to lock your notes press on Lock icon (you can see it at the top part of Notes application).

Fix problems with launchpad apps missing on Mac OS Sierra machines.

MacBook pro Touch Bar Apple Notes

Delete Notes Using Touch Bar

Step 1. Choose the note you prefer to remove.

Step 2. Click on Trash icon (in Touch Bar).

Step 3. If you want to delete folders, select a folder instead of a note and press on the Trash icon.

Customize Touch Bar on macBook Pro 2016 model

MacBook Pro Tips for Touch Bar and Notes Customization

Step 1. You can launch Notes program – press on View in menu – click on Customize Touch Bar option. You can drag any tool from the customization panel and drop it into your Touch Bar.

Step 2. When you want to remove a tool from Touch Bar you should move your cursor down and select the tools.

Step 3. Remember to click on Done option when you are happy with the results.

Step 4. To customize your formatting tools simply choose a note in Notes application.

Step 5. Press on View option and choose the feature Customize Touch Bar. Now you can work with tools and customize them.

Apple Photos Tutorial for Mac Users to Hide and Unhide Photos

Guides on how to use Mac OS are pretty popular among Mac users. Still there are so many questions you might be looking to answer after updating to macOS Sierra. This operating system has a lot of interesting tricks and secrets. You’ll love exploring its possibilities but let’s start with Apple Photos tutorial. It should be useful for all macOS Sierra fans who love taking and storing images on their computer. Learn how to fix iTunes sidebar missing problem on your Mac which is fast and simple to do.

Are you curious how you can hide pictures on Mac or unhide them? What is the difference for iPhoto vs Photos app? How does everything work once you install macOS Sierra on your computer instead of using an earlier version of the ‘fruit’ desktop firmware? We wish to provide you all the answers in this post. P.S. Have you tried to connect 5K display to Mac computer?

iPhoto vs Photo app vs Aperture Mac

iPhoto vs Photos App

These are actually two different options offered by Apple. The stock Photos app can be used on Mac to save your memories. iPhoto is an older version of the program (it is a different release) and you can easily update from iPhoto (or even Aperture) to Photos once you install OS X Yosemite 10.10.3 or newer operating system on your ‘fruit’ computer.

Modern users prefer Photos application and you can download iPhoto for Mac although you are highly advised to run the newer program. Read Apple Photos review (you can find it online) and you’ll understand how the two versions are different. User who are big fans of social networks should learn how to send disappearing photos via iPhone Instagram application on iOS 10.

How to Hide Photos on Mac

Apple Photos Tutorial: How to Use Mac OS Sierra to Hide / Unhide Images

Step 1. Follow Photos for Mac download link to install this program on your computer. You can visit the ‘fruit’ store and find Apple Photos app download link right there.

Step 2. Launch Photos program on your computer.

Step 3. You need to view your album and decide which images you prefer to hide from Photos.

How to Hide Picture in Photos App on Mac

Step 4. Now Control + click on the picture that should be hidden and select ‘Hide Photo’ option.

Step 5. Confirm your decision by pressing on Hide Photo once again.

Step 6. That’s it. The image is hidden. You can repeat the guide for each photograph you want to hide on Mac.

You can also customize your MacBook Pro with Touch Bar model if you want to.

Unhide Photos Mac Instruction

How to Unhide Pictures on Mac

Step 1. When you wish to reveal your images you need to launch Photos program and open your Hidden album.

Step 2. Right click on the image that you wish to unhide.

Step 3. The photo will appear in your Moments, Collections, Years and Photos.

Step 4. Repeat the guide for each photograph you are planning to unhide.

Hide Several Photos at Once on Mac

How to Hide Several Photos at Once

Step 1. Sometimes you want to hide multiple photos at the same time. Launch Photos.

Step 2. Choose several pictures at once by dragging the cursor.

Step 3. Right click or use Command + Click on those images.

Step 4. Choose Hide Photos and confirm. They will be hidden.

A lot of use know how to use Photos for Mac OS Sierra. Still even if you install the Photos Mac application you might know how to hide your private images from the stock app. Now you know what you can do so follow the guide above and you’ll easily hide pictures on Mac without creating a secret folder Mac. Hopefully you’ll love the simple secret and make it your personal instruction for those days when you don’t want your friends or relatives to find photographs that are not meant for their eyes.

There are ways how to hide folders Mac however this is something to talk about in the future. Right now you know that you are able to hide some or all pictures and they will disappear from your Collections, Moments and Years. They will be stored in Hidden album only you can access. Luckily, it is also easy to reveal them when needed.

View Hidden Photos on Mac App

How to Find Hidden Images on Mac

Step 1. Go to Photos program on your computer.

Step 2. Choose View option.

Step 3. Click on Show Hidden Photo Album.

View Hidden Photos Mac Guide

Step 4. Doulbe-click on ‘Hidden’ album you will see on the left menu.

Step 5. Enjoy all the hidden images you have.

Your iTunes Sidebar Missing? Fix iTunes 12.4 Problems, Return Sidebar

Is your iTunes sidebar missing? There are users with Mac or Windows computers who are using iPhone 7 (iPhone 7 Plus or other popular ‘fruit’ phone) or iPad and have updated their desktop program to discover new iTunes 12.4 problems. Have you also installed this version of Apple tool? Can you not find your sidebar anymore? Is there a quick fix to your issue? It is great that you can send disappearing photos on iPhone by following a simple guide.

Apple is constantly updating its software and hardware. Every year the company presents new popular gadgets (some of them are becoming extremely popular, others are just popular among millions of customers from all over the world and there are devices that are less popular yet a lot of people are still buying them because this is ‘Apple’). We know how to find sidebar in iTunes. We will share our knowledge with you. Return this useful part of the Mac / Windows program to your computer.

Can't Find Sidebar iTunes 12.4 Issue

Disadvantages of Can’t Find Sidebar in iTunes 12 Bug

It is easy to sync your new iPhone 7 with iTunes, download songs, apps, games, audiobooks and other staff using this desktop application. Sidebar makes the whole navigation process simple, quick and easy.

This addition is very important. You’ll have to spend more time while transferring songs, TV shows, movies etc. from iTunes to your iPhone or iPad. Without this feature you’ll be disappointed and this is the main reason why you should deal with no sidebar in iTunes 12. Let’s get it back.

How to Find Sidebar in iTunes 12.4

How to Enable Sidebar in iTunes

It is great that you can easily fix iTunes sidebar missing problem, hide and unhide it as well as customize it. Isn’t it awesome? Let’s fix your iTunes 12.4 problems right here right now and the problem will be gone. Remember that you can easily connect 5K display to your Mac.

Step 1. Launch iTunes on your computer. This ‘how to find sidebar in iTunes’ instruction works great on both Mac machine and Windows PC computer.

Step 2. Go to ‘View’ section.

How to Show Sidebar in iTunes 12.4 Mac Windows PC

Step 3. There will be a drop-down menu. Choose Show / Hide Sidebar option (the one you need to use at the moment). When you see no sidebar in iTunes 12 you need to enable it. When you wish to hide this option you should disable it. This is really simple.

Will you customize your iTunes sidebar once you locate it? We hope that the guide on how to display sidebard in iTunes is useful to you and any iTunes 12.4 issues you face will be gone once and forever [it is possible to sync iPhone with Windows 10 computer, isn’t it great?].

Once you deal with can’t find sidebar in iTunes 12 you can learn how to use some customization options and edit it.

iTunes 12 Customization Edit Guide

iTunes Sidebar Customization Guide

Step 1. Update to iTunes 12 or newer version on your computer. Only these versions allow you editing the program’s elements.

Step 2. Once your cursor is moved towards Library section there will be ‘Edit’ option.

Step 3. Click on Edit to start the Mac customization process.

Step 4. There are different options you can turn on and off. You can edit your albums, recently added, genres and other features. Enable and disable what you wish to change by checking or unchecking the options.

Step 5. Once you are happy with the changes you can confirm your decision by clicking on ‘Done’ option. This way your customizations will be saved.

That’s pretty much it. You know how you can return your iTunes sidebar once it is missing from the program. You can also customize some of the features to be visible or disappear. This is a cool way to make your version of iTunes better and more interesting and useful to you. Add changes and don’t be afraid to play with the app’s settings.

What do you think about new iTunes 12.4 version? Isn’t it cooler than the previous release?

How to Connect New Mac 5K Display and Fix Possible Issues

Some Apple fans dream about Mac 5K display and you can learn how to connect one well-known monitor to your ‘fruit’ machine. Not all users who are trying to perform this action enjoy the smooth procedure. Many do experience some bugs and issues. You might also come across possible known problems so you need to learn how to solve it before you start.

We are talking about LG UltraFine 5K display. This can be your Macbook Pro external monitor and you should follow the quick tips on how to start working with this display and make your computer even better with a powerful screen.

Remember that different problems are possible. Still you can fix them if you follow the detailed guide below. P.S. You can send amazing disappearing photos and videos on iPhone Instagram which is so cool.

LG 5K Display for Mac

Apple Display 5K Option

The new LG 5K monitor is a spectacular UltraFine 27-inch display. Users are more than happy to get this product to watch movies, films and various videos. This screen offers incredible 5120 x 2880 resolution, 14.7 million pixels and incredible P3 wide color gamut. It sounds very attractive and connecting it to your Mac could bring an unforgettable experience.

The really big display can be a perfect addition to any Mac computer. It can be if you can connect it without problem. Issues are possible so our main goal is to avoid or fix them. Some Mac users are able to bring Touch ID to old Mac models.

LG UltraFine 5K Display for Apple Mac computers

How to Connect LG UltraFine 5K Display to Apple Mac

Step 1. You should own a particular Mac model. So double check that your gadget is compatible with the LG 5K monitor. It currently supports the following models:

  • 13-inch or 15-inch MacBook pro released in 2016

Step 2. Make sure your Apple computer is updated to macOS Sierra 10.12.1 or newer operating system version.

Step 3. If you have the USB-C to Thunderbolt 2 Adapter or cable you are able to connect the monitor to a computer with lower 3840 x 2160 resolution screen:

  • 13-inch or 15-inch MacBook pro released in 2014;
  • Mac Pro released in late 2013;
  • 11-inch or 13-inch MacBook Air launched in the beginning of 2015;
  • iMac versions from 2014 and 2015;
  • Mac mini from 2014 with 3200 x 1800 resolution display.

Step 4. Connect the iMac, MacBook Air or MacBook Pro external monitor using the cable and enjoy the amazing 5K resolution.

How to Connect LG 5K Monitor to Apple Mac Computer

How to Fix Mac 5K Display Problems

The first problem with Apple display 5K connection is the compatibility. If your Mac model doesn’t support this product you won’t be able to connect it. So check once again if you own the correct Mac computer.

The second major issue you could have is related to your macOS Sierra version. Experts say that it is better to update to macOS Sierra 10.12.2 or newer for smoother results.

The LG 5K display can become your second Mac monitor however it could turn on only after you start using macOS version on your Mac Pro or Mac mini or other ‘fruit’ computer you have [it is possible to charge iPhone 7 with MacBook Pro 2016 version].

Double check if you have the correct cable. For example, your Mac won’t get power from the LG screen if it is connected via the Thunderbolt 3 to 2 adapter. You might need to use the original Apple power supply to charge your computer and use the cable that arrives with 5K display to connect without issues. The Thunderbolt 3 that can offer 5A of power might also be a good choice.

Some options might not work well or not work at all. The Display might not support different pre-boot options. For example, there could be issues with macOS Recovery feature and Boot Picker option.

If your display doesn’t work after you made sure your computer, version of operating system and cable are compatible you should contact LG since this is the company that stands behind the UltraFine 5K display. The firm could help you.

There is LG support page you can visit to fix the problem or get help with the software / user’s manual.

Cool iPhone Instagram Tips: Learn How to Send Disappearing Photos / Videos

It’s always great when you can surprise your friends with disappearing photos Instagram feature. Have you heard about this possibility? Are you a fan of Instagram network? Do you enjoy iOS new features on your iPhone? Have you upgraded to iPhone 7 or iPhone 7 Plus and wish to explore all the possibilities these models offer?

There are a lot of good Instagram feed ideas you can use. It’s nice to post interesting images and share incredible things you love with other. There are also many different Instagram tips for beginners and some of them let you use the impressive disappearing videos Instagram feature on both iPhone and iPad.

We’ll tell you how to post on Instagram from iPhone using the cool disappearing photos or videos feature. This is not complicated and you’ll love what you can do with the ‘fruit’ gadget and updated iOS 10 firmware version. By the way, Apple presented several new upgrades since it first introduced this operating system in September 2016. A lot of users have already installed the latest update and keep finding new options and things to do. By the way, remember that you can stop Facebook from accessing your iPhone data.

iOS 10 New Features iPhone 7 Photos

Disappearing Photos Instagram / Disappearing Videos

There are a lot of additional things you can do on your social network account. Thus, you are able to live stream videos on Instagram, mute different stories. You can take advantage of Boomerang and make animated GIFs. The iOS 10 message features also allow you sending disappearing images and video files.

You can also send Direct Messages with disappearing videos and photos on Instagram. Such interesting messages can be sent to your friends or even groups of people. The whole idea of such iOS 10 features is simple. The person sees the image or watches the video and it automatically disappears from the inbox. Isn’t it awesome? You will know if the file was watched or seen by you.

Are you ready to learn details about iPhone Instagram tips and how you can send the wonderful surprising message to your friend or share the disappearing photograph with the group of users?

How to Send Dissappearing Photos Videos iPhone 7

How to Post on Instagram from iPhone: Disappearing Files

Step 1. You should find Instagram download link for iOS 10 firmware and install it. If you already have this social network installed on your iPhone 7, 6s, 5s or other model you should make sure the version is the most recent one.

Step 2. You need to access your camera now. Just swipe to the right on your phone display.

Step 3. Take a photo you would like to share. You can also record a short video instead if you prefer sending a video file instead of a picture.

Instagram iOS 10 Dissappearing Photos

Step 4. When you are happy with the photograph or video you need to click on the arrow to proceed. You’ll find this option at the lower right part of the display.

Step 5. Now decide whether you want to send your image or video to one friend or several users at once. Choose your option.

Step 6. Click on Send option you’ll find at the bottom and your message will be sent.

Of course, you should also learn how to use iOS 10 message features to the fullest. When you send someone a disappearing photo or video you would love them to watch it and hope to also check it, right [you can download YouTube videos on iPhone 7]? Learn how to view such files:

Step 1. There is an airplane icon you should click on. You’ll see it at the upper right part of the display.

iOS 10 Airplane Icon iPhone 7

Step 2. The disappearing file should appear in the top bar.

Step 3. You can click on the images with blue rings. This way you can see the files shared by your friends. For videos and images sent to group, you can click on the faded friend’s profile image and respond.

What do you think about the iOS 10 new features? Would you like to share disappearing files through Instagram or not?

How to Protect Facebook Mobile Version from Accessing iPhone Data

Are you using Facebook for iPhone? Here come iOS 10 tips that help you to prevent the social network from accessing your iPhone address book and contacts. Follow the step-by-step instruction and learn more about Facebook privacy. There are so many secrets to explore when you update to iOS 10 firmware version. This is the most recent update presented in the fall 2016 for a number of supported Apple devices.

Firstly, let’s make sure you are running iOS 10. All users who have gotten the latest iPhone 7 and iPhone 7 Plus get the new firmware already pre-installed. Those who have previous models (iPhone 6s, SE, 6 and other) that are compatible with the operating system can find direct links to this platform and install it through iTunes or directly on the smartphone.

Secondly, you should know that your iPhone address book can be protected from access by Facebook mobile version. Enjoy the interesting iOS 10 tips and restrict the access to your personal data.

Facebook Mobile App for iPhone 7 Tricks

About Facebook Privacy

Sometimes you see people you don’t even know if Facebook chat. Is it something you are greatly annoyed with (learn how to fix unpleasant iOS 10 bubble effect problem)? Well, Facebook always suggests different people you might want to be friends with even though you have no idea who they are. Your iPhone contacts are uploaded to the social network once you gain this app an access to the smartphone address book.

If you are tired of friend suggestions option you can stop iPhone Facebook program from offering you new friends and accessing your contacts list. There is nothing difficult. It is a quick solution so you can take full advantage of it right now.

Facebook iPhone Contact Access Don't Allow

How to Prevent Facebook for iPhone from Gaining Access to Your Contacts

First Thing to Do: Remove Synced Contacts

Step 1. iOS 10 secrets are unveiled. You need to delete the contacts synced with Facebook from this social network.

Step 2. On your iPhone launch your favorite web browser and visit https://www.facebook.com/mobile/messenger/contacts/.

Step 3. There will be a list for all contacts that are uploaded to the social network. Look under Uploading and Managing Your Contacts and you will find a Delete All button. Click on it. This way you’ll delete all the synced contacts.

Step 4. You need to confirm your decision. Then all the contacts will be removed and you will get no information about your friends beginning to use Messenger.

Step 5. Make sure you disable Continuous Uploading feature in Messenger. If it is turned on all the contacts you have just removed will be automatically uploaded again when the applications is synced with Facebook.

Step 6. Remember to log out and clear your cache (compare iPhone 7 vs iPhone 7 Plus) before the changes will fully apply.

Facebook iPhone Settings Contacts Access

Second Thing to Do: No Access to Addresses

Step 1. The Facebook iPhone tricks continue when you tell the social network to not access your addresses. So launch Settings on your ‘fruit’ gadget.

Step 2. Select Facebook section.

Step 3. There will be a switch near Contacts. Disable this feature. This way Facebook should not get into your addresses ever again.

Third Thing to Do? No Access to Contacts List

Step 1. You should protect iPhone contacts now (remember to back up iPhone). Once again, this can be done directly on your iOS 10 handset.

Step 2. Go to Settings.

Step 3. You’ll have to scroll down so that you can get to Privacy menu and click on it.

Step 4. There will be Contacts section. Press on it.

Step 5. There is another toggle near Messenger. You need to toggle it. Now the popular social network will have no way to get to your contact information and use it to suggest you new friends.

Tips to Fix Mac OS Sierra Problems with Launchpad Apps Missing

Useful Mac OS tips and tricks are must-know for all users who are interested in fixing various Mac OS Sierra problems. Take a look at your Launchpad [not Touch ID which you can get on old Mac models]. Do you notice any applications missing from it? This is one of the Mac Launchpad issues you might come across. We know how you can solve everything and return your apps back to where they belong to.

What is launchpad Mac? This is so easy. Take your computer and take a look at it. There is a special platform with a launching option. In other words, this is the structure to launch apps on your OS X machine. It can be compared to iOS options as you can use your Launchpad on Mac as if you were managing your iOS 10 applications. Pretty similar for Apple consumers who own both iPhone and Mac [you can learn how to sync iPhone to your personal computer].

What should you do with launchpad manager to fix the problem? Follow the Mac tips and tricks and you could overcome the problem.

How to Reset Launchpad on Mac

How to Reset Launchpad Mac OS Sierra Guide

This is the first method you can use to reach your goal. Use your macOS Sierra features and complete the reset instruction. It helps when you download a new third-party application, install it on your computer and… don’t see it showing up in the Launchpad interface even on the new MacBook Pro with Touch Bar. You’ll love how simple this is.

Step 1. Are you sure you are running macOS Sierra? Double check the version of your operating system. Now press on your desktop.

Finder Go Launchpad Mac Settings

Step 2. You should press on Go section. You’ll find it on the menu bar. This is necessary for Launchpad resetting.

Step 3. Click-hold Option and press on Library section.

Step 4. You will see Application Support folder. It’s necessary to double press on it.

Dock Folder Mac OS X Launchpad

Step 5. You see your Dock folder. This is what you should double press on.

Step 6. Mac OS Sierra system has some .db files and you’ll have to drag them all into your trash on the computer.

Step 7. There will be an Apple icon at the upper left part of the screen. Press on it.

Step 8. Press on Restart menu.

Step 9. Confirm your decision by clicking on Restart button.

You need no launchpad cleaner as simple reset can fix Mac OS Sierra known issues with launchpad icon missing. In case you still don’t see the apps you can try a second method.

How to Fix Mac OS Sierra Problems via Default Locations

There are other Mac OS tips and tricks you can enjoy. Your Mac Launchpad shows applications that are found in default Applications folder. You can simply drag the app out of this folder. Then you need to log out – log in as this way you can restart Mac Launchpad settings. Then you should return the app back to the default folder and hopefully fix the bug.

Launchpad Mac OS X Tips and Tricks

Other Mac Launchpad Secrets

It is possible to create Launchpad Mac shortcut. Just assign any shortcut you wish to use and launch System Preferences – Keyboard preference – Keyboard Shortcuts and press on Launchpad & Dock. Yo have to choose Show Launchpad option then click on either Return or Enter and provide your chosen shortcut.

There is also another problem that prevents apps from showing in your Launchpad. Maybe the issue is with the database that is controlled by macOS Dock [here are some details about cool iOS 10 bubble effect]. It is possible to rebuild the database and solve the bug:

Mac Finder Folder

Step 1. Click-hold Mac Option key. You will open Finder – Go section where you can choose Library.

Step 2. Launch Application Support section.

Step 3. Choose Dock folder where you will find a lot of names saved as alphanumeric characters. You need to remove the files.

Step 4. Log out the account.

Step 5. Log in.

Step 6. This is how Launchpad resets along with Dock.

Step 7. Resetting will let the program scan your Application folders and apps will be shows in your Launchpad once again. Just let your computer reboot on its own before the changes take place.

Try all tips and tricks to make the issue disappear. If nothing solves the problem you should wait until Apple updates the version of macOS Sierra to newer version that fixes the bug by default. It often happens with different releases of mobile and desktop operating systems created by the iOS giant and other well-known companies.

Guide on How to Sync iPhone with Windows 10 on PC

It’s great to have files from your phone saved on your computer [it is also possible to download videos from YouTube to your phone]. This way you will not lose them in case anything happens after firmware update, restore or other processes. Are you ready to sync iPhone to PC when Windows 10 not recognizing iPhone? It can happen unless you follow the step-by-step guide on how to sync the handset to personal computer with the most recent operating system version.

Keeping files up-to-date is possible and you can do this after you download iTunes for Windows 10 64 bit. Not every Apple fans has a Mac computer. There are people with iPhone and PC. This means you should use your personal computer and iTunes for Windows 10 (make sure the program supports this platform otherwise you won’t be able to use it). Learn how to reduce iPhone mobile data usage without issues.

Windows 10 iTunes program

iTunes Download for Windows 10

This is the easiest thing to do. You should search for iTunes download 64 bit for your operating system, get the link, download the program and install it. Maybe you already have this desktop tool. In this case you should upgrade it to the most recent release on your computer.

It’s not necessary to keep all your music files, films and TV shows on your smartphone. It’s much better to sync the iPhone to PC and and keep your content on the computer.

How to Sync iPhone with Windows 10 PC

How to Sync iPhone to Windows 10 via WiFi Network

Step 1. It becomes possible to transfer content between iPhone and Windows PC once they are synced. Take your Lightning to USB cable and connet the handset to your computer.

Step 2. You need no Windows 10 iPhone driver since you only need the right iTunes version.

Step 3. Launch iTunes. The program will take a moment to recognize your iDevice.

Step 4. Press on the iPhone button that is available in the upper left menu.

Step 5. Scroll down. You should get to the bottom so that you can turn on WiFi option.

Step 6. You should check boxes next to several menu options. Firstly, this includes Sync with this iPhone over WiFi connection. Secondly, you should press on Music that can be found on the left and enable the box next to Sync Music. Repeat the same step for other content such as Photos, TV Shows and Movies.

Step 7. Press on Apply feature.

Step 8. Now click on Sync to enable it.

Congratulations! You have successfully synced your handset (maybe iOS 10 iPhone 7 or one of many previous models) with Windows 10 machine. Now when you connect to WiFi your gadgets will be automatically synced if they are connected to the same network.

Sync Windows 10 iPhone 7 Guide

Guide for iPhone Syncing to PC via Cable

Sometimes you have no internet connection. Is there a way how you can sync your phone to Windows 10 without WiFi? You can use your Lightning cable or 30-pin USB cable depending on the model of your handset. Here is what you should do:

Step 1. Your iTunes program should be updated to the most recent release. Update it if necessary before you launch it.

Step 2. Take the cable to connect your iDevice [here is how to factory SIM unlock your iPhone 6s] to your Windows PC.

Step 3. Select your phone from the upper left menu.

Step 4. There will be Music option on the left menu. Click on it.

How to Sync iPhone Music on Windows 10 iTunes

Step 5. You can now enable Sync Music feature. This way your music can be synced with your computer.

Step 6. Enable Sync options for Photos, TV Shows and Movies.

Step 7. You’ll have to confirm your decision by pressing on Apply.

Step 8. Now complete the procedure via Sync button.

That’s it. Use one of the methods described above to sync your files between the phone and PC. By the way, if you want to do the same thing on your Mac you can [here are some great MacBook pro touch customization tips]. Just use the iTunes version for your Apple machine and you’ll be happy with the results.

It is wonderful when you can transfer your files between devices but also remember to back up your iPhone via iTunes or iCloud once in a while. This way you can protect not only your music, movies and other files but also contacts and personal information.

Control Your iPhone Mobile Data Usage for iOS 10 TV App

A lot of Apple customers want to learn more about iPhone reduce data usage. This is important even if you don’t want videos on-the-go. However it becomes even of more importance when you enjoy such iOS 10 features as TV app streaming since this option can ‘eat up’ all your data.

It is actually possible to reduce your iPhone mobile data usage and still enjoy watching movies and videos via TV program. This app could be a great addition to your brand new MacBook Pro that boasts Touch Bar feature or the most recent iPhone 7 and iPhone 7 Plus. Still it might be handy to learn some secrets, tips and tricks to not overuse your previous mobile / cellular data.

Are you a fan of interesting iOS 10 apps? Do you have the TV app installed? There are so many advantages of using additional programs. You can watch TV shows, the movies you love, different videos and switch between films via single sing-on option. You can use WiFi connection as this is the best choice for cheap iPhone mobile data usage. What do most of us do when there is no active WiFi nearby? That’s right. You start streaming videos and TV shows via mobile data. Its consumption can be rapid and you could need to adjust the setttings.

Reduce iPhone TV Data Usage

How to Reduce Mobile Data Usage on iPhone: for TV App Users

Remember that you can also reduce data consumption on your iPhone AT&T or other carrier and get more of the impressive iOS 10 features and newest iOS 10 apps. But this is a different story. Right now let’s explore the TV app settings and make this program use less cellular data. By the way, this guide works on both iPhone and iPad devices and it doesn’t matter if you own iPhone 7, 7 Plus or earlier iPhone 6s, 6s Plus 6, etc. You should update to iOS 10.2 before you can run the application. For your ATV you need to update to tvOS 10.1 (it is available in beta stage).

Step 1. When you wish to know how to reduce data usage on iPhone 7 TV app the first place to head to is your iPhone Settings.

Step 2. Now you should scroll down a little bit. You will find TV option so click on it.

Step 3. Do you see the feature ‘Use Cellular Data for Playback?’ You should toggle its switch.

That’s not the end of the adjustments. It’s also important to reduce iPhone streaming TV data usage while you are watching a program online. There is a simple method a lot of people prefer choosing. It has its one big disadvantage and some benefits (you’ll enjoy one more advantage once you stop iPad from ringing).

How to Reduce Video Quality on iPhone

How to Reduce Mobile Data Usage on iPhone: Video Quality

It is extremely easy. When you want to know how to reduce data usage you should play with the quality of the videos you’ll be watching.

Step 1. Take your iPhone or iPad and launch Settings. You might want to backup iPhone before you apply any changes.

Step 2. Select TV app.

Step 3. Double check that you have successfully enabled ‘Use Cellular Data for Playback and proceed.

Step 4. Click on Playback Quality – Cellular.

Step 5. The default option you should notice is called ‘Best Available’ and it consumes much data than you wish. You should switch to ‘Good to let videos consume less data’ and you are done.

iOS 10.2 Beta Version for iPhone iPad

It’s also possible to mess up with the definition quality. You don’t need High Definition quality when you have plans to reduce data consumption:

Step 1. Open Settings and select TV app.

Step 2. Click on Purchases and Rentals.

Step 3. There are two definitions. You should select Standard Definition quality for videos instead of the default High one.

Now you can watch all that you want. The video quality won’t be perfect but your data will be preserved.