Guide on How to Pair AirPods with Different Apple Devices

Have you read the AirPods review? Are you interested in using the new Apple wireless AirPods accessories with the iPhone 7 or other compatible device? This newest product works great with the iPhone, iPad, Apple TV and Mac. The first thing you should always do when looking for the best AirPods price is to get all the details about this accessory. The second thing you must learn is how it works. Then you need to learn how to pair AirPods with your devices [here are some useful iPhone 7 Instagram tips and tricks].

Pairing AirPods Apple accessories makes you enjoy all the interesting features these new wireless headphones have to offer. The Cupertino-based giant brings the high quality sound to all users who love listening to music and watching movies. We will explain how you can pair and unpair iPHone AirPods with different ‘fruit’ gadgets.
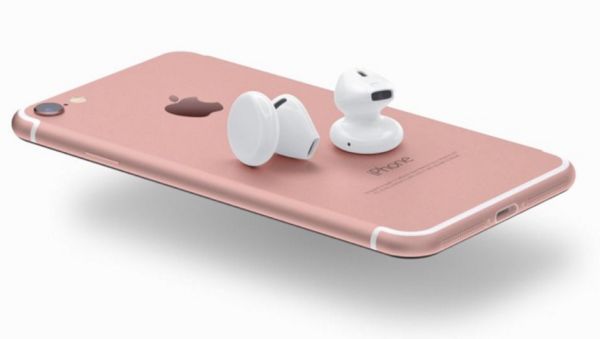
iPhone 7 AirPods How to Pair

How to Pair AirPods with iPhone iOS 10, iPad

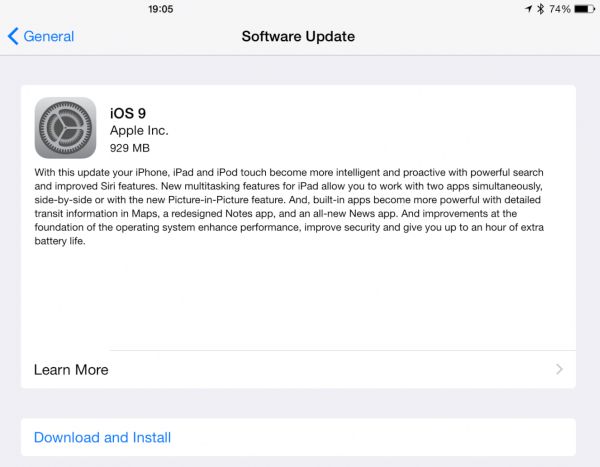
Step 1. The whole thing is pretty simple. Make sure you have installed iOS 10 ipsw through direct links or on your iPhone and unlock the device.

Step 2. Open AirPods case.

Step 3. You need to hold the accessory next to the smartphone.

Step 4. AirPod Apple should show setup animation on the phone and you can click on Connect.

Step 5. Press on Done and your iPhone will be successfully paired [it is easy to manage iPhone 7 files even without jailbreaking, did you know this?].

To pair Apple wireless AirPods with iPad you need to update your tablet to iOS 10. Then you should login to your iCloud account (the same one you are using with the iPhone that is already paired) and the syncing will start automatically when you sign into this account from your iPad.
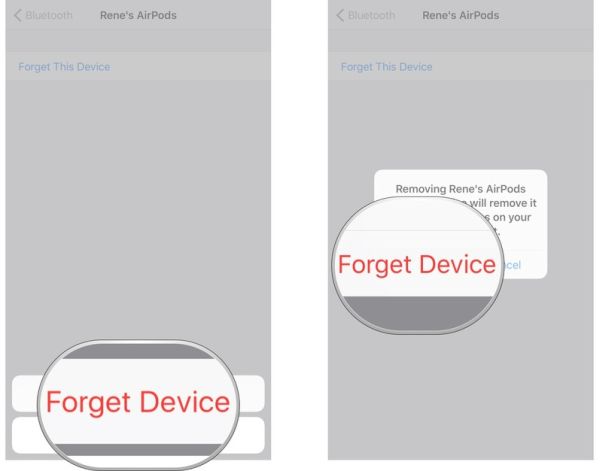
How to Unpair AirPods

How to Unpair AirPods from iPad or iPhone

The new Apple Airpods price might look a bit expensive still once you purchase this accessory you should learn how to unpair it.

Step 1. On your iDevice, go to Settings.

Step 2. Click on Bluetooth option.

Step 3. There will be an info button next to AirPods. Click on it.

Step 4. Click on Forget this Device feature.

Step 5. Confirm your decision and unpairing will be complete.

Apple Airpods

AirPods Cost

It doesn’t matter what gadget you own as AirPods price is the same for different devices. These headphones were released in October. They cost $159. AirPods bluetooth support makes this product interesting to customers who prefer cord-free in-ear headphones to ordinary headphones.
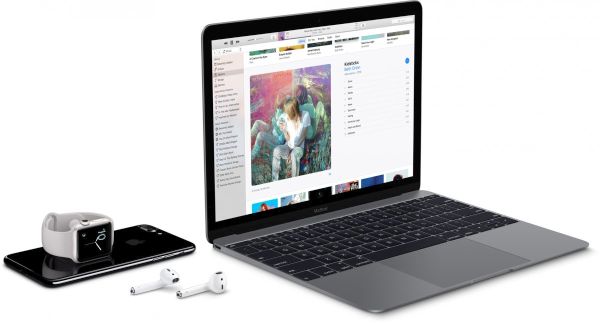
How to Pair Airpods with Apple Mac Watch

How to Pair and Unpair Bluetooth Headphones with Apple Watch, Mac

This is so simple. You only need to pair your smartwatch to iPhone or iPad after updating to watchOS 3, install macOS Sierra on your Mac to sync via iCloud.

When you wish to disconnect the headphones from your watch or computer you should simply unpair AirPods from your new iPhone 7 or previous model. Sometimes you wish to only unpaid the earphones from computer (without unpairing from your handset):

Step 1. Use your Mac. Click-hold Alt key + Bluetooth icon from the menu.

Step 2. Simply press on AirPods.

Step 3. Select Remove option.

Step 4. Confirm that you want to remove the connection.

How to Pair Unpair Apple AirPods

Airpods Compatibility with Apple TV: How to Pair

Step 1. Take the AirPods case. There will be a pairing button on its back. Click-hold it.

Step 2. Now you should open Settings on Apple TV.

Step 3. Select Remotes and Devices.

Step 4. Click on Bluetooth section.

Step 5. Choose AirPods. That’s it.

How to Unpair Headphones from ATV

Step 1. You should select Settings on your TV.

Step 2. Choose Bluetooth from Removes and Devices section.

Step 3. There will be a list where you can choose headphones.

Step 4. Press on Forget Device.

Step 5. Confirm the previous step by selecting Forget Device for the second time.

By the way, if you own a blocked handset there is a way how to officially unlock a blacklisted Apple iPhone without issues.
Fun Guide for Using iPhone Wallet Passes and Mac Apple Pay Cards

How does Apple Pay work on iPhone 7 and other ‘fruit’ devices? This question has been answered for so many times. Now it’s time to talk about Apple Wallet app and how you can share your Wallet pass on different iDevices. There is also great Apple Pay on the Web feature that becomes useful on new Mac computers. Users who have the smartphone, tablet and computer from the famous Cupertino company can enjoy all the awesome payment features without issues.
Are you going to the event and have extra pass you would like to share with a friend? It’s easy to do on the iPhone and iPad if you follow some simple steps. There is no need to cancel the tickets you have booked if your plans suddenly change. Offer them to your family members or friends and quickly share the pass or several passes.

Apple Wallet for iPhone 7 iPad

How to Share Wallet Passes on iPhone 7 and iPad

What is Apple Wallet? This is a cool application that lets you book tickets for different programs and movies. Its supports iOS 10 firmware devices and earlier versions such as iOS 9, 9.x. It can book tickets and you are ablet to share PassBook iPhone invitations with others.

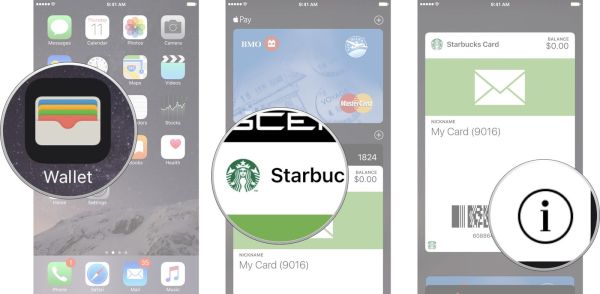
Step 1. We won’t focus on how to use Apple Wallet. We’ll pay closer attention to how you can share your passes with others. So launch Wallet application on your smartphone or tablet device.

Step 2. Find the pass you are planning to share.

Step 3. Click on the pass and press on ‘i’ icon that you’ll see at the lower right part of the screen.

How to Share Pass on iPhone 7 iPad Wallet

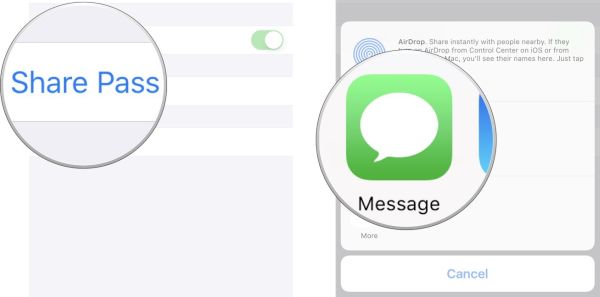
Step 4. Choose ‘Share Pass’ and select the one of the few options. There is iMessage, AirDrop, email and you can choose the most suitable. Thus if your friend with his or her iPhone is near you you should click AirDrop. If not, you can send an email or share the pass through iMessage.

To enjoy your Passbook iPhone options you need to add the pass your friend shared with you. Here is how you can complete this goal:

Step 1. Click on the pass you have received via email or other method.

Step 2. The shared ticket will pop-up and you’ll be able to click on ‘Add’ option.

Step 3. The pass will appear in your Apple Wallet app on iOS 10 platform.

Apple Pay iPhone Mac iPad

Great Apple Pay on the Web

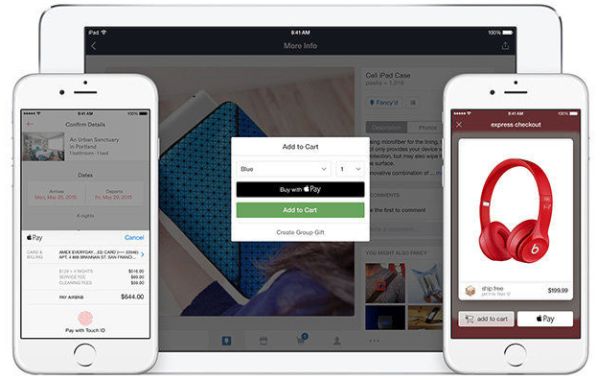
There are several Apple payment options you can enjoy. It is possible to buy and share wallet passes and shop with numerous retailers with your iDevice. You are also able to manage your Apple Pay cards on your Mac computer.

It’s not the time to explain how to use Apple Pay on iPhone, this time it’s more interesting to explore Apple Pay cards. How does Apple Pay work on your Mac after you install macOS Sierra? Manage your cards and you’ll figure everything out.

Users who purchase the new MacBook Pro 2016 and wish to use Apple Pay should manage their credit / debit cards.

Step 1. You should go to System Preferences on your computer.

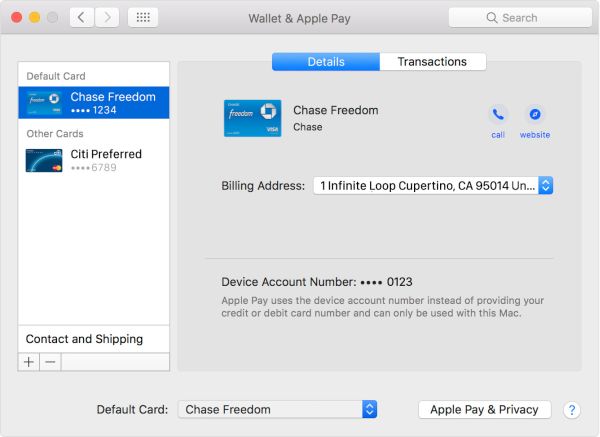
Step 2. Select Wallet & Apple Pay option (icon).

Step 3. You will see all the information you need on the sidebar. It includes your transactions, contacts, billing data etc.

Step 4. When you wish to manage your cards on older computers you’ll have to do this on your iPhone.

Apple Pay Manage Cards

Step 5. Follow Steps 1 and 2 when you have plans to change your Apple Pay default card. There will be drop-down list at the lower part of the screen. Here is where you select that card to make it your default payment option.

Step 6. Use the same sidebar when you have plans to delete the card you were using.

Step 7. With the card selected you will find the Delete option at the lower part of the sidebar. Click on this button.

Step 8. Confirm your decision. The credit card will be removed from your Apple Pay account.

You see how easy it is to share your Wallet passes with new iPhone 7 and iPad users and manage your Apple Pay cards on the brand new MacBook Pro 2016 model.

Awesome Instagram Secrets for iPhone 7 Users

It really doesn’t matter much if you prefer to download older version of Instagram for your smartphone or get the most recent update for new iPhone 7 model and explore Instagram tips for business. It’s more important to get Instagram secrets after you start using this popular network on your handset.

Actually, Instagram boasts over 400 million active accounts thus it is extremely important to learn more about this network if you wish to use Instagram for business in 2016 or 2017, or even in the future. There are a lot of companies that already know how to attract new customers through this network. Ordinary users also enjoy it since this is a great way to socialize with friends and family. Everything becomes simpler when you know how to use the program, right?

iPhone 7 Instagram app secrets

Instagram Download Reasons

In case you are not using this network yet, let’s see why others enjoy it so much. Instagram for iPhone 7 or older iPhone models is a fast way to share your photos and images. It also users popular hashtags to promote your posts and help you find new friends. Of course, this is also the reason why Instagram for business 2016 is so popular.

Big companies and small businesses are searching for customers by making their photos popular. You can like images others post and photos that get the most amount of likes get to the top of searches by hashtags. This is why it’s important to use hashtags and receive as many likes as possible.

iPhone Instagram Secrets

Download Instagram for iPhone Without App Store

Is it possible? Can you find the iOS 9 or iOS 10 program somewhere except iTunes and App Store? Absolutely!

You can search for the program file and even download older version of Instagram as long as it supports your version of mobile operating system. Always remember to double check the files you download to avoid any possible viruses. If you don’t trust a source with the program file you are highly advised to visit the App Store and safely download and install the tool directly from the ‘fruit’ platform.

Instagram Secrets for iPhone 7

After Instagram download and installation you can explore all the opportunities offered by this program. Instagram iPhone 7 users (as well as other iDevice owners) are welcome to post photographs, videos, images and comment, like posts shared by others.

Remember that you can use Instagram for business 2016 and in the future. Let’s speak about the iOS 10 features you can enjoy with your social networking program. Firstly, we can make your account private (this way you can approve followers that will be able to view and comment on your photographs).

Step 1. This is Instagram sign up moment. You need to launch the tool on your phone and sing in using your credentials or register a new account.

Step 2. You’ll find a profile icon at the lower right part of the screen. Click on it.

Instagram Settings Gear iPhone

Step 3. Now click on the ‘gear’ at the upper right part of the screen.

Step 4. You’ll see Private Account option under your Account. Enable it.

Instagram Notifications Enable iPhone

There are other interesting Instagram tips for business you can try along with other secrets to keep in mind. Let’s learn how you can save your iPhone data via this social network:

Step 1. Launch Instagram on the mobile gadget and sing in.

Step 2. Click on Profile icon – gear and select Settings.

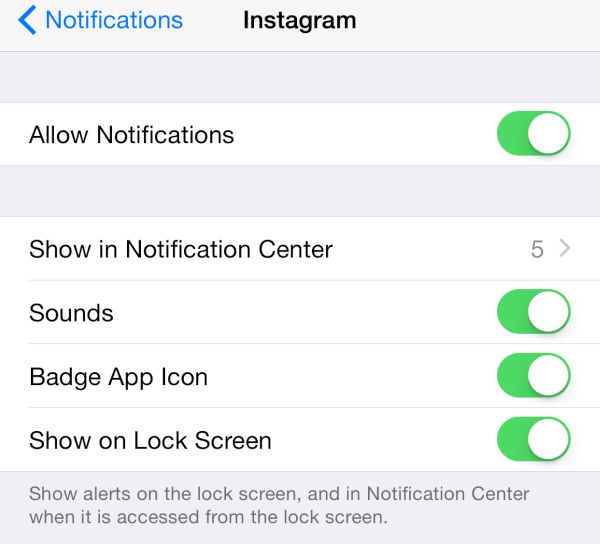
Step 3. Firstly, you can enable Push Notification Settings. Secondly, you can select Mobile / Cellular Data Use where you can enable Use Less Data option. This way you’ll limit your data consumption on the smartphone and make the program consume less data.

What else can you set up in settings? There a couple of interesting things you can change. For example, once you get to Instagram Settings you can disable Save Original Photos option. This way the original files you upload to your account won’t be saved on your iPhone.

There is one more secret to share. You can Clear Search History (this option is presented under ‘gear’ icon) and you are advised to complete this step once in a while.

iPhone Call Blocking Tool: How to Block and Unblock Number on iOS 10

The amazing iPhone call blocking feature allows you to stop receiving unwanted phone calls. Isn’t it cool when you can block caller ID on iPhone 7 or iPhone 7 Plus and do this with a couple of clicks?

The most recent iOS 10 firmware version brings a lot of great changes to all supported mobile devices. Customers who chose to purchase the newest generation gadgets are even luckier because they received some unique and long-awaited specs others can only dream of.

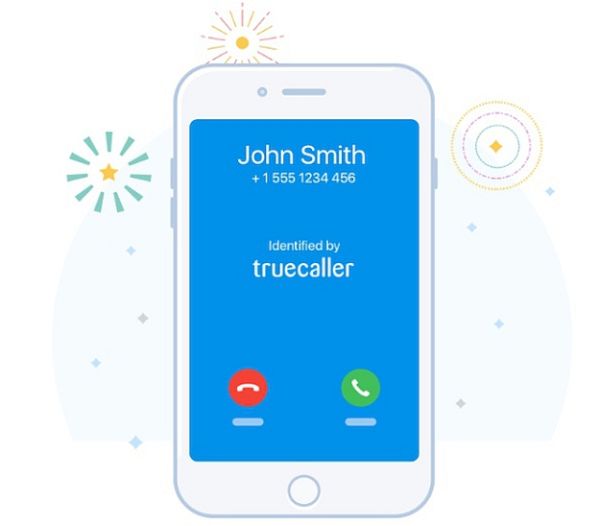
You can affect your Truecaller iPhone incoming calls option by blocking and unblocking phone numbers that you don’t like or find scammers. We’ll explain below how exactly to reach the goal and help you avoid all those ad calls, robo-callers and telemarketers who are searching for customers and don’t care about troubling you. Here is how you can easily manage your iOS 10 files.

The introduction of iOS 10 makes this goal simpler. The ‘fruit’ giant did an incredible job and improved its mobile firmware version so that users can enjoy more features and set up everything much easier and quicker.

Truecaller iPhone Caller iD iOS 10 Feature

How to Block Calls iPhone Instruction for iOS 10 Platform

Apple finally allowed game and application developers to take advantage of different extensions of the stock programs. This way you get more features and are able to keep away the calls you don’t want to get.

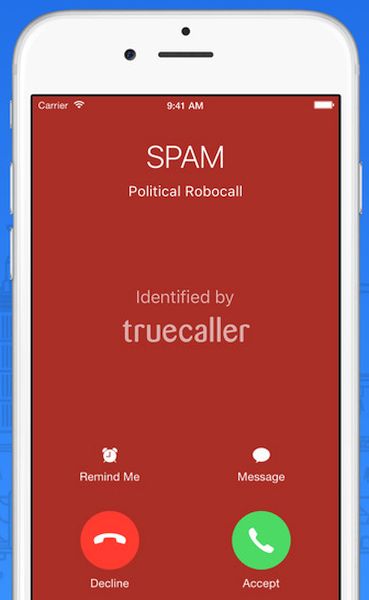
Truecaller iPhone incoming calls controller is a great thing. You’ll find its advantages as soon as you decide to give it a try. It’s great that all your important call will go through. Only unwanted ones will be blocked on your behalf.

Block Spam Calls on iOS 10

Block Caller ID on iPhone 7

Step 1. Before you can get the features on your phone you need to download and install Truecaller which is absolutely free and takes only a couple of moments.

Step 2. The block calls iPhone advantages start when you click on Call Blocking and Identification. It’s located right below Calls.

Step 3. Enable Truecaller. You’ll have to toggle it on.

Step 4. What happens when you block a number on iPhone 7 Plus that got an exclusive dual-lens camera system? Actually the app does everything for you. It can automatically identify who is calling you. All the spam calls are automatically blocked and you receive only the phone calls from real people.

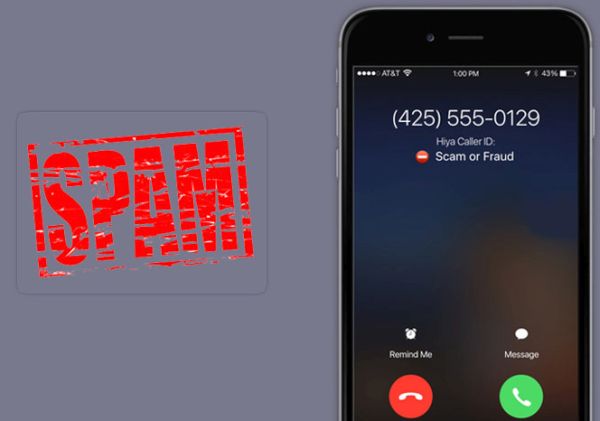
Are there other tools that support iPhone call blocking? Of course, there are! You can take a closer look at Who Called application or Hiya app. There are other helpful extras you can try and find the best tool that protects you from scammers.

How to See Blocked Messages on iPhone Running iOS 10

The program blocks everything automatically if you are using Truecaller. So when you wish to read all your blocked messages you need to launch the application on your iPhone and select all messages option. This way you will see all the text messages that you have received, including the blocked ones.

Block Spam Fraud iPhone Calls on iOS 10

Why to Block Calls on iPhone 7?

This is an interesting question. A lot of us might wonder if it’s important or not to block phone calls. There are a lot of scammer companies that obtain the lists of real phone numbers and send the spam messages. This could be done for advertising or trying to steal your money. Just think about it, nearly 20 million customers from the U.S. alone lose over $7B because of spam calls every year. This information is provided by Truecaller.

The spamming is a big threat to everyone no matter what country you are from and where you live. iPhone unblock number option is not available iin Truecaller because you block nothing manually. The app takes care of this by analyzing the phone number that is calling you with its database of scammers, telemarketers and robo-callers.

You can also enjoy one little trick offered by the call blocking program. It has the feature called Announce Calls. You can turn it on when you launch this tool. If it is enabled you will hear the caller names spoken aloud by the app but only if this name is in your contact list on iOS 10 smartphone. If you don’t have this number in your list you will hear that an unknown number is calling you.

Have you purchased the iPhone 7 or bigger iPhone 7 Plus with dual-camera already? Do you have plans on updating to one of these phone models?

Learn to Edit Photos on iPhone 7: Explore iOS 10 Features & Portrait Mode

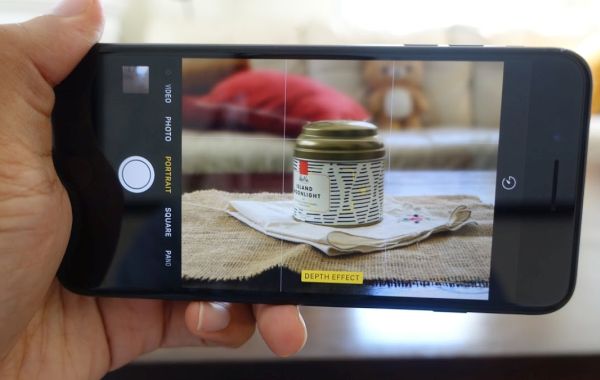
There are so many iPhone 7 features that you can keep exploring them forever. This time we want to pay attention to portrait mode on newest iPhone 7 Plus, 7 and other models as well as your tablet that is updated to iOS 10 firmware version. Using the nice extra options you can always capture better photos and even use amazing blur effects to even improve them more.

Let’s learn how to edit photos on iPad or your smartphone and explore the possibilities you can enjoy on both new and older phones. A lot of users are willing to upgrade to iPhone 7 Plus because of the new dual-camera system it brings. Many customers are also amazed by 256GB storage space Apple finally offers to users. Previous models could only boast the 128GB storage at maximum so doubling that number was a good decision taken by the Cupertino-based company in 2016.

How to Unlock iPhone iOS 10 Portrait Mode

How to Unlock iPhone Portrait Mode on iOS 10

Before you can enjoy the amazing iPhone 7 Portrait Mode you should install iOS 10.1 as this is the most recent operating system version for iDevices that was presented in the end of October. The new iPhone 7s feature is amazing and it’s nice that the newly released Portrait Mode option works on iPhone 6s, 6 Plus, iPad and other gadgets.

If you are planning to get more from iOS 10.1 update you can look at FabFocus camera program that is sold at $1.99 on the App Store.

Step 1. Download and install the tool FabFocus to enjoy the Portrait Mode and increase the number of iPhone 7 Plus specs.

Step 2. With the installed application you can open it.

Step 3. You should let the program access to iPhone Camera and Photos to enjoy all the features of the updated mobile firmware.

Step 4. Now you should create a photograph. Just click on your shutter button which is located at the lower center part. Users who prefer taking selfie should click on the front camera icon and then tap on the shutter button when you have taken your best pose.

Start Option in Portrait Mode iOS 10 Features

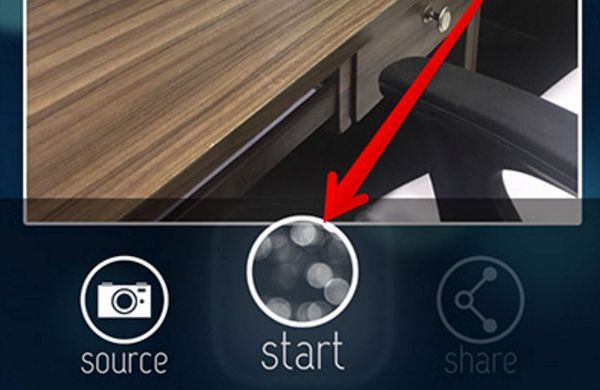
Step 5. Since we wish to blur our background you need to click on the Start which you’ll see in the lower center part of the app. If there is no face or the application cannot find it you will be able to manually apply blur effect to where you wish.

How to Use Portrait Mode iPhone 7 Guide: Photo Editing

Step 1. Take an image with your iPhone 7 camera to enjoy the following features.

How to Edit Pictures in Portrait Mode on iOS 10

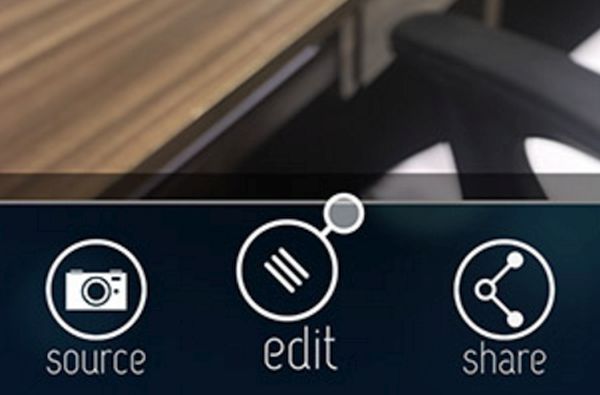
Step 2. Click on Edit and choose the area using the brush tool. This aread will be highlighted once you drag the brush over the image.

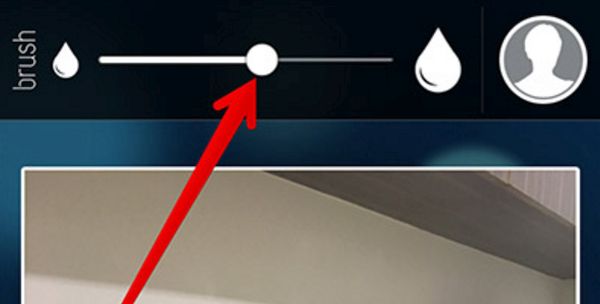
Users are able to paint the parts of the photo on their own via Paint option which can be found at the bottom [it’s a paint button]. The size of the brush can be changed by dragging the top button to the left or right [this way you can decrease or increase it]. Now grad the tool over what you painted and this area will be selected.

Increase Size of the Brush iOS 10 Portrait Mode

If you plan to erase the part of the image you need to highlight it and click the Eraser option. Make sure you also tap on tick mark.

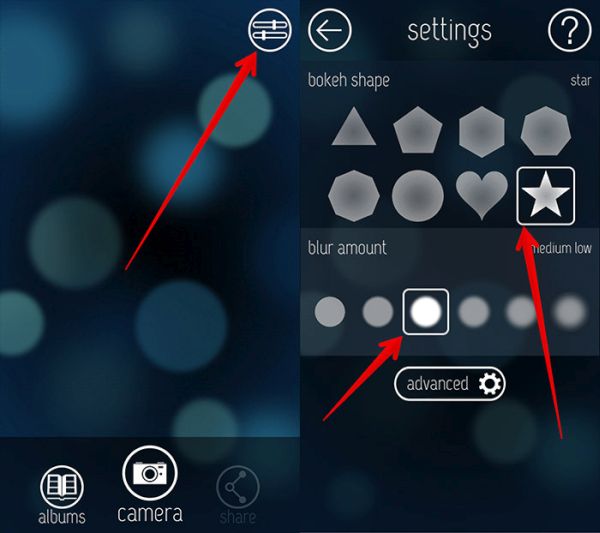
Step 3. Extra features are located under the ‘arrow’ at the lower left corner of the screen. Here you can control the ‘blur’ shape and adjust its intensity. Press on the same arrow to get back to the normal screen and continue editing the image.

Step 4. Save the changes via tick mark. Do this once you like how you edited the photograph with the blur effect.

The iOS 10 features add more options to iPhone 7s as some users refer to real iPhone 7 Plus specs. The great new camera allows taking beautiful pictures. Using the Portrait Mode is your key to incredible DSLR-style blurry photographs.

Extra Settings for Portrait Mode iOS 10 Features

iPhone 7 portrait mode also lets users add some ‘blur’ to their current images. This also works on other handset models.

Step 1. Launch FabFocus which you downloaded earlier.

Step 2. Click on albums and choose the image that needs ‘blur’ effect.

Step 3. Add this effect manually by editing the image.

Step 4. Once you are done, save the changes through tick mark.

Share iOS 10 Photos Portrait Mode

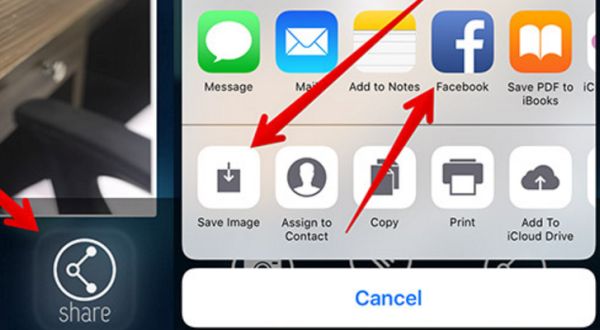
The cool portrait mode iPhone 7 Plus feature offered by the application can be shared with your friends. There is ‘Share’ option you can use to post it on Facebook, save to camera roll or attach to the email.
This is an interesting iOS 10 option that becomes richer when you use an additional application to enhance its power.

Best File Manager Tips for iPhone 7 Without Jailbreak

Just like it happens with the file manager for iPhone 6 you can easily manage files on iPhone 7. Apple presented several new phones in 2016 including iPhone 7, 7 Plus and smaller iPhone SE. The latest generation handsets are running iOS 10 and you should know how to free space when your memory space gets limited by numerous files.

Sure, your might not need any iPhone explorer or file manager for iPhone 7 if you have 256GB storage which is an amazing upgrade offered to both ‘7’ versions this year. Still there are users who went with the 32GB version and might need to deal with the cluttered smartphone.

Of course, the need to quickly find file manager for iPhone without jailbreak was more common with 8GB and 16GB models [like new iPhone SE that offers 16GB of storage]. The Cupertino-based company finally stopped producing such phones as modern customers like to take tons of images, record 4K videos, download numerous iOS 10 apps and games and keep everything on their pocket device. We’ll explain how to manage files on iPhone if you really need to free up some space on your 32GB iPhone 7 or iPhone 7 Plus right here right now.

iPhone 7 iPhone 7 Plus File Manager

iOS File Manager No Jailbreak Guide

There are different companies in the market that offer extended memory slots to smartphone owners. Not Apple. The ‘fruit’ giant customers have to deal with their files on their own. We hope that the tips and trick you’ll find below can help with your iPhone file transfer and management.

What is the simplest way to keep a track of your files? Firstly, you should decide if you need iPhone file manager Mac or Windows version. Both exist. Secondly, you can perform some actions and free up space on the smartphone.

You know that even if you have big storage capacity you cannot store everything you enjoy on one device. There are too much data these days so you definitely need good file manager for iPhone 7 or 7 Plus.

How to Manage Files on iPhone

There are so many various files on the iDevices, including songs, images, videos, movies, presentations etc. If you can’t find a perfect iPhone file manager app you can manually help yourself and remove or delete what you don’t need every day.

iCloud File Managing iPhone 7 iOS 10

• iCloud Storage Tips

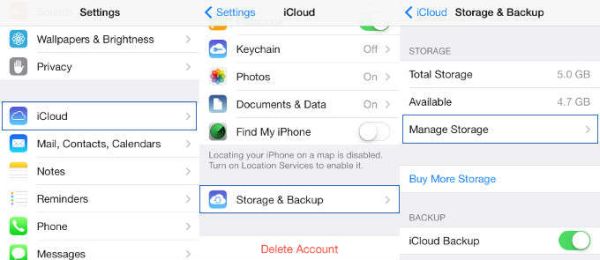
Any Apple fan can use iCloud for storing all the files. It doesn’t matter if you have iPhone, iPad, Mac or other ‘fruit’ gadget – use iCloud storage and your iCloud account to backup all the data and store ‘excess’ number of files. This particular program can be used for your documents, video files, tunes, songs, other audio files and anything else you want to keep.

Remember to delete old backups if you have newer ones saved. Also get rid of your old messages, emails and other files you don’t really need.

• Extra Folders and iOS 10 Files

Be strategic and don’t keep the old files that are unnecessary. Remove the folders and all the files as soon as they are not needed. It does take some time however if you save them all you will have to spend even more time while deleting everything at the same time.

• Erase Backups

There are many multimedia and backup files that could ‘eat up’ too much of space on your handset. You should backup everything you wish to erase before you delete any files. Some programs get repeated files so check on your WatsApps and similar tools to make sure nothing is doubled.

iPhone Dropbox File Storage Management

• Dropbox

There is another file manager for iPhone without jailbreak. Do you remember the Dropbox? It’s a great manager for your iOS 10 documents, music, videos. The basic program offers 2GB of space but you can easily eatend it to 1TB [not for free though].

• Old Messages

Remove all messages that are old. These could be promotions, product ads, unnecessary messages, iOS 10 spam. This way you can organize free space for important documents, photos and other files.

All the actions require your time. But this is the best way to manage your files and stay organized.

How to Customize iPhone 7 or iPhone 7 Plus without Jailbreaking It

The simple iPhone 7 user guide explains how you can customize your smartphone without major efforts. It is currently impossible to jailbreak this model which arrives with iOS 10 pre-installed on it. Let’s see how you can bring customizations to your handset and get acquainted with curious iPhone tweaks that are available to all users.

There are a lot of great iPhone 7 features [for example, you can enjoy wireless charging on iOS 10] and you have plenty of time of exploring all the options and adding the interesting touches to make your ‘fruit’ experience simply perfect. Everyone want’s to be a pro and this is something you can do right here right now.

How to Customize iPhone 7 Guide

How to Customize iPhone Without Jailbreak

There are so many things you can do with your smartphone. Here are some of the best changes you are welcome to add or adjust on your 4.7-inch iPhone 7 or 5.5-inch iPhone 7 Plus. These both phones look like previous generation models yet they have some long-awaited features including improved cameras, better batteries and more storage capacity.

iPhone 7 Wallpaper

  • iPhone 7 Wallpapers

You can easily set new wallpapers on your handset [find out whether you have CDMA or GSM iPhone model]. The guide is simple:

Step 1. Launch Settings on the iDevice and select Wallpaper – Choose a New Wallpaper option.

Step 2. Choose the image or wallpaper you wish to use and press on Set option you’ll find at the lower part of the screen. It says Set Lock screen / Home screen however you can choose both options.

iPhone 7 Display Zoom

  • Cool iPhone 7 Features with Display Zoom

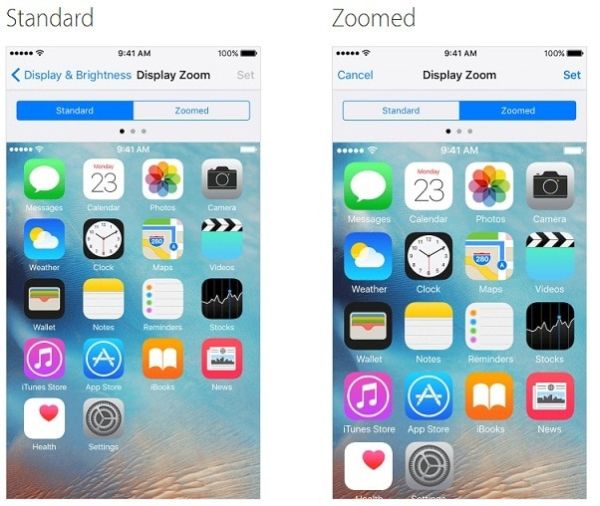
iOS 10 users can enjoy the awesome display zoom feature to get to all the details on their newest Apple handset. Still experiencing no SIM card issue on iPhone? Here is how to use this option:

Step 1. Go to Settings app.

Step 2. Choose Display & Brightness section where you will find Display Zoom option.

Step 3. Click on Zoomed option and press on Set – Use Zoomed and wait for the smartphone to restart.

The same instruction will help you to revert changes. Just select ‘Use Standard’ in the last step and your phone will use a bit less battery life afterwards.

How to Reboot iPhone 7

  • Quick Reboot iPhone 7 User Guide

The latest generation phones use a different reboot option:

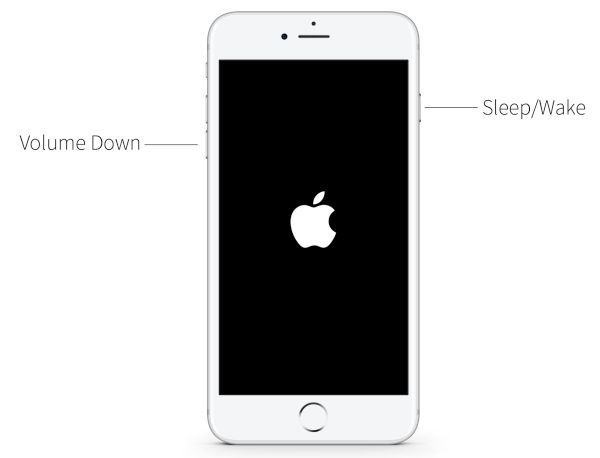
Step 1. You should click and hold the On / Off option that is placed on the right side of your device.

Step 2. Now you need to click and hold the Volume down option found on the left side of the smartphone while you are still holding down the On / Off button.

Step 3. While you are pressing two buttons at the same time your display will turn off and get back on. You’ll see Apple logo and this means you have successfully rebooted.

Choose iPhone 7 Home Button Click

  • Cool iPhone Tweaks No Jailbreak for Home Button

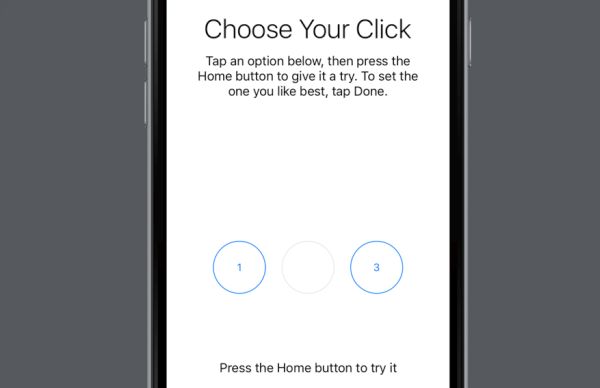
You can adjust the click intensity for the integrated Home button on iPhone 7 Plus and iPhone 7 and change its click speed without any issues:

Step 1. Go to Settings and select General – Home Button.

Step 2. Choose your click intensity from Light, Medium and Heavy [options 1, 2 and 3 accordingly] and test your button.

Step 3. Choose Done when you like the speed.

Step 4. You can adjust the click speed by going to Settings – General – Accessibility where you can select Home Button.

Step 5. You will see three speeds right below Click Speed. Select one of the following: Default, Slow or Slowest and adjust the speed to your personal needs.

How to Customize iPhone 7 Siri Without Jailbreak

iPhone Customization for Siri

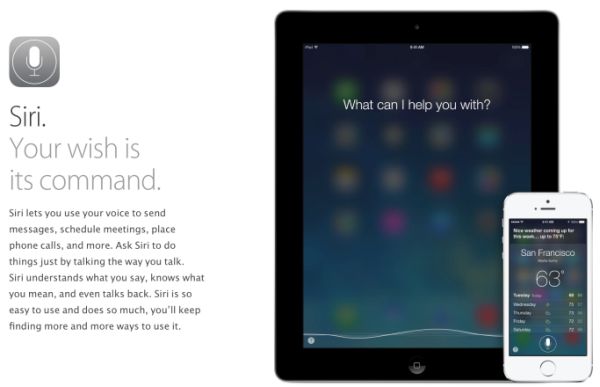
You can do so many different things with Siri on iPhone 7. Change its language, adjust the settings and make your personal assistant must-use in your everyday life.

How to Change iOS 10 Siri Language

Step 1. Go to Settings and choose Siri.

Step 2. You need to select Language and choose the one you wish to use. It can be English, Hindi or any other option. It’s up to you how you want your personal assistant to talk to you.

How to Select Siri Voice on iOS 10

You know that Siri can be female or male and you are the one who choose the accent.

Step 1. Launch Settings and select Siri option.

Step 2. Select Siri Voice and choose the accent from Australian, American or British English.

Step 3. Point to gender: male or female and you are done.

Changing Contacts in Siri

Step 1. Your iOS 10 assistant can call your friends or anyone else once you change contact information by launching Settings and choosing Siri. Also learn how to block spam calls on your iPhone 7.

Step 2. Go to My Info and you will see your contact list.

Step 3. Select data that Siri will use.

There are other methods to add ‘custom’ changes to Siri and other parts of iOS 10 firmware version to make it interesting and useful in all the ways you can think of. We are sure you can customize iPhone 7 to your personal likes and enjoy using this Apple phone for at least 2016-2017 since the next year the company is expected to unveil a major iPhone 8 upgrade and a lot of customers might be happy to get the newest model as soon as it is officially released.

How to Use iPhone 7 Wireless Charging Option

The release of the new Apple smartphones caused many rumores about new iPhone wireless charging possibility. This option is already offered by some of well-known competitors so seeing such an addition to the popular ‘fruit’ handset lineup was something to be expected. What can we say about the reality? Has Apple introduced the long-awaited option?

The idea of seeing iPhone 7 wireless charging faded as soon as the Cupertino-based company presented the two new smartphones to customers. You are still able to charge your newest handset wirelessly.

We’ll share a simple guide to walk you through the wireless charging procedure. Hopefully Apple will present this opportunity to all users in 2017 along with the new smartphone upgrade which is believed to be a major one [there are so many Android smartphones out there with the simple wireless charging technology that it becomes painful for some ‘fruit’ fans that they are not able to enjoy the option by default]. We have heard so many rumors about iPhone 6 wireless charging, iPhone 7 improvements and nothing has happened at the official level. Still there are always methods you can try and reach your goal, aren’t there?

iPhone 7 Wireless Charging

New iPhone Wireless Charging: How to Guide

Some work has to be surely done on your end. Forget about iPhone 6 wireless charging and let’s focus our attention on the newest iPhone 7 with A10 processor, improved cameras and other curious features and options. Some customers believe that the iPhone 7 and 7 Plus are not worth upgrading to because their design is the same as iPhone 6 and 6s lineup. Others are happy to get this latest generation model because of its dust and water resistance and interesting updates Apple offers.

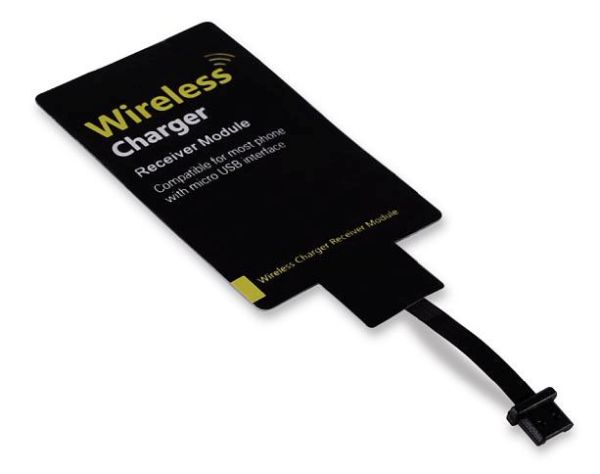
Firstly, you can find the wireless charging card receiver. You can search your local stores or online shops for the cheapest or most affordable accessory. For example, you can look at Leapcover or find a similar Qi receiver [this one is priced at around $10]. Your wireless iPhone charger should work similar to the process described below. Secondly, we offer a fast glimpse at what you can expect and how the whole iPhone 7 wireless charging idea works.

iPhone Wireless Charger

Step 1. It is necessary to plug in your lightning cable to the receiver you found. This way you’ll be able to place the cable over your phone’s back.

Step 2. It is needed to also find a thin case on the handset before you can put the gadget on the charging pad.

Step 3. Start charging wirelessly.

As you can see your iPhone 7 charging options still require using the lightning cable. This is what users hope to get rid of completely. At the same time getting additional accessories does require cables because this is the only way to connect the handset to charge it.

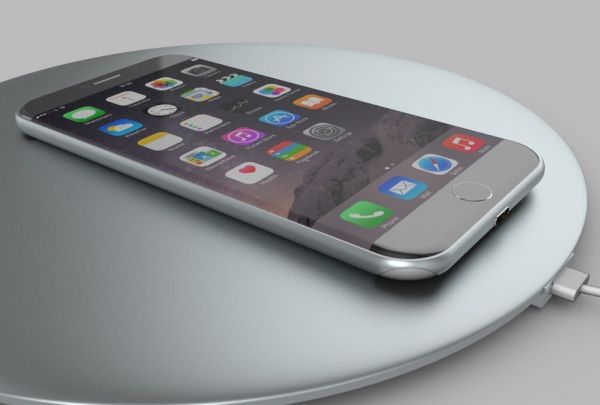
This is a different method of enjoying both iPhone 7 features and wireless charging. If you are not a fan of a charging station with just any case you can search for a special charging case that is designed specifically for your iDevice. Right, you still need to find additional accessory developed for the latest Apple smartphone model and use it to charge your device. You’ll have to place the device into the case and then on the charging pad.

iPhone 7 Wireless Charging Reports

iPhone 7 Wireless Charging Dreams

It would be great if Apple adds the wireless charging feature to the phones one day. Customers are always happy when their experience requires no efforts. With the current iPhone models it is impossible to find a simple and quick way to charge the smartphone without a cable while other well-known companies release handsets with this technology already built in.

Apple takes steps to improve its devices. This year it took a step towards waterproof and dust resistance along with built-in Home button with touch sensitivity, better batteries, more storage capacity [the old 8GB and 16GB models are in the past and users can enjoy 32GB, 132GB and 256GB models] and improved cameras.

The next year phone is already awaited by millions of ‘fruit’ fans. 2017 is when Apple celebrates the iPhone’s 10th anniversary. This is the main reason why experts and customers are talking about design upgrade and major changes that could be added to the next iPhone 8. Could it finally get the wireless charging option or not? What do you think?

Deal with iOS 10 Spam Calls and Enjoy iPhone 7 Waterproof Test Results

Would you like to block spam on iPhone 7? It is possible to do on other iOS 10 devices as well since there is a simple iOS 10 spam calls feature you can use. Nothing is too complicated and you’ll enjoy how easy and fast you get stop receiving random phone calls from scammers or local telemarketers.

We’ll share useful and must-have block unwanted calls iPhone instruction with you and all you need to do is follow it [learn how you can sync iPhone music without losing your data]. Once you forget about the unpleasant calls you can also see the results of waterproof iPhone 7 test. This is the first ‘fruit’ water resistant iDevice released by Apple.

How to Block Unwanted Calls on iOS 10 iPhone

How to Block Unwanted Calls iPhone Guide

While the cool iPhone 7 specs are available only to customers who upgrade or purchase this new phone model, iOS 10 features can be enjoyed by users with previous phones as well. You just need to update to this firmware version and get rid of spam on iPhone asap.

Your waterproof iPhone 7 will not get any robocallers if you know about the interesting iOS 10 option that blocks unwanted phone calls [this has nothing to do with blacklisted iPhone devices]. Apple allows devs to use extensions in Phone program which is a stock application and thus spam blocking becomes simpler and easier for ordinary users as well. Here is what you need to learn and how to use this wonderful feature.

Spam iPhone Calls How to Block

Block Spam Calls iPhone Apps

You need to use a third-party application created to block spam calls. Such apps have big databases of scammer numbers. They work fast and determine if your incoming phone call is included in ‘spam’ list or not. If it is scammer it will be blocked right away [here is a guide on how to unlock blocked Sprint iPhone]. You will not hear it ringing. Pretty cool, right?

Since there are several third-party apps you can use we’ll mention only the most popular titles. There is Callblock app you can get at $3.99, Who called tool that costs $0.99 and free Hiya application. You can download all these programs from App Store so let’s start with the no-cost option titled Hiya. It can identify spam calls and block robocallers, telemarketers and scammers on your behalf.

How to Block Spam Calls iOS 10 iPhone Guide

How to Block Unwanted Spam Calls on iOS 10 iPhone

Step 1. Download and install Hiya free application.

Step 2. The program will ask your permission to access iPhone contacts. Agree, choose your counter and provide the phone number. Click on Next.

Step 3. The program should text you the code which you need to enter to Continue.

Step 4. Once the code is verified you can go to app settings to setup your preferences.

Step 5. Now you can launch Settings on iPhone that is running iOS 10 and choose Phone menu [hopefully iOS 10 won’t get as many iOS 9 problems and issues].

Step 6. You need to select Call Blocking & Identification option to proceed.

Step 7. Enable Hiya to make it work.

Step 8. Now all the calls that are believed to be from spammers or scammers should be blocked automatically by the program. You will not be annoyed by all those unwanted people and organizations reaching you.

iPhone 7 Waterproof Test Results

How Waterproof Is The iPhone 7

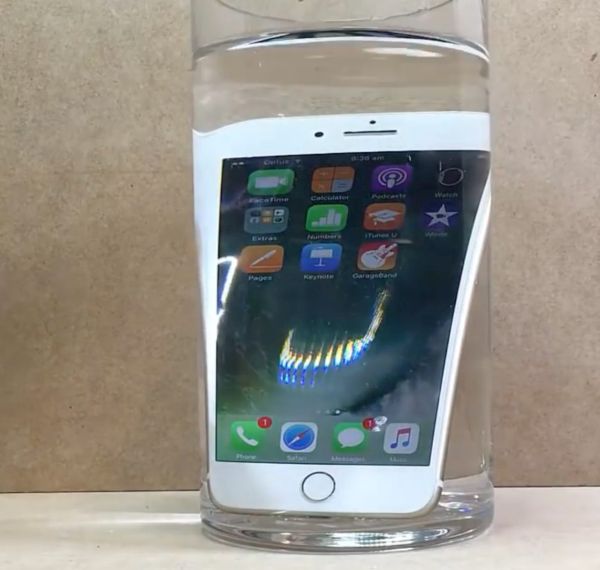
All previous Apple phones weren’t waterproof. However the most recent iPhone 7 and iPhone 7 Plus are water resistant which is modest and awesome. The iPhone 7 waterproof test shows that if you submerge your device in water [up to 1 meter] it should survive. The test lasted for about half an hour and the gadget wasn’t damaged which is great.

What does it mean to you? If you own iPhone 7 or iPhone 7 Plus you don’t have to place it to water to test. However if it happens that your smartphone falls in water [not too deep] it will still work perfectly well.

No phone is 100% water-resistant. Everybody knows this. Still the IP67 rating for water-resistants is pretty cool. A couple of inches of water will not hurt your brand new handset. This is what is so important to every handset owner these days, isn’t it? You can create beautiful selfies on the sea and in the water parks as long as you don’t submerge your gadget deep in water.

Don’t risk and don’t intentionally drop your precious device in water. Still you are protected in some ways in case of minor water accidents. The device should be fine as long as you don’t practice salt water tests on your own.

Steps to Sync iPhone to New Computer Without Erasing Everything

It is easy to delete all your images, applications and personal data while syncing your phone. Thus it is better to learn how to sync music from iPhone to Mac without erasing your files as well as other content. Remember this guide for working with new computers and more than one PC or Mac. It’s always better to keep your current information on the gadget you are using, right?

We’ll explain how you can sync iPhone to new computer without erasing anything. It works for all models including current iPhone 6s, SE, previous 6 and 5s. This instruction is also perfect for syncing iPhone 7 once it goes on sale and you get a chance to purchase it or upgrade to the next Apple phone.

There are actually several things you can try. If you know several successful methods you will never ask a question ‘Will syncing my iPhone to a new computer erase everything’ because you will not lose your data. You’ll be a syncing expert and easily preserve your applications, images, videos, content and songs.

Sync iPhone Music to iTunes without Deleting Files

Guide to Sync iPhone without Deleted Music

It’s not that difficult to work with new computers although sometimes it is problematic to sync and even activate iPhone after factory IMEI unlock. The process is extremely simple when you have only one computer. When the phone is connected to the new PC or Mac for the first time you will see the message which makes sure you donn’t erase anything. It asks one question:

  • Do you want to erase this iPhone and sync with this iTunes library?

Choose ‘no’ when you have no plans to delete your data: music, films, videos, photos, and content. With Apple, although, you can only sync iPhone without erasing to one computer at a time. Still sometimes you wish to work with two or ever more computers at once. Is it possible?

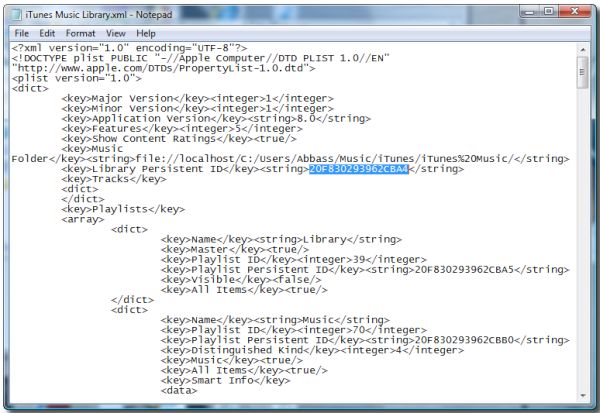
Library Persistent ID Key

Unfortunately manual syncing is not longer possible because it will erase your data when you try to only copy your Library Persistent ID Key to several computers. The Cupertino-based company changed the way iTunes supports syncing now. This method used to help you keep your content but it will now erase and then sync.

Sync iPhone Data Between Several Computers How to

Method 1.

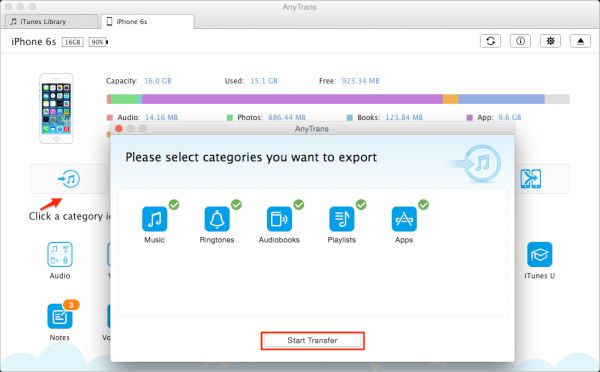
It is possible to get third-party program and trick Apple. You can sync iPhone without deleting music to more than one Mac with AnyTrans or similar application. Here is how to sync music to iPhone without erasing other files:

Step 1. Download the program that promises to sync iPhone without deleting music. It doesn’t necessarily have to be AnyTrans as there are other tools you can search for. Just read reviews to make sure your data will remain.

Step 2. When you wish to transfer your files to your computer you can launch AnyTrans and go to System Preferences where you can ‘open’ Security & Privacy menu. This is needed to allow files syncing.

Step 3. Once you connect the phone to your computer you can copy music, videos and other data between your smartphone and Mac or Windows platform. Just choose what you wish to sync and press on ‘Start Transfer’ process.

Sync iPhone to Multiple Computers Macs How to

Method 2.

When you have several computers to transfer information to:

Step 1. When you have copied your files to iTunes via AnyTrans or alternative program you can manually manage the phone and not lose a file you have.

Step 2. Now when the copy of your data is saved on iTunes you can finally manage it manually and transfer data to more than one computer. By the way, iTunes is also used to complete iPhone unlock from your carrier.

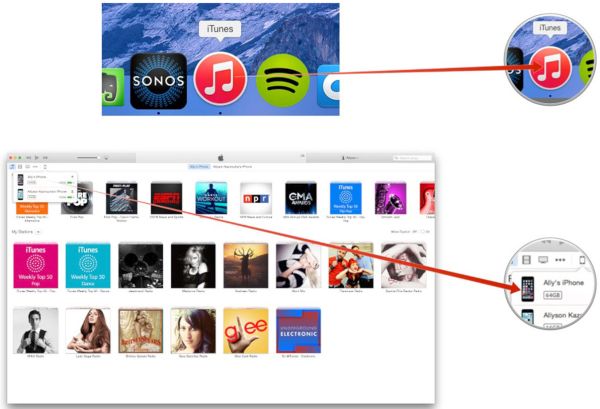
Step 3. The first ‘manual management’ will erase your information this is why it is important to sync all your files beforehand. So once you connect your handset to your PC or Mac you need to launch iTunes program and wait for it to detect your gadget.

Step 4. Choose yourphone from the iTunes menu and go to Summary – Manually Manage Music and Videos.

Step 5. Press on Apply option.

Step 6. You get an option to drag your files between the iDevice and computer. The drag-drop method is the best to manually manage songs, movies, and data between gadgets. It can be performed on multiple computers.

iOS 9 Update Problems Fix

iPhone 6 Won’t Sync with iTunes

This could be a problem with different firmware versions. When you are not able to sync your images or other files between iPhone 6, 6, SE or new iPhone 7 you are advised to update both iTunes version and mobile firmware version to the most recent available.

The iOS company has many buggy releases so when something stops working you need to update for the newest firmware and this should fix the ‘iTunes won’t sync’ issues. This happened to iOS 9.3.3 and earlier versions [there were many different iOS 9 problems]. This might happen to iOS 10 which will be presented in the fall 2016.
Prepare for iPhone 7 release and iOS 10 update. Hopefully there will be no problems with syncing and transferring your files between computers and your phone.