Thinking of recording your FaceTime calls? It is possible to record your video and audio using your iPhone 7 or Mac. Both Apple devices are able to help you achieve your goal. There is no need to search for third-party applications that work as FaceTime recorder since everything can be done with the help of QuickTime. It’s easy, quick and you’ll enjoy the results.
Recording FaceTime Calls
There is more than one call recorder for FaceTime. You can choose any program you like since recording video and audio for FaceTime (if you are a fan of this video calling tool) is must have for various situations. Learn how to record FaceTime on Mac with sound or directly on your iPhone and you’ll solve several problems at once.
You do need to use third-party apps to help record FaceTime video on iPhone and your computer [here is how to fix iPhone 7 camera freeze bug]. We’ll tell you what application is number 1 and better to download and you’ll repeat the guide, learn cool tips and master this task.

How to Record FaceTime Calls with QuickTime on iPhone + Mac
You need your smartphone and Mac in order to record FaceTime audio and video calls on iPhone. You should also get a 30-pin or Lightning cable to connect the handset to your Mac. Besides, you should use FaceTime program and QuickTime app.
Step 1. Use the cable to connect your iOS 10 or iOS 9 phone to your computer.
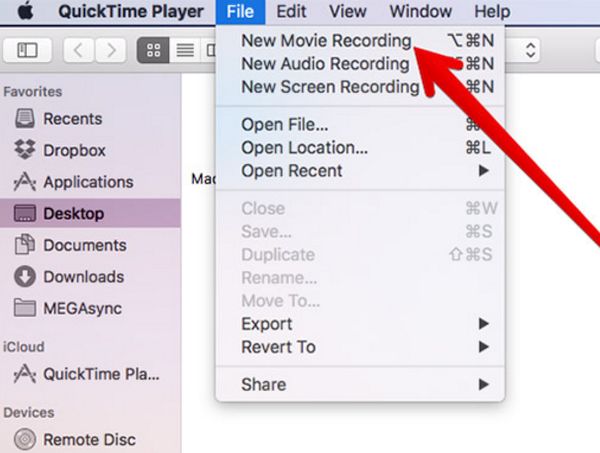
Step 2. Launch QuickTime program on Mac machine.
Step 3. Choose File – New Movie Recording option.
Step 4. You’ll see the record option and an arrow next to it. Press on this arrow to continue.
Step 5. Unlock your phone. It’s screen will be shown on your computer. Turn up the volume so that QuickTime ‘hears’ your phone call.
Step 6. Now you can open FaceTime on iPhone 7 [you can also turn your iPhone Live photos into still images].

Step 7. You can now click on Record button on Mac’s QuickTime tool.
Step 8. Now you can enjoy FaceTime call on your smartphone.
Step 9. Remember to click on Stop in QuickTime when you finish with your phone call.
Step 10. Now choose File – Save and give your recording a name. Choose where you wish to save it and click on Save option.

This is how you record FaceTime on iPhone. You see that this is not a direct method since there is now way how you can record your phone calls directly on iOS 9 or 10 handset [by the way, if you are using WhatsApp you can send disappearing photos and videos from your smartphone to your friends]. Let’s find out how different this guide is for your computer recordings.

How to Save FaceTime Calls on Your Mac
Step 1. Launch QuickTime tool on your computer.
Step 2. Select File section.
Step 3. Choose New Screen Recording option.
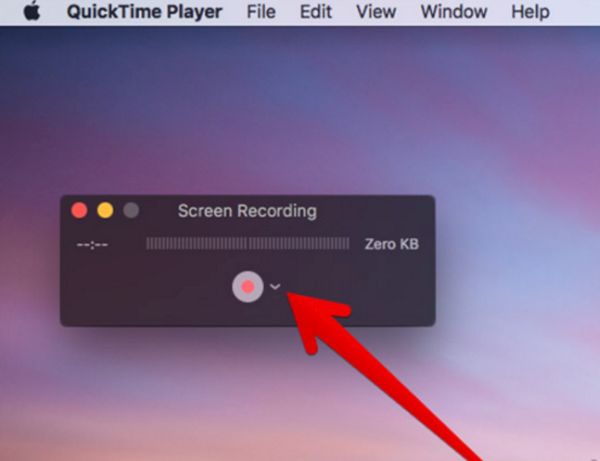
Step 4. You’ll see the arrow near Record option which you have to click.
Step 5. Choose Built-in Microphone option or select Internal Microphone feature.
Step 6. Open FaceTime program on your computer.

Step 7. There should be Record option in QuickTime app as well. Click on it.
Step 8. You can record the Mac screen or only FaceTime calls. Choose Screen option or just press-drag over your FaceTime window to decide which feature you need to use. P.S. You can also hide and unhide images on Mac without any issues.
Step 9. Place your FaceTime call.
Step 10. When your call is over you should choose the Stope Recording option in QuickTime Menu.

Step 11. Choose File – Save to save your new recording. You need to give it a name.
Step 12. Once the name is given you should press on Save once again.
That’s it. You’ve learned how to record Facetime audio and video for iPhone or Mac. Both methods are performed on your computer since it is currently not possible to make such recordings directly on your smartphone screen.